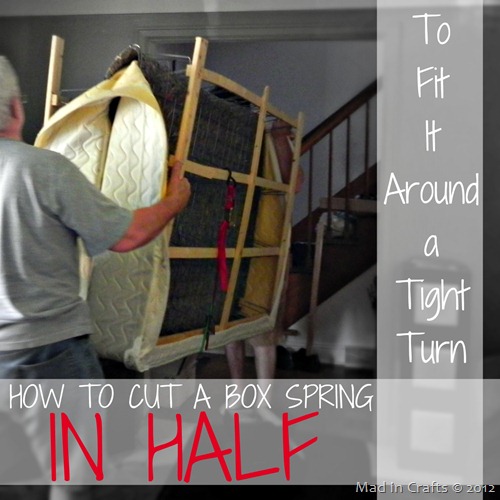
On our big moving day, we had about 7 adults working to get everything from the old house to The Mad House. Since it was a really short move, that was plenty of people. We really only ran into one problem: our queen size box spring. Our current box spring was not going to fit up the new stairs, so we decided to give cutting our box spring to fit it around a tight turn a try.
Cutting a Box Spring to Fit It Around a Tight Turn
CAN YOU KEEP YOUR OWN BOX SPRING OR DO YOU HAVE TO BUY NEW?
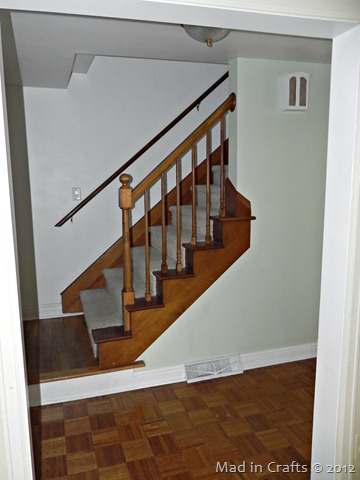
That sucker was just not going to fit up these steps. The clearance between the ceiling over the landing and the newel post of the banister was just too small. Even with five intelligent, adult men working on it, my mom directing traffic, and me helpfully yelling, “PIVOT!” from the living room, it just wasn’t meant to be.
We looked into buying a split box spring for our bedroom, but they cost a few hundred bucks that we didn’t have to spare. My mom did some online research and found that it was possible to cut our existing box spring in half, fold it, and fit it up the stairs.
I was skeptical, but we figured the worst that could happen is that it wouldn’t work and we would have to spend the money to buy a split box spring. We had nothing to lose but a little time.
I am pleased to say that cutting the box spring worked PERFECTLY! Cutting the box spring in half was a great solution to our problem. The process was easier than I imagined it to be, and now our bed is comfortably set up in our master bedroom and not in our downstairs hallway.
If you have a tight turn in your staircase, or maybe one too many platforms, you can give this tutorial a try. Hopefully, this DIY box spring trick will work as well for you!
WHAT DO YOU NEED TO CUT A BOX SPRING IN HALF?
IMPORTANT: This tutorial works for what is known as a semi-flex box spring (which consists of a wood frame with a metal top frame and fabric covering). If you have a different kind of box spring, this tutorial won’t work for you.
While you will be saving money by not buying a new box spring, you may need to make a trip to some hardware stores if you can’t beg, borrow, or steal the tools you will need for the project.
These are all affiliate links, if you make a purchase (of anything from the site, not just these items) after clicking through, I will earn a small commission. Ads and affiliate links are the way I am able to keep this website running and to offer you free tutorials all year long. Thank you so much for supporting me and Mad in Crafts!
- Semi-flex box spring
- Needlenose pliers or a flat-head screwdriver
- Handsaw or circular saw
- Packing straps, bungee cords, or duct tape
- 4 long 1″x1″s or scrap wood
- Straight metal brackets
- Wood screws
- Electric drill
- Staple gun
- Staples
- A few people

Want to know which craft supplies I always keep in my craft room?
Visit the Mad in Crafts Amazon Storefront to learn more and to buy your own supplies!
CUTTING AND BENDING THE BOX SPRING
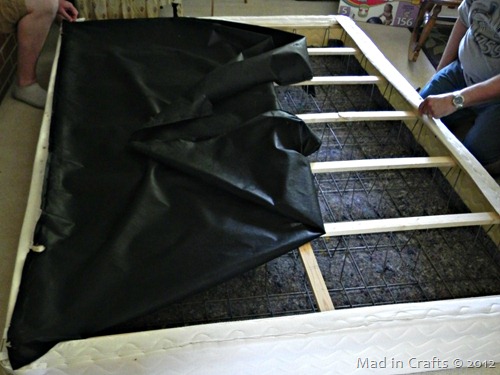
The first step in the whole process is the worst step. Lay the box spring face down on the floor and begin removing ALL the staples holding the top piece of fabric down. Plan on scooting around the box spring for a good half hour, popping out staples with needlenose pliers or a flat-head screwdriver. Save the fabric for later.
TIP: Carry a plastic cup with you as you go and deposit the staples inside. Nobody wants to step on a rogue mattress staple a week later.
Once the staples are out, remove the top piece of fabric exposing the inside of the box spring. So THAT’S what is inside of those things!
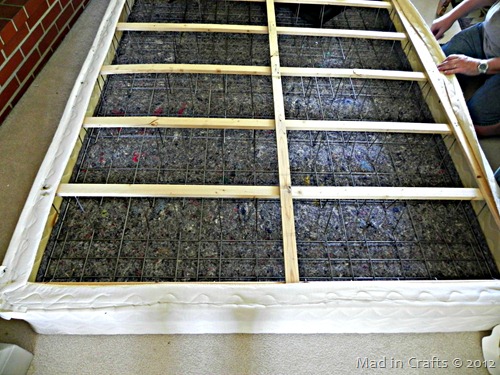
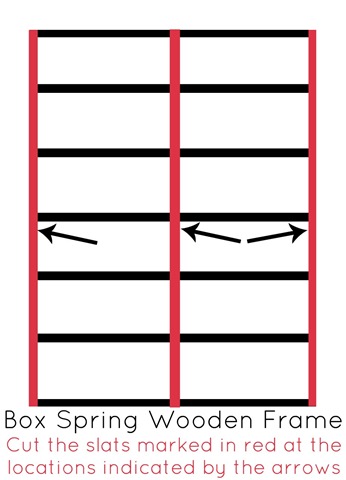
Determine where you will cut the box spring in half. There will be several wooden slats running across the width of the mattress. Make your cut just to one side of the middle crosspiece. Remove the staples holding down the mattress cover, just for a few inches on either side of this mark. You will need to pull the mattress cover back to fold the box spring in half, and the cover would keep you from being able to do that. You don’t have to take it all the way off; you just have to be able to push it out of the way.
Using a handsaw, cut through the frame JUST to the left or right of the middle crosspiece. Do NOT cut any crosspieces! Repeat on the opposite side and the middle, like this:
Sorry for my lame diagram, but I hope it helps you get the idea.
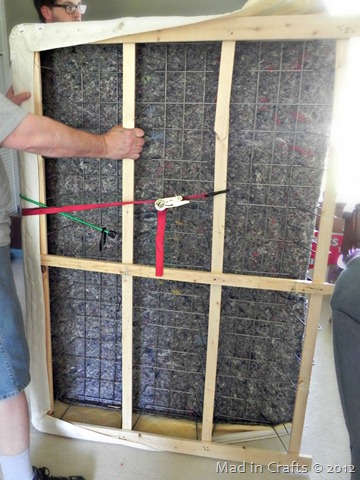
Now that the box spring has been cut, it is time to fold it in half. You will need a few people for this step. Stand the box spring up on its side, with one person on each end. Use a fulcrum like a doorframe (or my body in our case) and carefully bend the box spring, bringing the two ends together.
Now, the springs shouldn’t be so taut that they will FWOI-OI-OING the box spring back flat again if you let go, but you should still secure it to be safe. Packing straps, bungee cords, or duct tape will all work to maintain the bend.
Carry that half-sized box spring wherever you need it to go!
PUTTING THE BOX SPRING BACK TOGETHER
Once you have managed to get the box spring into the room in which it will be living, you will need to properly put it back together.
Unstrap the box spring, and lay it flat on the floor. Lay something large, flat, and heavy, like a wooden bookcase, on top of the box spring to help it to flatten all the way out again. Leave it for a few hours or overnight.
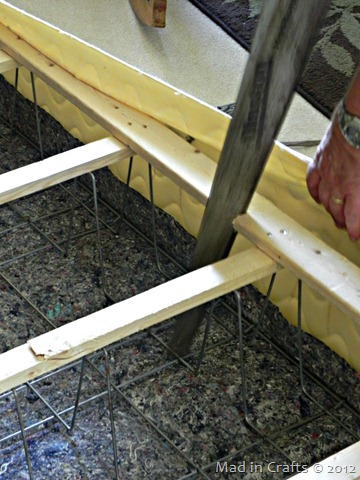
Once the metal springs are pretty much back into shape, you can work on shoring up the sawed wood frame. Place 1×1’s on either side of the center slat and screw it into the crosspieces. (See picture above) Add one 1×1 to each of the two side slats. Screw those into the crosspieces as well.
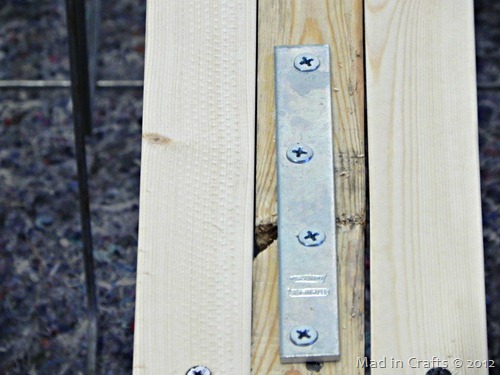
Use straight metal brackets screwed into the frame to reconnect the wood slats you sawed earlier. At this point, the box spring is probably sturdier than it was before you cut it in half!
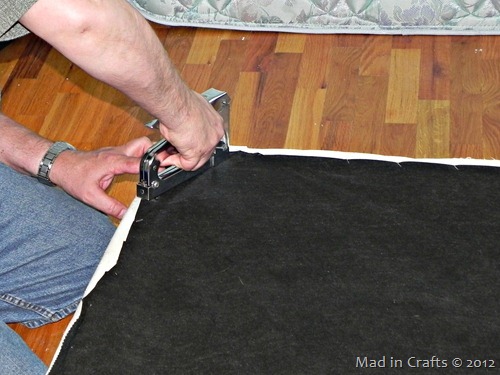
Place the fabric covering back onto the box spring and staple it into place.
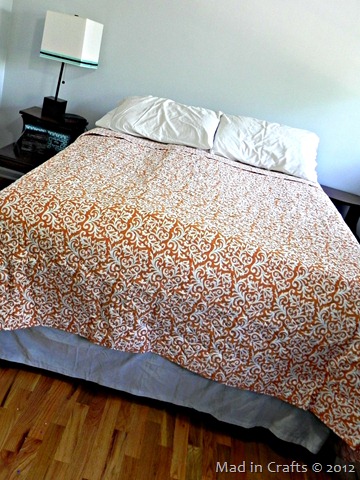
Set the box spring on your bed frame, add the mattress and bedding, and enjoy your new bed!





Great instructions. I’ll be trying them out today! Thanks!
I’m so glad I came across this. I saw a few other sites that had instructions, but none seemed like they would work. I followed you directions and it worked like a charm! I’m so glad to not be sleeping on the floor and to not have had to fork out more money for a split box spring. Thanks!
Fantastic news! It is definitely a money-saver!
Thanks for posting this. I will be trying your method the day before moving day. Wish me luck!
Great advice. Thanks for the info. We did it and the whole process worked out just fine.
Took us about 45 minutes, but then we’re not carpenters. You suggested 1×1 s for supports, but
we used 1 x 2 instead. Box spring frame is now even stronger than before we modified it.
Charlis
So glad to hear that it worked so well for you!
Very helpful tutorial, which we will be trying in the very near future. However – let’s say you’ve succeeded in disassembling/reassembling the boxspring. What about if/when you have to move again – can this be easily recreated for the descent back down the steps to a new location? Just thinking ahead…
We, thankfully, haven't had to move again since we cut our box spring, so I can't speak to how well the process works a second time. Sorry!
Thank you for this awesome tutorial! Worked like a charm and saved us from spending more $$$$ on a 2 piece box spring!
Awesome! I am so glad to hear that!
Thank you so much for posting and with pictures and detailed instructions. My wife and I were about to buy split box springs when I found this and figured I would give it a shot. It worked like a charm. You saved us a couple of hundreds of dollars! Thank you!
So glad it worked for you!!!