This is such a happy post for me! First, because our bathroom makeover project is FINALLY DONE and, second, because I don’t have to keep any of it a secret anymore. If you follow me on instagram, you have been getting some blurry hints about the big reveal but now I can share all the DIY projects that went into transforming our “fine” bathroom into a gorgeous space.
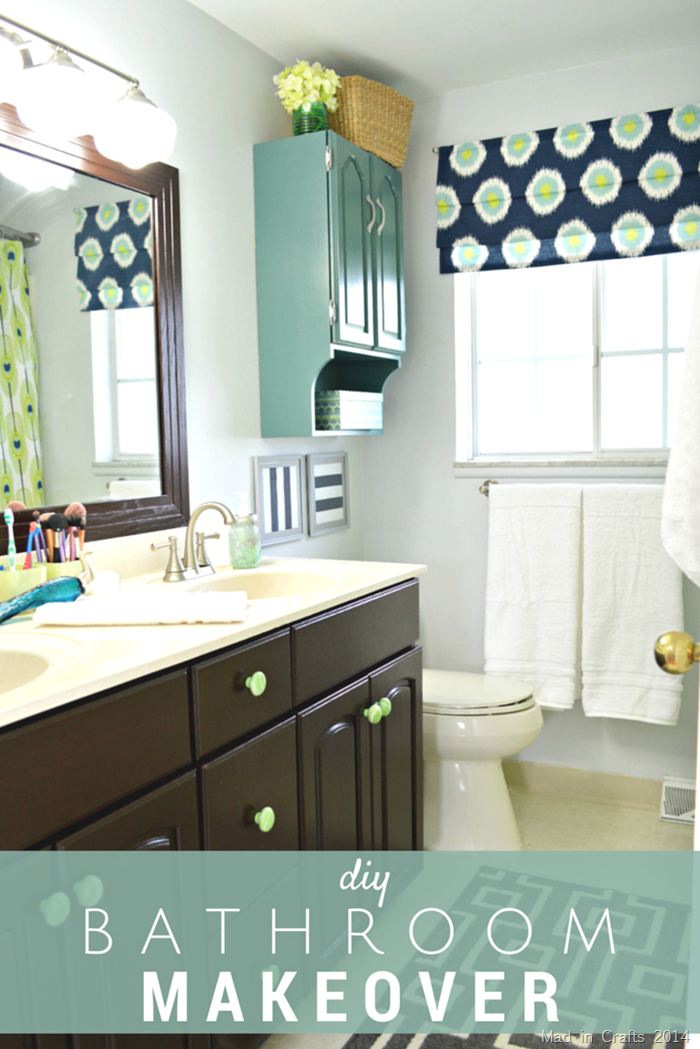
Because our bathroom was basically fine in the first place, the room just got a makeover not a renovation. I don’t have the budget or the DIY skills to lay tile or replace a toilet. In fact, all of the larger pieces of our bathroom were left in the room. I didn’t even paint the walls because they had just been painted two years ago when we moved in. That doesn’t mean I didn’t put any work into the room. Let me tell you, there were plenty of projects and more than a few frustrated grunts and groans along the way. But now it is finished and it is beautiful. And for the moment it was clean, so I got the pictures in before all that changed.
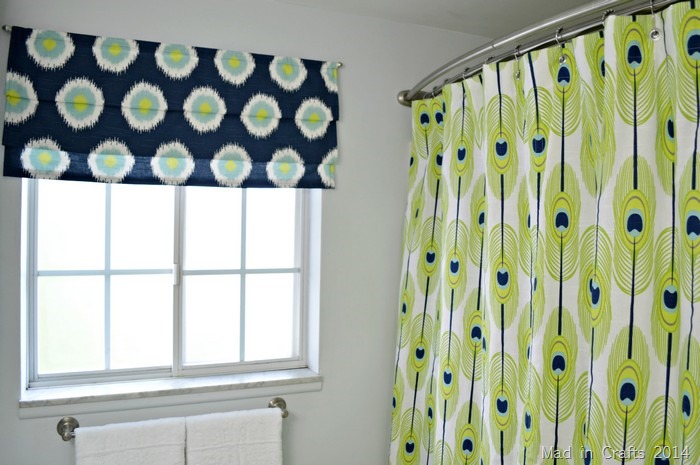
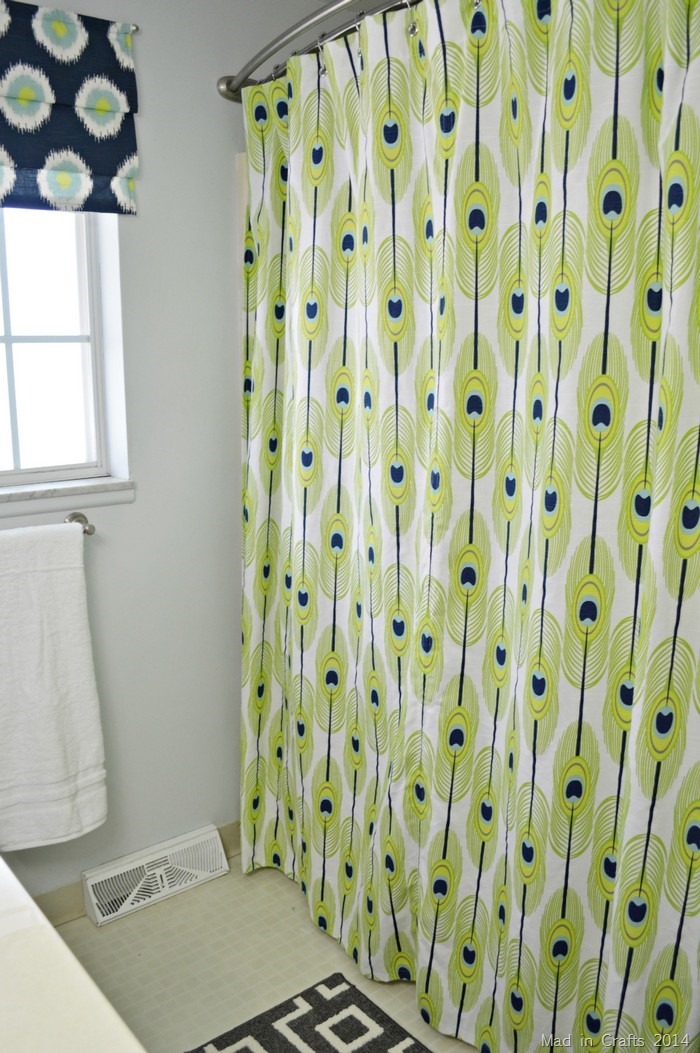
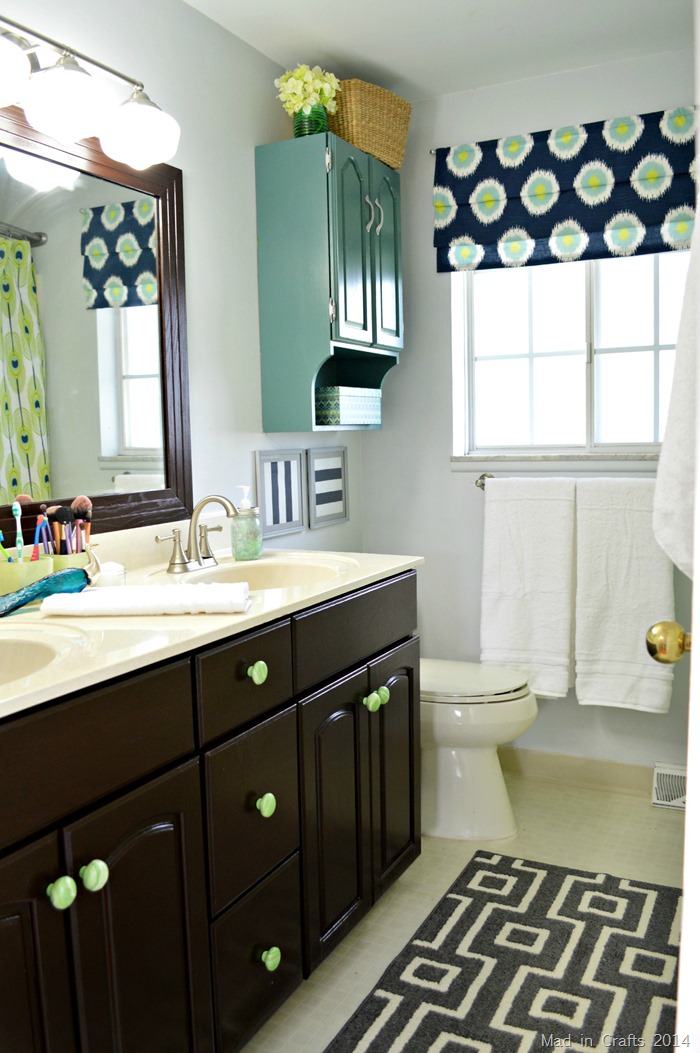
After some input from my facebook fans, I decided on the peacock feather print fabric for the curtain that I sewed for the shower. Yes, I sewed that all by myself. Be impressed. I also made the new faux Roman shade window treatment to replace the old curtain that was haphazardly draped over the curtain rod. These two prints established the navy, bright green, light teal, and grey color scheme that I carried throughout the whole room.
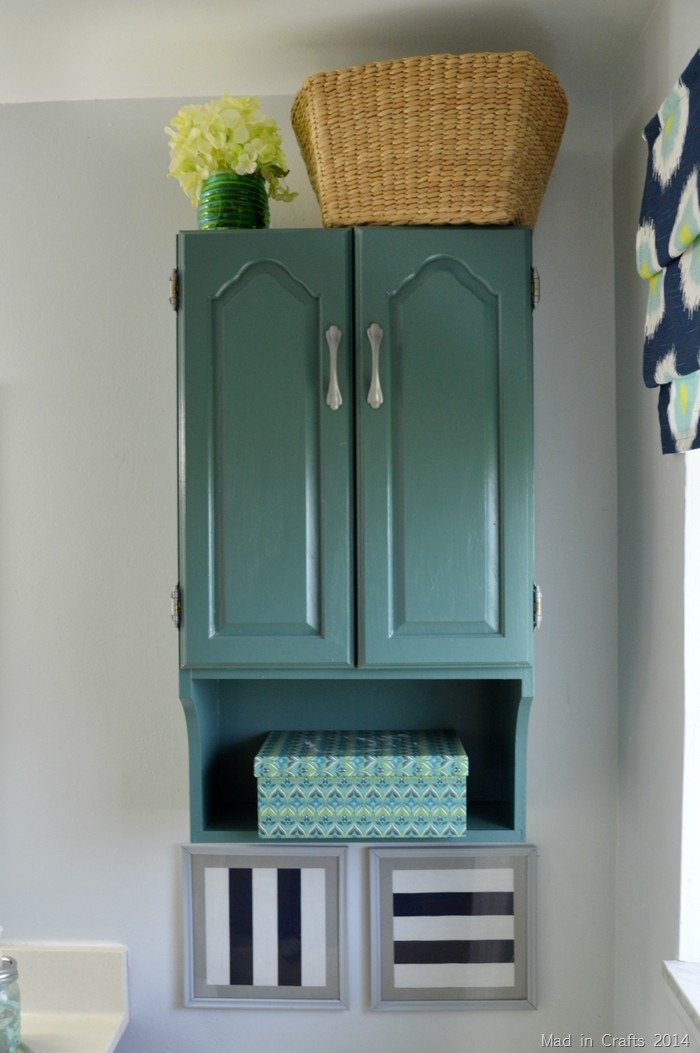
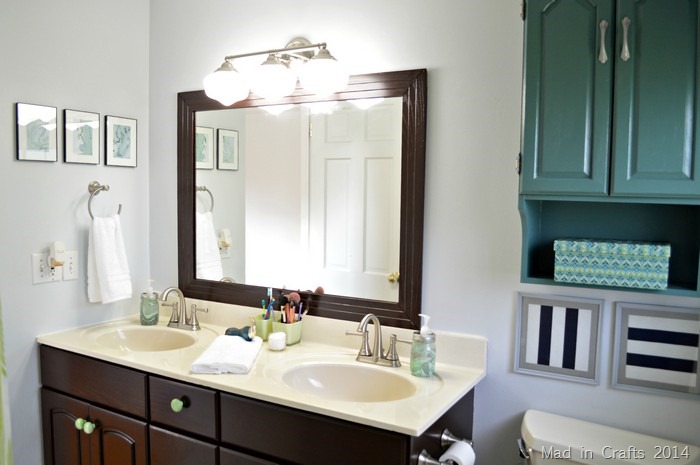
I replaced our rickety old wire shelving unit with a hanging cabinet. The cabinet was an oak colored laminate with brass hardware, so it needed a full makeover as well.
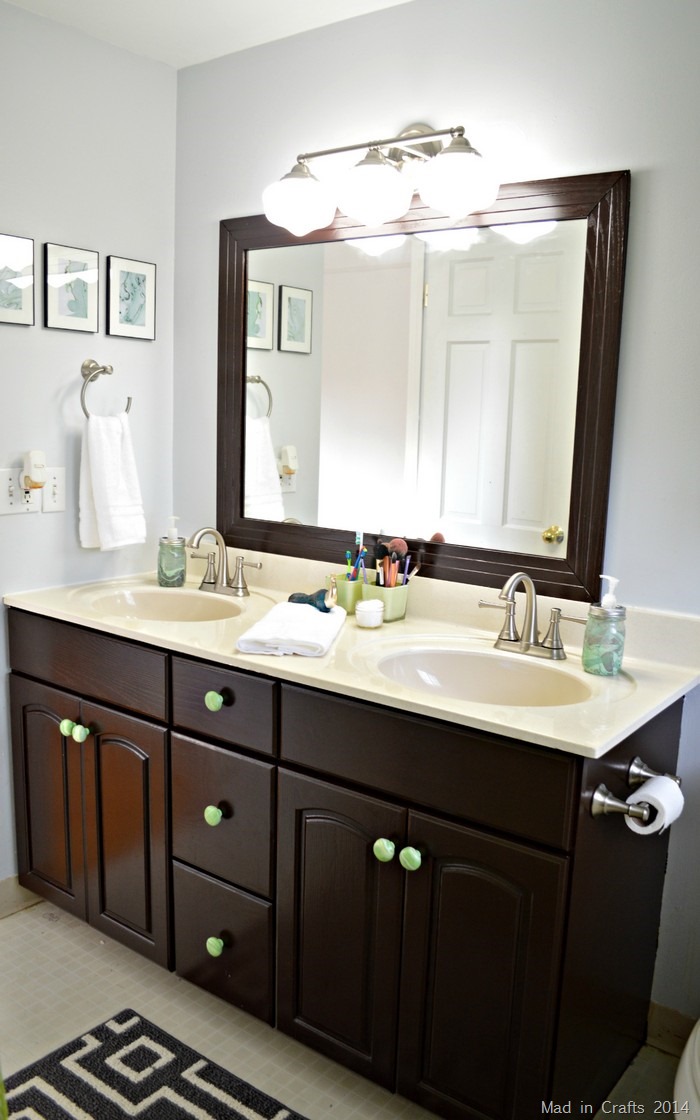
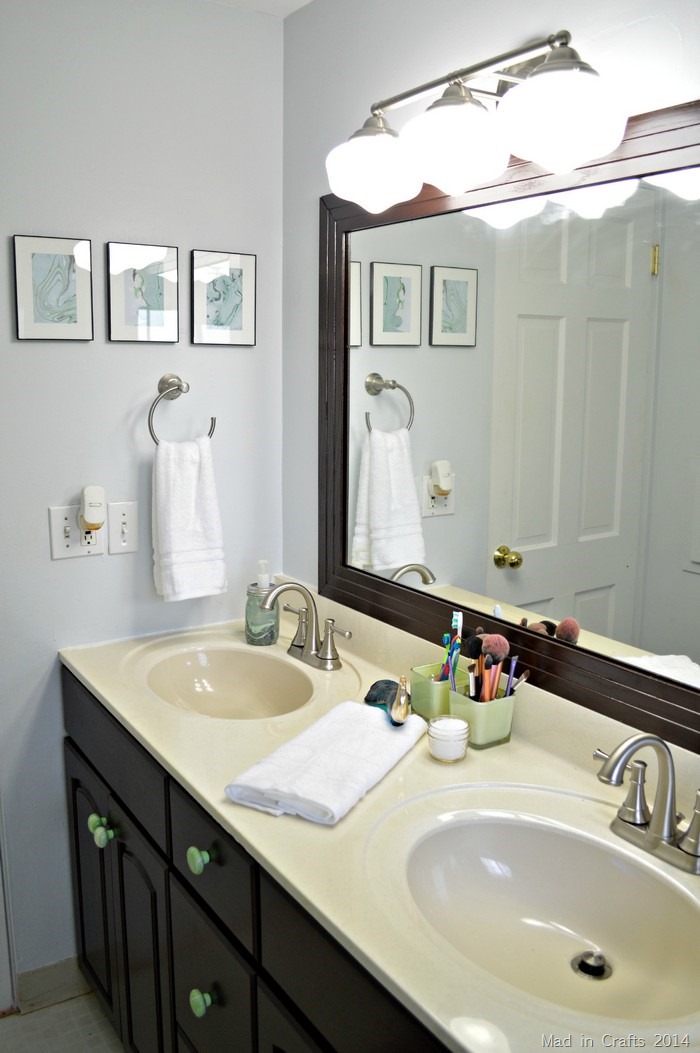
The most dramatic change in the room came in the form of the re-stained cabinet and newly framed mirror. I followed the tutorial from Monica Wants It for staining over your existing light colored cabinetry with gel stain. The only way I deviated from her tutorial was that I used Minwax gel stain instead of the General Finishes stain she recommended. Minwax was just easier to find.
Changing the finish of the cabinetry from the dated oak to the more modern rich brown immediately made the room seem more luxurious. Gel stain is not at all like other stains, so be sure to do your research before you try it out for yourself.
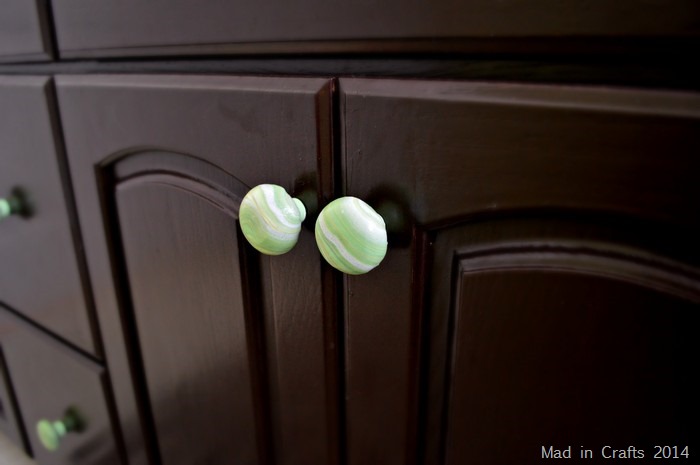
Did you notice that the shiny brass hardware is gone, gone, gone? I searched and searched for pulls that I liked and that I could afford. And, as I so often do, I ended up making them myself instead. I will be sharing the tutorial for these marbled beauties soon.
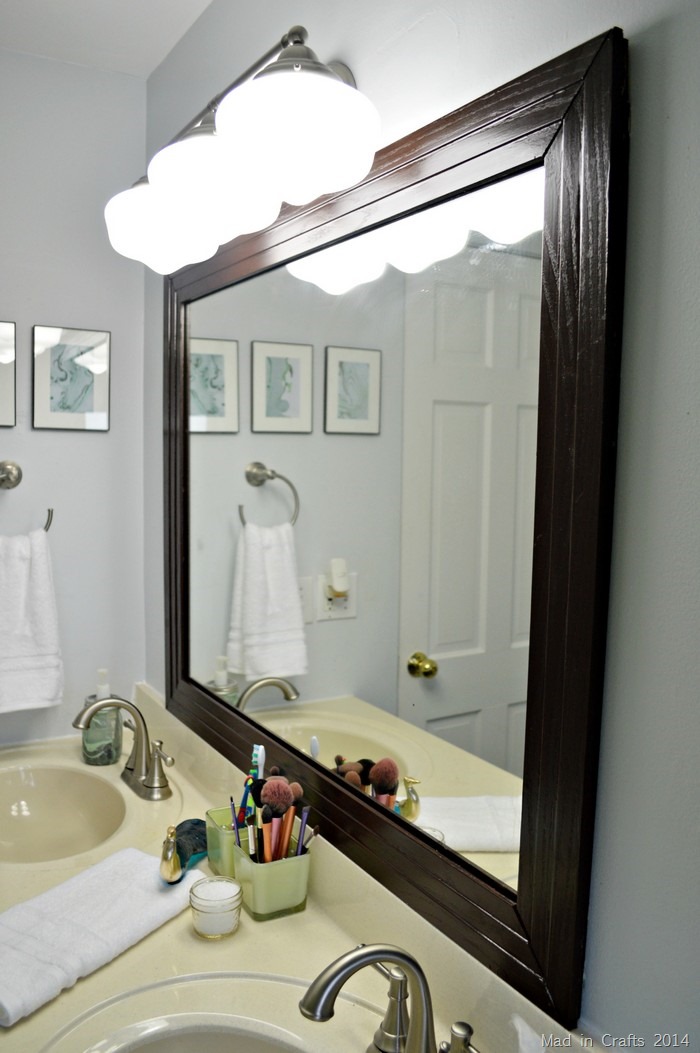
Above the newly stained cabinet is my gorgeous framed mirror. I splurged an extra $10 to buy oak molding instead of pine and stained it to match the cabinets below. This was a fairly simple project but it made such an impact on the look of the bathroom.
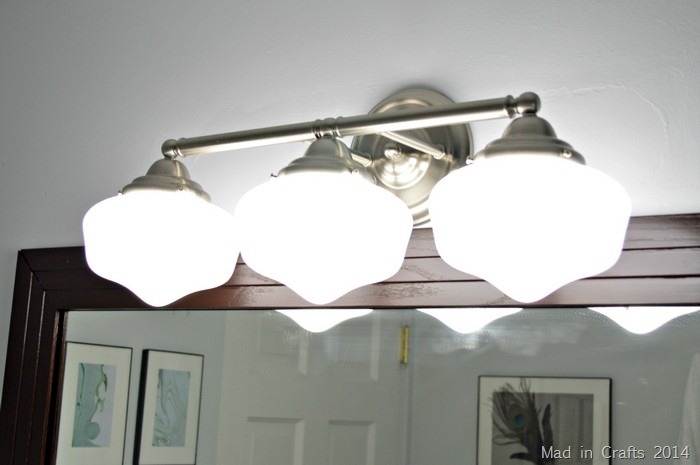
My new schoolhouse fixture is bright and beautiful over the framed mirror. I was arguing with my inner cheapskate about whether I should really buy this new fixture or just spray paint our old one. And then, when I ran to the hardware store for the elevety billionth time, there it was. On sale.
The dark wood and new brushed nickel fixtures make even the older countertop look new again. Maybe I am delirious from all the stain fumes, but I even think the old wall color looks refreshed against the dark stained wood.
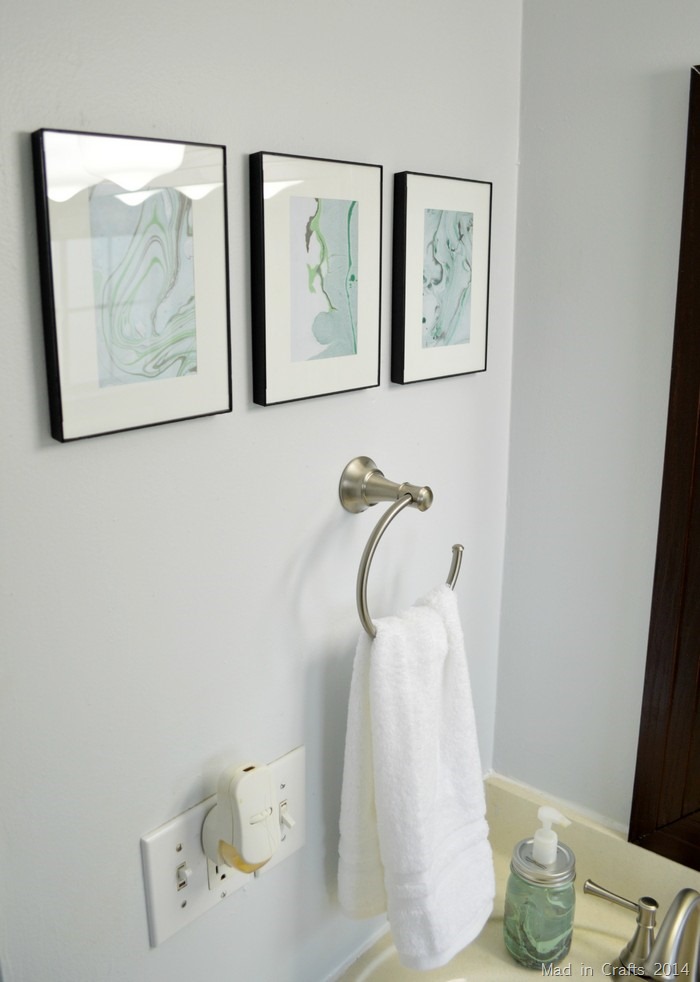
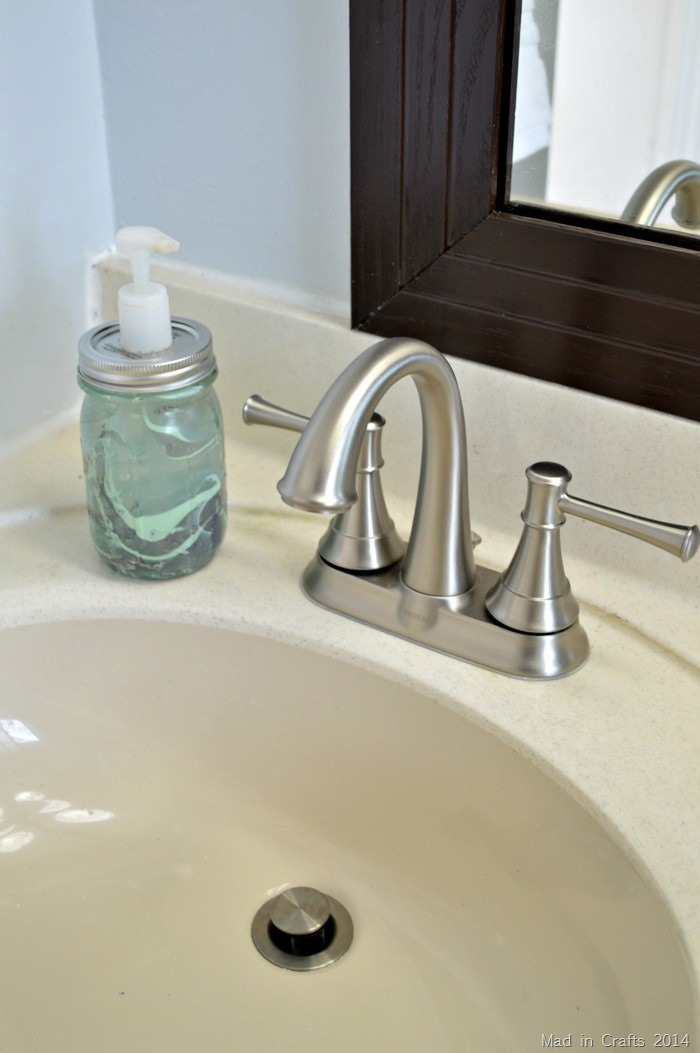
Of course, the room had to be finished off with some DIY artwork for the walls. I will show you how crazy easy it is to make and frame marbled paper to use as elegant artwork in the next weeks. You can see that even my mason jar soap dispensers got the marble treatment.
If you remember, the reason I got started on this bathroom makeover was because I won a huge prize at the SNAP! Conference I attended in April. Moen sent me a whole bathroom worth of fixtures making this makeover possible for us. These GORGEOUS faucets are part of their Ashville collection, which I used all over the bathroom. The fixtures all have a brushed nickel finish that is spot resistant. The faucets also have Microban technology that helps to prevent germs from living all over the handles and spout.
We put in all of the new Moen fixtures ourselves. My dad removed the old faucets and installed the new ones with a small amount of help from me. Once we got the right faucets (that’s a story for another time), the installation was painless. The other fixtures were very easy to install too!
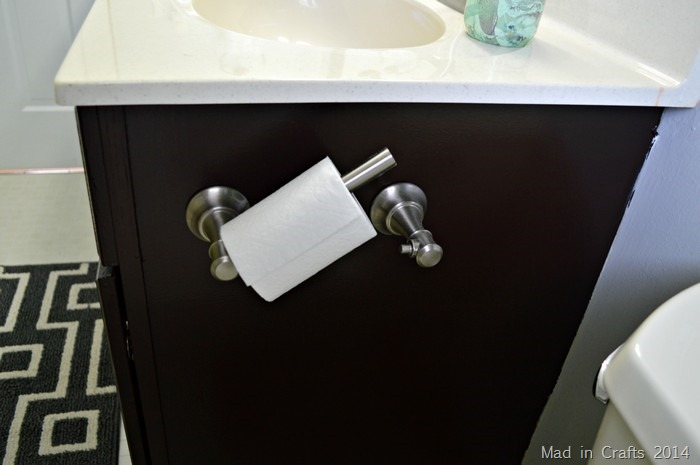
And look at this! The toilet paper holder just pivots to open to change out a roll. It’s so easy that other people in my family other than me might actually be able to manage to change out the roll! They won’t. But they definitely could if they wanted to.
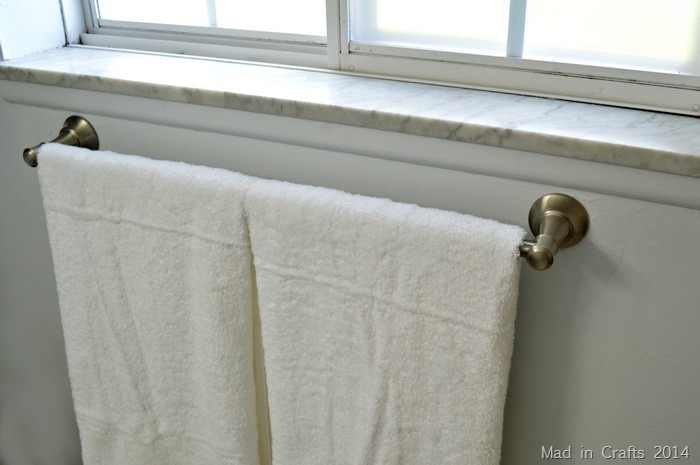
Also from Moen’s Ashville collection is this snazzy new towel bar. Complete with snazzy new towels. The theory with the white towels is that they will look newer longer since I can just bleach them when they start to look dingy. I will let you know how that theory holds up.
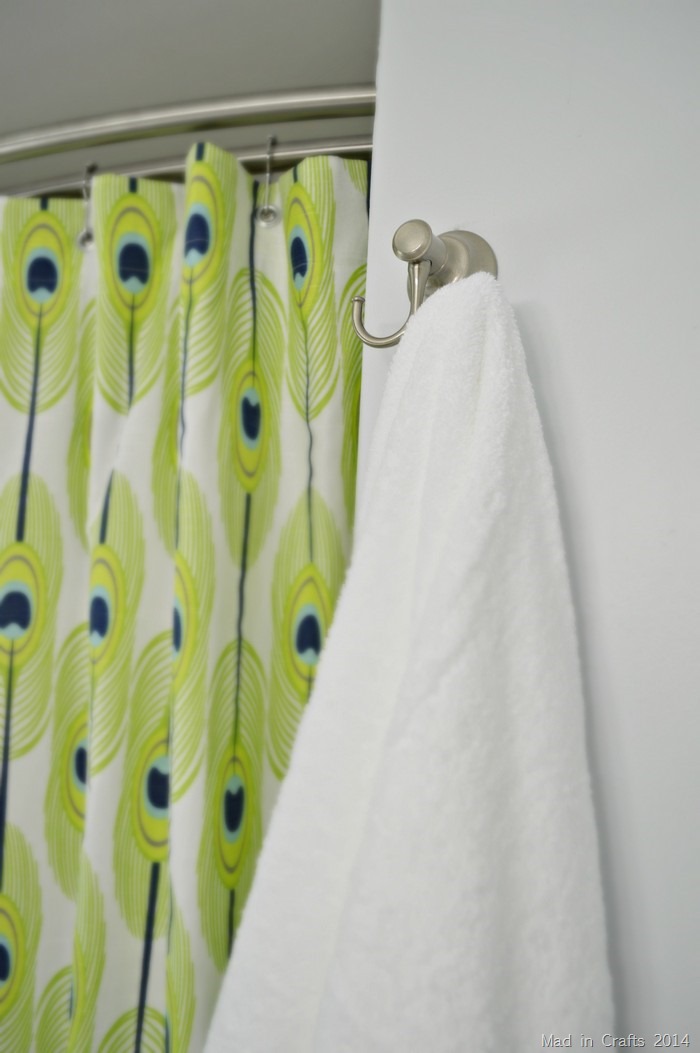
Since we were short on places to hang towels in the bathroom, I also installed a robe hook on the wall just outside of the shower. It’s a convenient spot to grab a towel, especially when I am wrangling wet kiddos fresh from their baths.
The most surprisingly luxurious feature of our bath makeover is the new curved shower curtain rod. I don’t understand what kind of time lord technology these curved rods use, but the shower now feels significantly more roomy than it did with our old curtain rod. I opted for the double rod because, although I still hang the curtain and curtain liner on the same rod, the outer rod can be used as an additional towel bar should we need it.
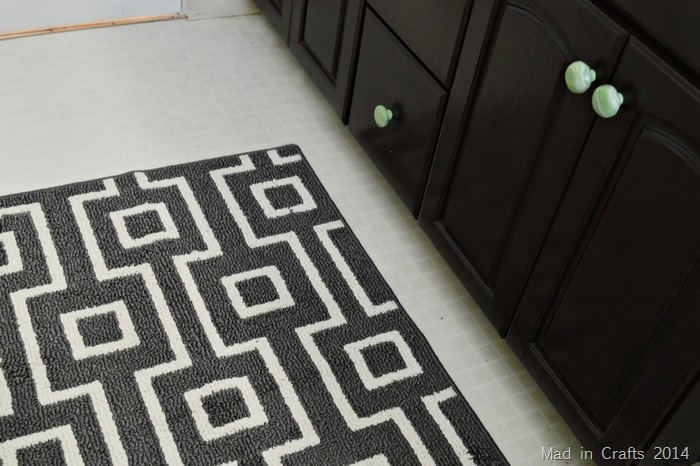
Lastly, down on the floor, is my new bath rug. I decided to stick with grey for the rug so that it wasn’t competing with the bright shower curtain. I was glad to finally find this square-based pattern because I wanted something geometric, but darnit if almost every rug in town wasn’t some kind of chevron!
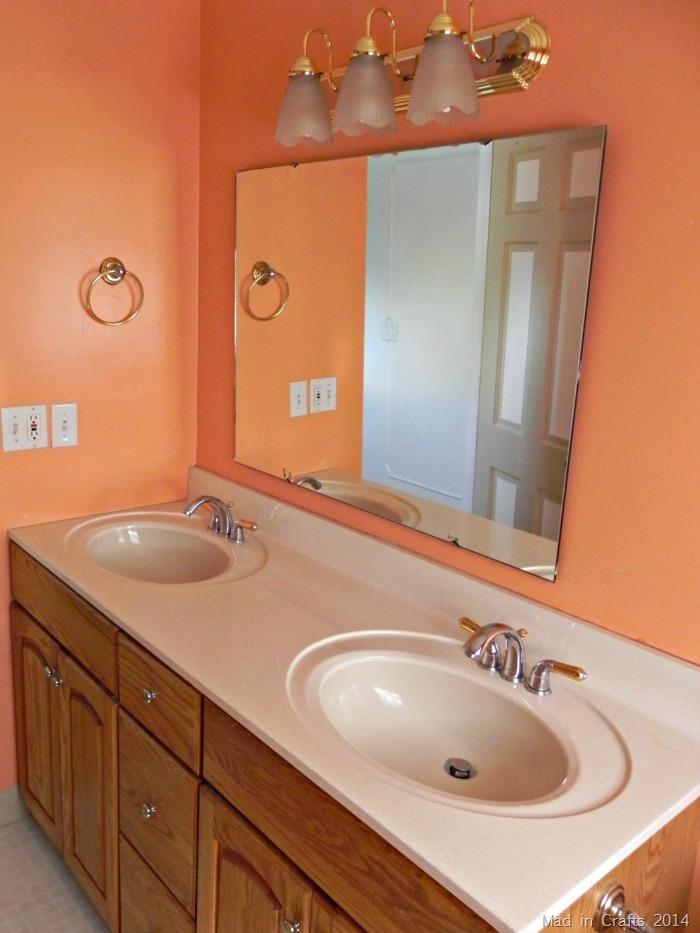
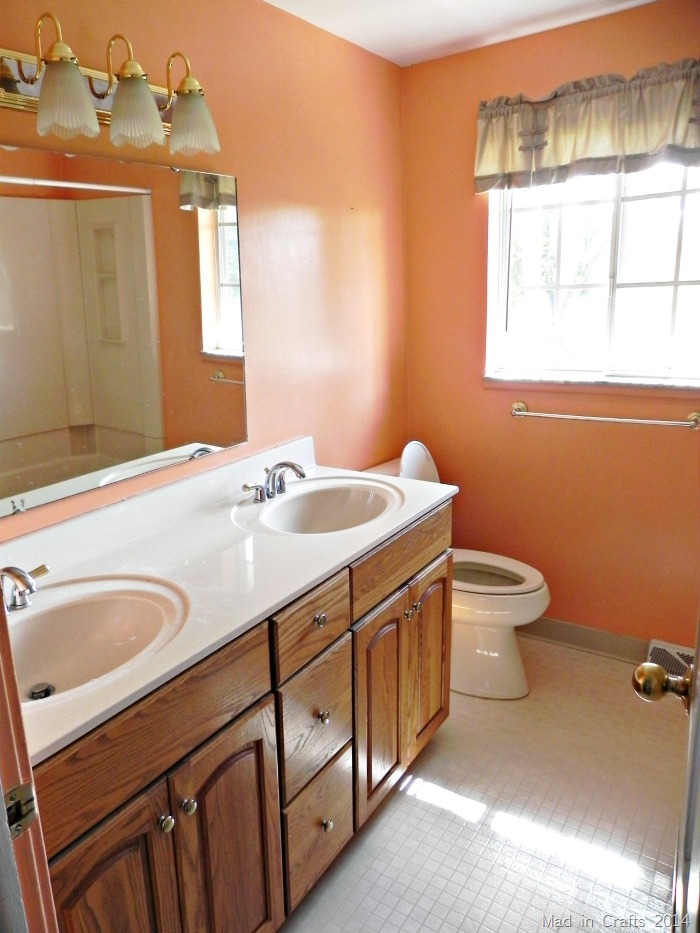
Now, before I give you one last look over the whole room, I want to remind you of what it looked like before. Not in its repainted “fine” state, but how it looked when we bought the house two and half years ago.
Please in your rush to get past these pictures, do not fail to notice the two-colored paint job on the bathroom door.
Yeah, that paint color needed to go. Also, I apologize for the open toilet in this picture. But, honestly, is the open toilet any grosser than that orange paint?
I am so pleased with how this room turned out. I was nervous to make over a bathroom because they do have a real impact on the value of a house, plus they can be a nightmare on the project budget. Because of Moen’s generosity and because everything was DIY’d, the bathroom makeover was very reasonable and I think we added a good deal of value to the house along the way.
Thanks for sticking around through this monster post! If you are interested in any of the supplies I used in the room, I gathered together a list of sources below. Some of the links are affiliate links. If you purchase after clicking one of these links, I will receive a small commission. Thanks!
SOURCE LIST
- Wall Paint: Ace Royal – Silver Anniversary
- Cabinet Paint: Old Village Paint – Cabinet Makers Blue
- Mirror and Cabinet Stain: Minwax Gel Stain – Walnut
- Shower Curtain Fabric: Premiere Prints – Feathers
- Faux Roman Shade Fabric: Premiere Prints – Ikat Domino
- Framed Fabric: Premiere Prints – Canopy Blue
- Rug: Geo Design Print Squares Rug
- Towels: Sonoma Ultimate Performance Bath Towels
- Light Fixture: Patriot Castlefield Vanity with Opal Glass
- Faucets: Moen Ashville 4” Centerset Faucet
- Towel Bar: Moen Ashville 24” Towel Bar
- Towel Ring: Moen Ashville Towel Ring
- Robe Hook: Moen Ashville Double Robe Hook
- Toilet Paper Holder: Moen Ashville Pivoting Paper Holder
- Shower Curtain Rod: Moen Double Curved Shower Rod
You can also find all of the Moen fixtures at Homedepot.com.
Did you like this post? Think it’s worth sharing? Please share with your friends using the social media share buttons at the bottom of the page!
Thanks, Jessica



This is gorgeous! Just pinned. Would love to feature a photo or two on our blog and link over to you. Permission? 🙂 And thanks for linking to OFS!
Thanks so much, Abbey! Yes, I would love to have you share on the OFS blog!
Oh my god, you had me with the peacock shower curtain! I love it. But I’m also drooling a little over the green marbled knobs on your vanity. Can’t wait for the tutorial!
OMG, it’s a million times better! Love the funky material and colors. I wanted to run from the peach. I rented a house once that was nearly 100% peach. I wouldn’t wish it on my worst enemy! LOL
This is just beautiful! I love the dark stain on the cabinets (and that cabinet you added over the toilet – I’ve been thinking about doing that). The new cabinet hardware is gorgeous! Your faucets are very similar to mine 🙂 and I adore the new light fixture. I will swear I just bought that same towel bar set.
Looks very nice! I am inspired to try something in my apartment. Great job too on matching up before and after photos so we can really make a comparison.
I love the cabinet over the toilet. Where did you get that.
What a fantastic bathroom! I love the colors that you chose… Everything looks so fresh and clean!
Thanks so much! We love it too!