
When it came time to replace the oh-so-stylish window treatment in our upstairs bathroom, I had a pretty good idea of what I wanted to do. I did NOT want another full-length curtain obstructing the afternoon sunlight, which meant that I had to apply some privacy film over the windows. Once the privacy issue was out of the equation, I could make a window treatment that was only decorative. I am definitely more of a straight, clean-lines kind of a girl, so any curtains with frills or poofs wouldn’t work. I loved the Roman shades my parents had in their old house, so I decided to make a simple faux Roman shade for our bathroom window.

HOW TO SEW A FAUX ROMAN SHADE
WHAT DO YOU NEED TO MAKE A FAUX ROMAN SHADE VALANCE

This is a sponsored post. I was given free material from Online Fabric Store in exchange for my work, but the opinions are 100% my own.
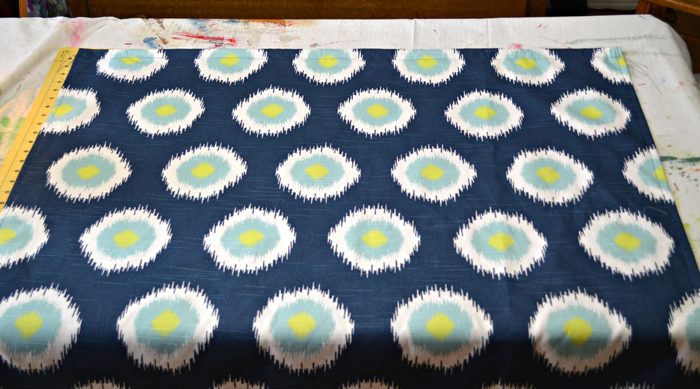
I chose Premiere Prints Ikat Domino Canal Slub Duck for the window treatment in the bathroom. The colors in the fabric tied the cabinet, shower curtain, and wall colors together, and the print was a good scale to play off of the feather pattern of the shower curtain. I like sewing slub duck fabric because it is nice, sturdy, and not slippery. It’s a great decor fabric for novice sewers like myself.
These are all affiliate links, if you make a purchase (of anything from the site, not just these items) after clicking through, I will earn a small commission. Ads and affiliate links are the way I am able to keep this website running and to offer you free tutorials all year long. Thank you so much for supporting me and Mad in Crafts!
PLANNING AND MEASURING FOR ROMAN SHADES
IRONING AND PREPPING THE FABRIC
Since I had applied a privacy film to the window glass, the window treatment didn’t need to cover the whole window. I have always liked the look of Roman shades, but I was too intimidated to try sewing a functional Roman shade myself. I settled on sewing a faux (aka stationary) Roman shade for the top third of the window.
I began by ironing out my print fabric and another piece of white cotton fabric that I used as lining fabric. This project involved far more math than I am comfortable with, coupled with having to use both my sewing machine AND my iron, and I was completely out of my comfort zone. Part of me wanted to just use a staple gun to stick the fabric right to the wall and be done with it.
MEASURING FOR THE DIY FAUX SHADES
To minimize my angst, I tried to keep the curtain measurements as simple as I could. When you are measuring for your own curtain, you will want to find the exact measurement of your curtain rod (or the width of the interior of your window frame if you are using tension rods) and add 2”, so that you can have 1” of fabric on each side to fold over for a hem.
Measuring for the length of your curtain is less exact. Functional Roman shades need to be as long as the window when they are finished, so I just decided to go with that plan. The formula then for the length of my fabric was: find the measurement from the top of the curtain rod to the bottom of the window + 2” of seam allowance + (2 times the height of curtain rod + 1”). This allows for seam allowances and leaves space for the rod pocket. I know that seems like way too much algebra, and it is, but let me show you real numbers.

For our window, the formula was 39” + 2” + 4” = 45” in length. I hope that makes sense because that is the most exact math you are going to get in this whole post.
PLANNING THE PLEATS OF THE ROMAN SHADE

I did some research on faux Roman shades before I started my post, and there were so many different opinions on how the folds should fall. Should they be even? Should they all fall right at the bottom of the shade? Should the folds be relaxed (droopy) or straight? It was overwhelming. Finally, I decided to just play around with the fabric until I liked how it looked. Fortunately for me, the large repeat on my fabric’s pattern allowed me to make two nicely sized folds in the curtain so that the pattern matched up. No long division is required!
Whether you decide to create your folds using your math skills or by eyeballing them, there are two crucial things to remember:
1) The folds need to be of consistent height, especially at either end of the curtain. Measure when you fold, measure when you iron, measure when you pin – all the way across each fold.
2) Use way more pins than you think you should. I don’t know how many times I had my folds nice and straight, and I picked up the fabric and the folds drooped and fell and I had to start over again. Save yourself the curse words and use a lot of pins.
PINNING AND SEWING A FAUX ROMAN SHADE
SEWING A FAUX ROMAN SHADE VALANCE
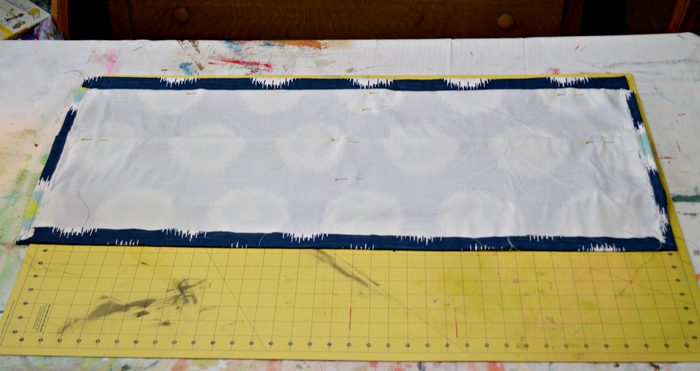
- Cut the valance fabric and lining fabric to size.
- Pin the lining to the fabric, create a 1″ hem fold on one side, and sew the hem in place.
Repeat for all three remaining sides.

- Fold, iron, pin, and sew a pocket for the curtain rod.
The measurements for this pocket will depend on the size of your curtain rod.
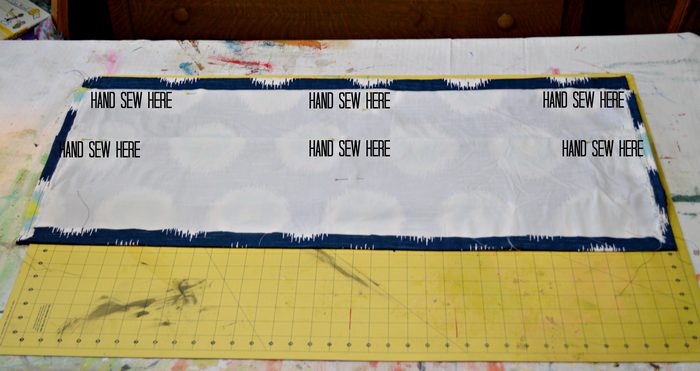
- Determine the size of your shade pleats.

- Pin those pleats in place and tack the pleats in place by hand.
Be sure to tack the back of the top fold to the highest drop of the curtain lining ONLY. If you sew all the way through the top drop of the curtain, the stitches will be visible when the curtain is hanging.
- Iron the finished faux Roman shade.
- Slip wooden dowels into the pleats to help them keep their shape.
- Insert the curtain rod into the rod pocket at the top of the finished shade and hang!
FINAL THOUGHTS

I did consider using stitch witchery or hem tape to hold up the folds instead of hand sewing, and that would have been much faster – if I knew what I was doing. As it was, I was doing too much experimenting and starting over, and ripping out stitches is easier than peeling off melted stitch witchery.
Thankfully, the curtain looked fantastic on our bathroom window. If it had been crooked or otherwise wonky, I probably would have cried.

I love the way the two fabrics work with each other, and I am so happy with the nice bright light that streams into the bathroom now. It’s a win all around!
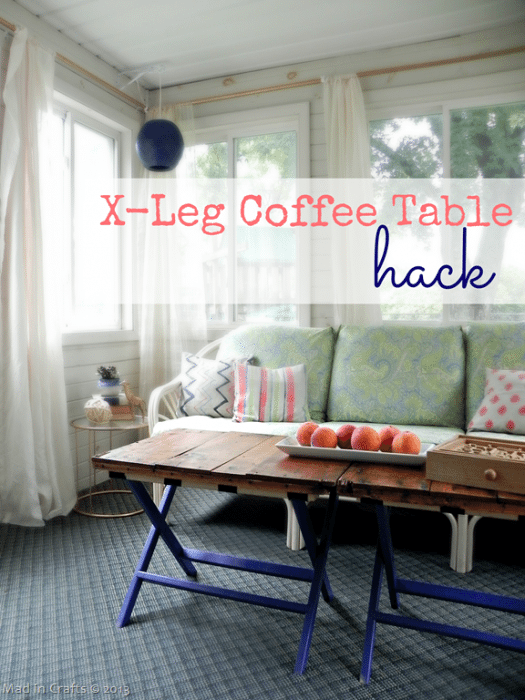
You might like these other DIY projects:
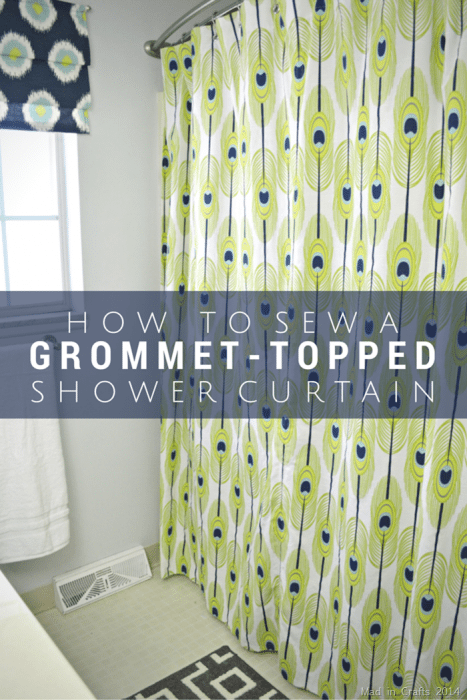
SEW A GROMMET-TOPPED SHOWER CURTAIN


So pretty!! Love the fabric you chose!
It looks great – I love that fabric!
Your bathroom is just gorgeous. Love the fabrics!
Just joining your site, I have to agree with everyone else, your shower curtain fabric is beautiful. You did a nice job on your bathroom. Thank you for sharing with us.
I love your faux Roman blind. Please could you tell me how the pole is attached to the wall. I can’t understand how the brackets don’t show and I’d like mine to look like yours with just the little ends showing.
Many thanks.