
I have been itching to do some bleach dyeing for a while now, but I haven’t had the right base for a good project. When I found some plain cotton drawstring bags while I was out thrift shopping, I decided they would be test subjects for my first bleach experiment. Before I could take the color out of the bags, I needed to add color first. I armed myself with tie-dye and a spray bottle of bleach and got to work making these bleached & dyed drawstring bags.

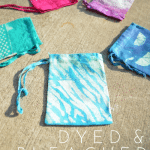
DYED & BLEACHED DRAWSTRING BAGS
WHAT YOU NEED TO MAKE DYED & BLEACHED DRAWSTRING BAGS

I found these small cotton drawstring bags at Goodwill, but you can find them online or at your local craft supply store. You want to be sure that they are mostly cotton, however, because synthetic fabrics don’t take dye as well. If you are a conscientious crafter, you will also wash them to remove any sizing that might be on the fabric. I did not.

Because I wanted each of the five bags to be a different color, I decided to use Tulip Tie Dye rather than Rit dye. If you are going to make your bags all the same color, I would suggest using Rit and dyeing them all in one big bucket. I love how easy it is to mix up the dye from the Tulip kits, and how little mess it creates. I used this same product on my daughter’s watercolor curtains, her dip dyed tablecloth, and my batik tote bag.
These are all affiliate links, if you make a purchase (of anything from the site, not just these items) after clicking through, I will earn a small commission. Ads and affiliate links are the way I am able to keep this website running and to offer you free tutorials all year long. Thank you so much for supporting me and Mad in Crafts!
- drawstring bags
- tie dye kit
- bucket
- stencils
- bleach (you can get a gallon or a half-gallon cheaply from the dollar store)
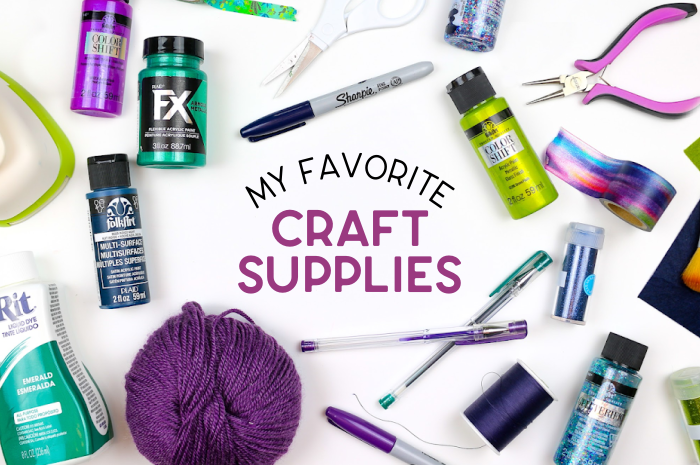
Want to know which craft supplies I always keep in my craft room?
Visit the Mad in Crafts Amazon Storefront to learn more and to buy your own supplies!
HOW TO DYE THE BAGS

I was working on our cement patio, so I wasn’t worried about protecting my work surface. But if you are, just lay out a trash bag or small tarp and work on top of that. I used a small bucket or food container for each of the colors since that was the right size for my small bags. It’s best if the bag lies flat at the bottom of the bucket, so the dye can reach all of the cloth evenly.

After I doused the bag with dye, I swirled it around with a plastic spoon to make sure I hadn’t missed any spots.

I repeated the process with the other four bags. I used magenta, blue, and teal dyes straight for three of the bags. Then I mixed the magenta and blue to make purple and all three colors to make a dark blue. Since I mixed the colors right in with the bag, the bags ended up with a mottled color appearance. If I had been smart enough to mix the colors before putting the bags in, the color would have been evener.

After letting the bags sit in the dye overnight, I rinsed the dye out of each bag until the excess water ran clear. Then let them air dry. After the bags were dry to the touch, I cut pieces of freezer paper to fit inside each bag. Then I ironed the bags so the waxy side of the freezer paper was attached to the inside of the bags. Not only does the paper make a barrier so the bleach doesn’t bleed through the whole bag, but it gives the bag some structure so it lies flat.
BLEACH DYED STENCILS

For my first bleach experiment, I busted out a polka dot stencil. I love this stencil; it’s the same one I used for my polka dot glitter clutch. I laid it out on the bag and then taped it in place with painter’s tape. Finally, I made sure to cover the exposed bag with tape so I didn’t get bleach everywhere.

I sprayed straight bleach over the stencil, blotted it with a paper towel, and removed the stencil. This is what the bag looked like right after spraying it with bleach. The polka dots became even more pronounced as the bleaching process progressed.

I tried the same stencil again with a lighter hand on the magenta bag.

I tried a repeating citrus stencil on the dark blue bag. You can’t expect the stencils to come out perfectly crisp and clear, so it is better to use a stencil without a lot of detail.

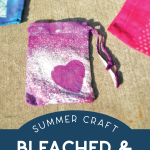
For the purple bag, I used a heart shape to make a reverse stencil. I just laid the heart on the bag and gave the bag a few spritzes of bleach.

Next, I used a stencil to create these zebra stripes. I masked off one section of the bag, stenciled it with bleach, then replaced the stencil, re-masked the bag, and stenciled it again.
You will need to neutralize the bleach dye by soaking the bags in a 1:10 part solution of hydrogen peroxide and water. So mix up 10 parts of water for every one part of hydrogen peroxide. Then the bags are machine washable on cold and can be put in the dryer on a gentle cycle.
EVERYDAY USE FOR THE DYED & BLEACHED BAGS

You could embellish the bags with rhinestones, embroidery, or HTV, but I chose to leave mine as they were! Drawstring bags are great for keeping jewelry or other small items organized in your closet or dresser. I also think these bags would be cute gift wrap for party favors.
Are you longing for a beachy breeze and the sand between your toes? Bring in some of the elements of summers at the shore with these beachy projects. This ebook contains step-by-step tutorials for home decor pieces, handmade jewelry, spa products, and more!
To receive this ebook FOR FREE simply sign up for the Mad in Crafts newsletter using the form below. This ebook will only be free for a limited time, so don’t wait!
You might like these other DIYs:

TIE DYE & CRAYON FAUX BATIK BAG


