Mad in Crafts

  • Email
  • Facebook
  • Instagram
  • LinkedIn
  • Pinterest
  • Twitter
  • YouTube
  • Home
  • About
    • ABOUT JESSICA
    • CONTACT
    • MEDIA KIT
    • Seen On
  • PRIVACY
  • CRAFTS
    • HOLIDAY
      • VALENTINE’S DAY
      • ST. PATRICK’S DAY
      • EASTER
      • FOURTH OF JULY
      • FALL
      • HALLOWEEN
      • THANKSGIVING
      • CHRISTMAS
    • HOME DECOR
    • KIDS
    • MISC
    • Wearable
      • JEWELRY
      • PURSES, CLUTCHES AND TOTE BAGS
      • T-SHIRTS
    • FREE PRINTABLES
    • FREE SVGs
  • DIY
    • Gardening
    • Health
    • ORGANIZATION
    • Outdoor
    • Room Makeover
    • The Mad House
  • Recipes
    • Dessert
    • DINNER
    • DRINKS
    • Snacks and Appetizers
  • ENTERTAINING
    • Birthday Party
    • Party
    • Wedding
  • SHOP
Please note: This page may contain affiliate links. If you click a link and choose to make a purchase from the partnership site, I will earn a commission. Thank you for supporting Mad in Crafts!

FAIR ISLE FAUX PALLET SIGN

December 10, 2014 by madincrafts 3 Comments

FAIR ISLE STYROFOAM PALLET SIGN

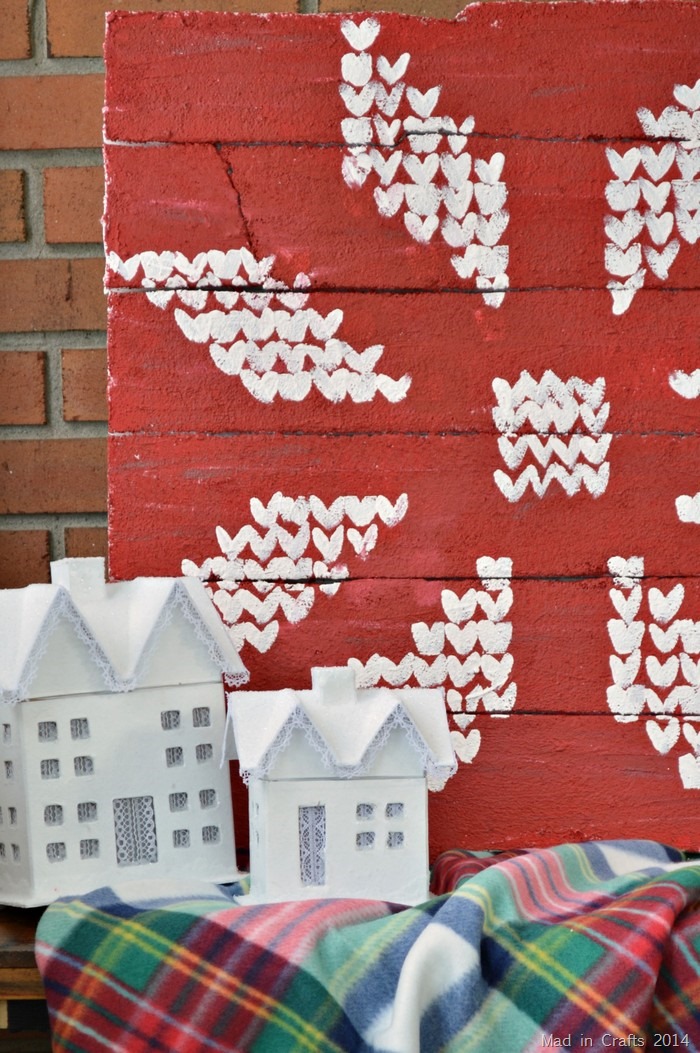
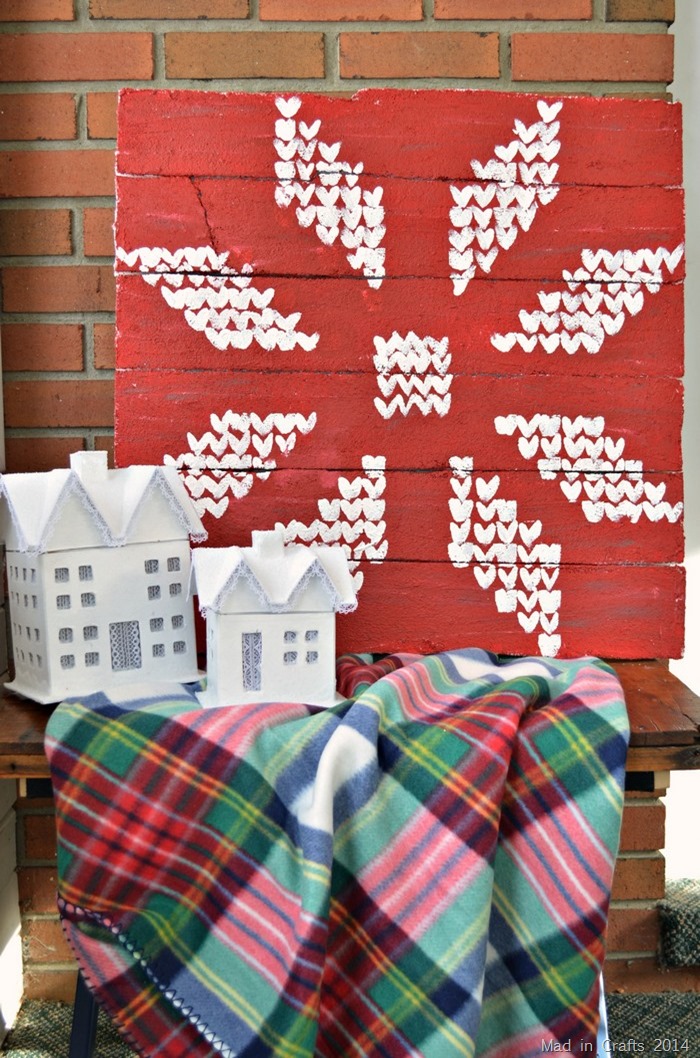
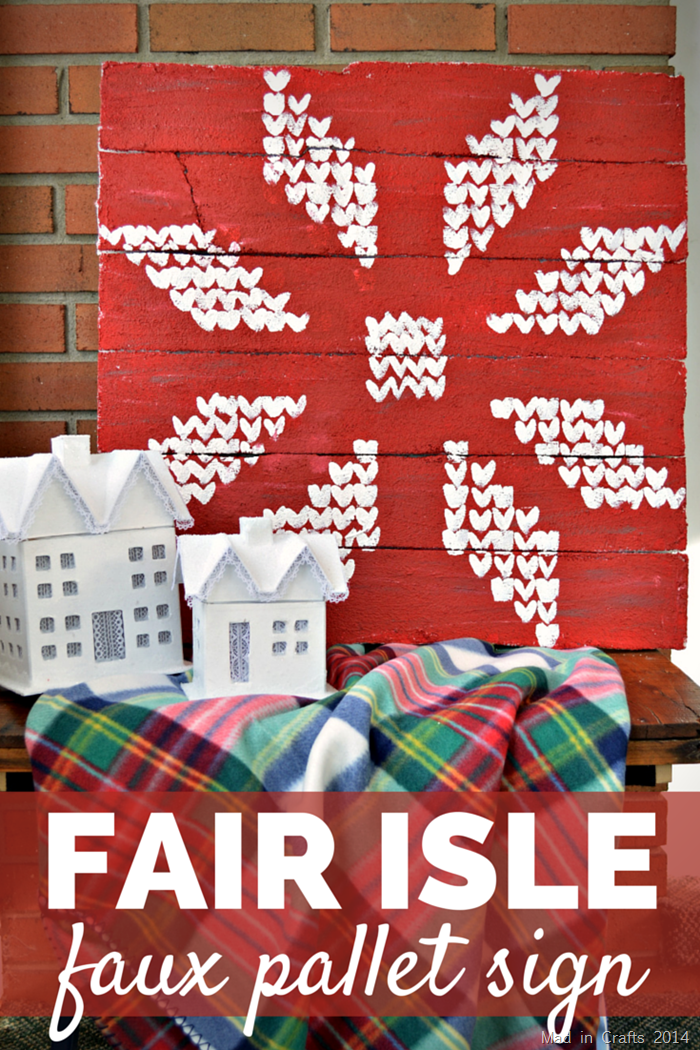
Remember how I told you that I had seen a resurgence of fair isle patterns when I made my most recent trip to Bronner’s?  Well, some of that trendy fair isle is popping up in my Christmas décor this year too!  I decided to take a common fair isle shape, the poinsettia, and super size it for a big piece of art.  Because I took another tip from Bronner’s: When it comes to Christmas MORE is MORE!

Watch this short video to see how I put together this festive sign.  Be sure to subscribe to my YouTube channel too; I release fun videos twice a week!

To make the sign, I used the same foam pallet technique that I used for my faux pallet cornice.  I started with two 12”x36” Make It Fun: Foam sheets, which I then cut down to 12”x24”.  I then cut each of those smaller sheets into 4”x24” pallet slats.  I coated the front and outer sides of the slats with Smooth Finish and let it dry for 24 hours.  I used toothpicks and duck tape to position the slats into a 24”x24” square.  Finally I used a piece of dollar store foam board to give the sign stability.

Distressed Faux Pallet

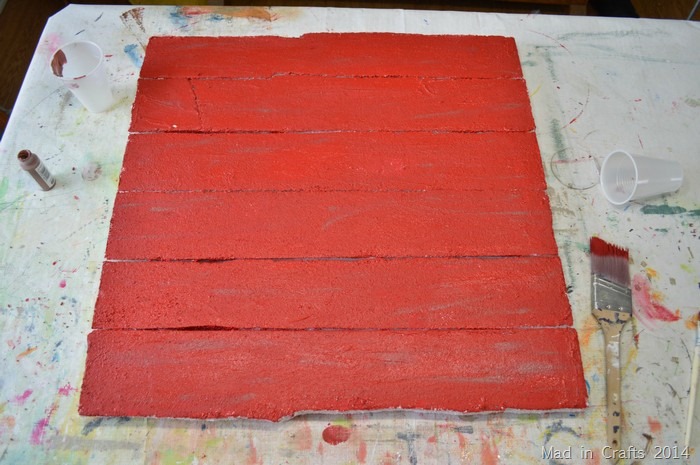
After the Smooth Finish was thoroughly dry, I applied a coat of red craft paint to the front of the sign.  I used both white and brown craft paint to add some texture to the color.  Little sweeps of color is all that is needed to age the sign a bit.  Finally while all the paint was still wet, I used a soft, dry paintbrush and went over the whole sign to blend the colors together.

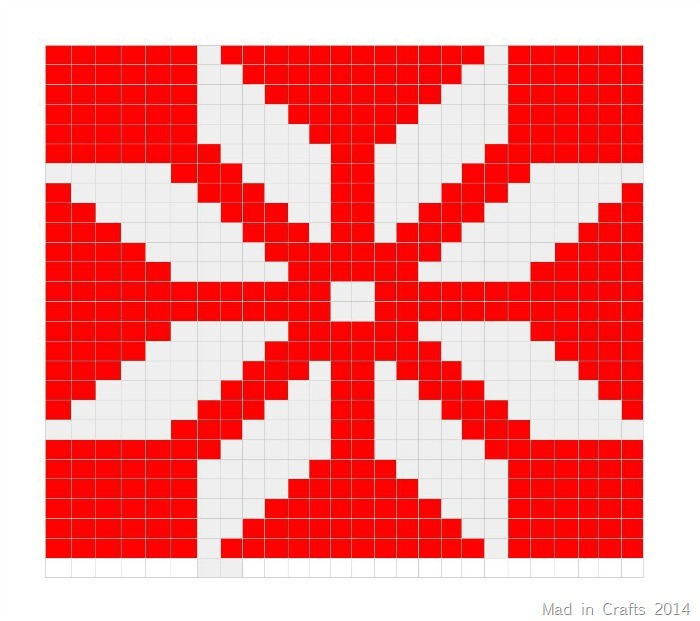
fair isle sign pattern

I used a Google Drive spreadsheet to map out my fair isle poinsettia design.  It took some finagling to create a pattern that would fit on the pallet, but I ended up with this pattern.

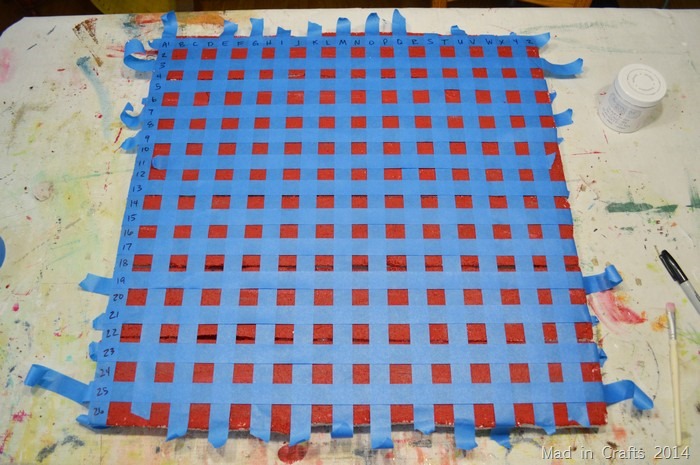
tape off grid

Next, I used painter’s tape to mark off a 26×26 grid on the front of the sign.  TIP:  You are just using this tape as a guide, so you don’t have to press the tape down onto the sign.  Just lay it over the top and secure the sides.  If you press it down, you may end up peeling paint up when you remove the tape.

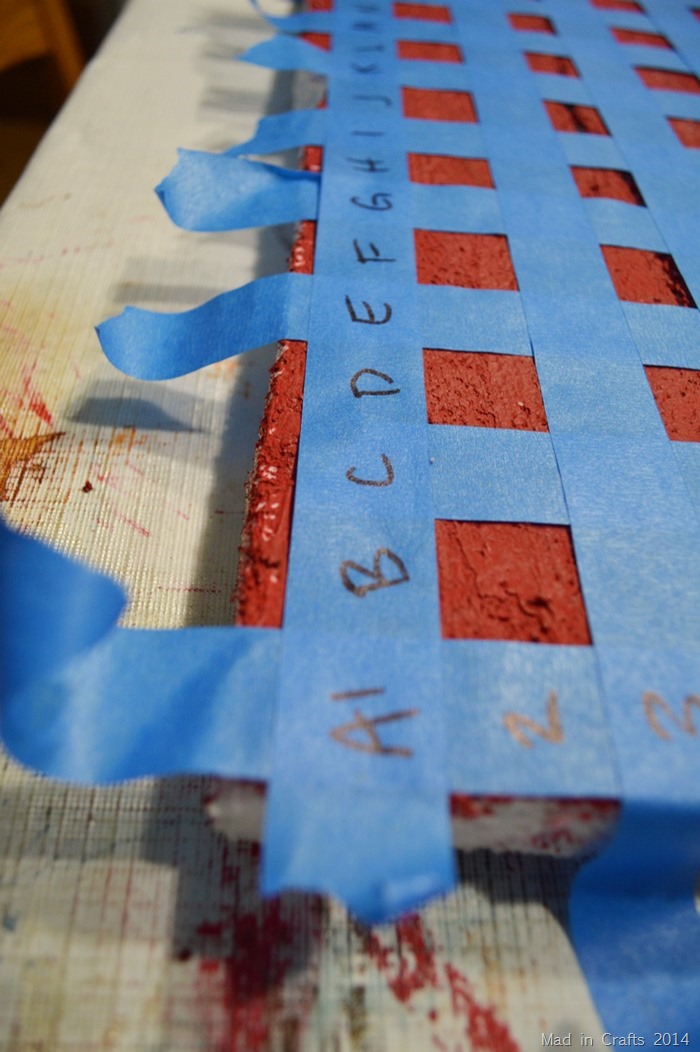
Label rows and columns

I labeled the columns and rows of my tape grid so I could refer back to my pattern easily.

painted sweater detail

I painted simple V shapes (to represent sweater stitches) in each grid square that corresponded with a white square on my pattern.  Then I removed the tape grid and finished the design with more painted Vs.  I made a few mistakes along the way, but I just covered them up with red paint and kept going!

faux pallet sign from styrofoam

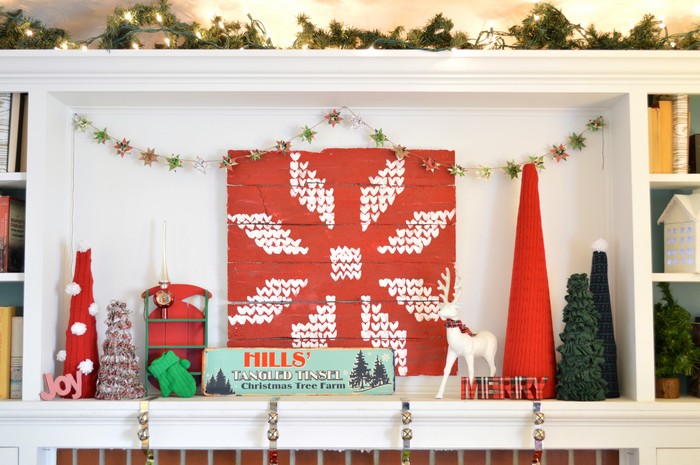
I am really excited about this finished project!  I plan to hang the sign up as the focal point above our mantel this year.  Since the sign is foam, it can be hung with a few 3M strips that can be taken down after Christmas.

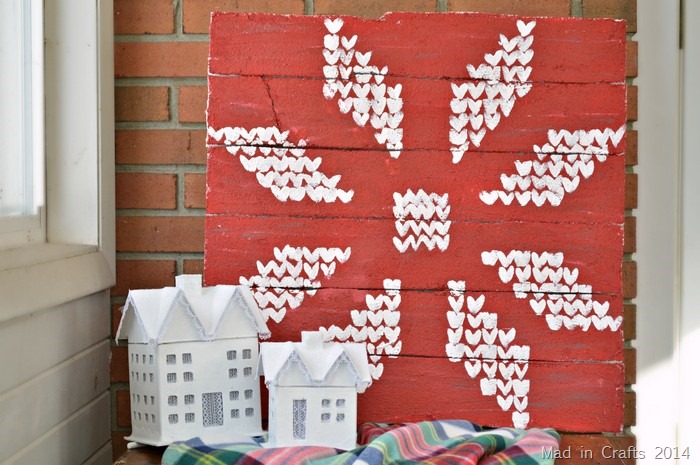
Fair Isle Faux Pallet Sign

This year I matched up my plaid decorations from last year with a few fair isle touches around the house.  

Fair Isle Poinsettia Pallet


I will be sharing my Christmas mantel with you tomorrow.  The fair isle sign is the focal point of the mantel, but there are several other DIY’d features as well.  Make sure you check back in to see it!

Fair Isle Mantel

I’ve gathered links to the materials I used in this tutorial.  NOTE:  You will also need Smooth Finish to be able to paint the foam, but that product is not currently available on Amazon.  Check your local craft store!  These are affiliate links, so if you purchase after clicking one of these links, I will receive a small commission. Thanks!

FAIR ISLE FAUX PALLET SIGN
Martha Stewart 32049 2-Ounce Acrylic Satin Paint, Tartan Red
FAIR ISLE FAUX PALLET SIGN
Martha Stewart 32073 2-Ounce Acrylic Satin Paint, Root Beer Float
FAIR ISLE FAUX PALLET SIGN
Martha Stewart 32076 2-Ounce Acrylic Satin Paint, Wedding Cake
FAIR ISLE FAUX PALLET SIGN
Deco Art Americana Chalky Finish Paint, 8-Ounce, Everlasting
FAIR ISLE FAUX PALLET SIGN
Plaid:Craft Martha Stewart Basic Brush Set 5/Pkg-
FAIR ISLE FAUX PALLET SIGN
ScotchBlue Painters’ Tape, Delicate Surface, .94-Inch by 45-Yard
FAIR ISLE FAUX PALLET SIGN
Styrofoam Sheet – 1 x 12 x 36 Inches
FAIR ISLE FAUX PALLET SIGN
FloraCraft 3-Piece Foam Tool Set
InLinkz.com

Filed Under: Christmas, Christmas Decorations, Holiday Videos, Video Tutorials Tagged With: affiliate, Christmas, Christmas decorations, fair isle, paint, pallet, pallet art, styrofoam, tutorial, video tutorial

Share on Facebook
Facebook
Pin on Pinterest
Pinterest
Tweet about this on Twitter
Twitter
Share on LinkedIn
Linkedin
              

Comments

  1. Sharon says

    December 12, 2014 at 1:30 pm

    This is amazing, Jessica! I love it!

    Reply

Trackbacks

  1. PLAID AND FAIR ISLE CHRISTMAS MANTEL - Mad in Crafts says:
    December 11, 2014 at 12:28 pm

    […] focal point of the mantel is the oversized fair isle sign that I shared with you yesterday.  The blown up version of a classic fair isle poinsettia ties […]

    Reply
  2. SWEATER SLEEVE CHRISTMAS TREES - Mad in Crafts says:
    December 12, 2014 at 12:27 pm

    […] been riding the fair isle train this Christmas.  I’ve made an oversized fair isle sign, sewed a quick throw pillow cover from a thrifted sweater, and made these cute cone Christmas trees […]

    Reply

Leave a Reply Cancel reply

Your email address will not be published. Required fields are marked *

Recipe Rating


About Jessica

Search the blog…

Gallery of Valentine's Day Crafts
DIY Home Organization
Delicious Dessert Recipes

Copyright

You're welcome to link to Mad in Crafts or use a single image with a brief description to link back to any post. Republishing posts in their entirety is prohibited. Feel free to pin on Pinterest!

Affiliate Disclosure

Jessica Hill is a participant in the Amazon Services LLC Associates Program, an affiliate advertising program designed to provide a means for sites to earn advertising fees by advertising and linking to Amazon.com

Copyright © 2021 · Metro Pro Theme on Genesis Framework · WordPress · Log in

We use cookies to ensure that we give you the best experience on our website. If you continue to use this site we will assume that you are happy with it.Ok