Mad in Crafts

  • Email
  • Facebook
  • Instagram
  • LinkedIn
  • Pinterest
  • Twitter
  • YouTube
  • Home
  • About
    • ABOUT JESSICA
    • CONTACT
    • MEDIA KIT
    • Seen On
  • PRIVACY
  • CRAFTS
    • HOLIDAY
      • VALENTINE’S DAY
      • ST. PATRICK’S DAY
      • EASTER
      • FOURTH OF JULY
      • FALL
      • HALLOWEEN
      • THANKSGIVING
      • CHRISTMAS
    • HOME DECOR
    • KIDS
    • MISC
    • Wearable
      • JEWELRY
      • PURSES, CLUTCHES AND TOTE BAGS
      • T-SHIRTS
    • FREE PRINTABLES
    • FREE SVGs
  • DIY
    • Gardening
    • Health
    • ORGANIZATION
    • Outdoor
    • Room Makeover
    • The Mad House
  • Recipes
    • Dessert
    • DINNER
    • DRINKS
    • Snacks and Appetizers
  • ENTERTAINING
    • Birthday Party
    • Party
    • Wedding
  • SHOP
Please note: This page may contain affiliate links. If you click a link and choose to make a purchase from the partnership site, I will earn a commission. Thank you for supporting Mad in Crafts!

Easy Trick for Hanging a Large, Photo Gallery Wall

January 3, 2013 by madincrafts 6 Comments

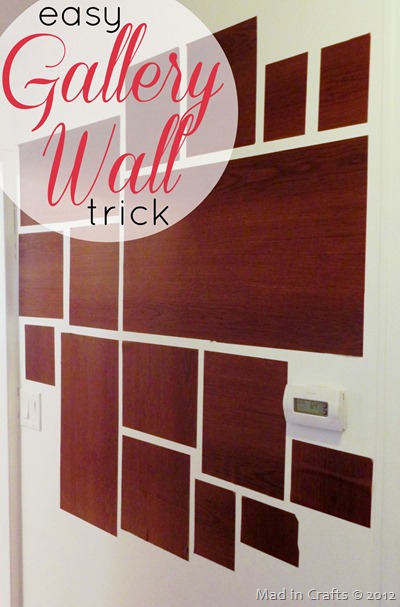
easy gallery wall trick

Usually  I am really quick to get pictures up on the walls in a new home.  I hate the look of blank walls; having wall art and photos up helps to make the new place seem more like a home.  Since this house is OURS though, and we plan on staying for a while, I have been more deliberate and slow to hang things.  I want to get it right the first time so I don’t have to live forever with off-center artwork.

I finally got around to putting up our family photo gallery wall in our front hallway, and I discovered an easy trick that helps to lay out a large area of pictures gallery-style.

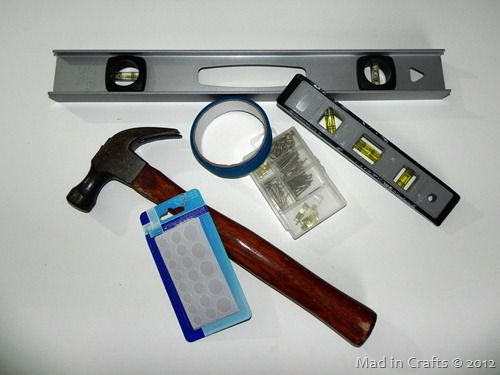
photo hanging tools

To make a Large Gallery Wall, you will need:

dollar store contact paper

levels

hammer

nails

dollar store adhesive dots

painter’s tape

marker

framed photos, artwork, etc.

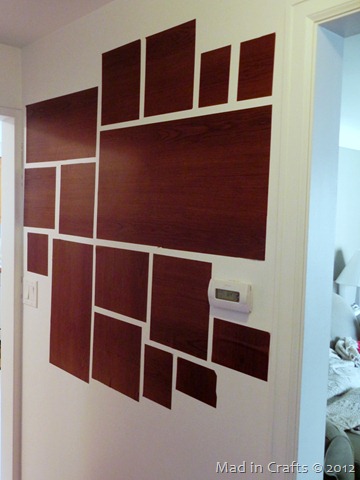
contact paper templates

First you will need to trace all the elements of your wall onto dollar store contact paper.  Cut them all out and label them with: 1) what photo they are of, 2) which direction is up, and 3) the location of the nail hanger.  I used up two rolls of contact paper to trace the elements for this wall.

Now you can peel the backing off of the contact paper, and test out as many different arrangements as you would like.  The contact paper peels right off the wall without damaging it, and easily moves to a new spot, so you can be as indecisive as you like.

I wanted the gallery to have a strong eyeline like the photo gallery in our old house, but with many more photos, I needed to fit all the puzzle pieces together as best I could.  I finally decided on a layout that I liked after about an hour of putzing.

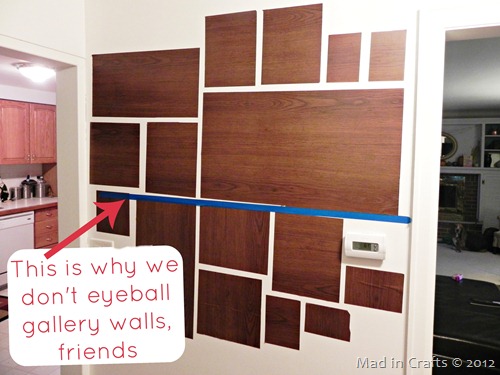
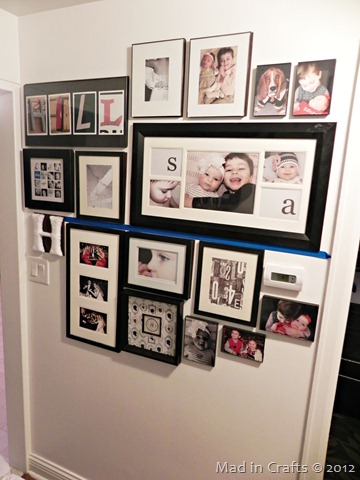
level the layout

After I had the layout complete, I got out my level to mark the center eyeline.  Usually when I hang pictures, I just eyeball where they will hang.  DO NOT DO THIS FOR GALLERY WALLS!  There are too many pictures involved and each new frame can get you farther away from level.  See how far off my eyeballed contact paper is from the level painter’s tape?  That would have bugged the crap out of me for years if I hadn’t taken the time to fix it all.

hang photos

Adjust the contact paper according to your new level eyeline and pound the nails into the spots you already have marked.  Easy peasy.  Hang up all your photo gallery elements, and check everything for level.  Then you can go back and peel off the contact paper and painter’s tape.

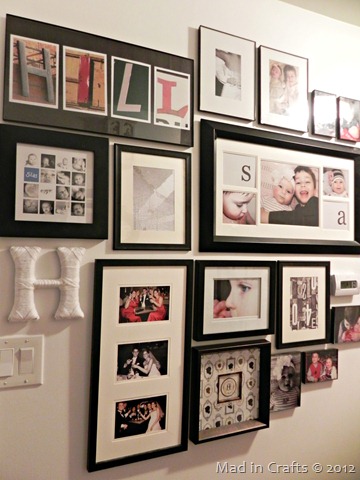
finished gallery wall

Before you rehang the photos, place small rubber dots on the bottom of each frame.  You can buy packages of these rubber dots at the dollar store, and they will help to keep your frames from shifting into a dozen crooked angles.  There is nothing so aggravating to my eye than a wall of pictures that are all crooked.  Makes me crazy.

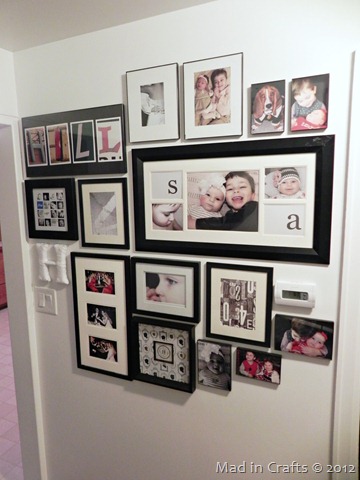
hallway gallery wall

You’re done!  Step back and admire your work.  Because you used the contact paper trick, you can be sure that your final layout is what you really wanted, not just the one you settled for.


Did you like this post?  Think it’s worth sharing?  Please share with your friends using the social media share buttons on the toolbar at the bottom of the page!

Thanks,  Jessica Hill

Filed Under: DIY Tagged With: affiliate, decorating tips, dollar store, gallery wall, home decor, household tips, photo gallery, tutorial, wall art

Share on Facebook
Facebook
Pin on Pinterest
Pinterest
Tweet about this on Twitter
Twitter
Share on LinkedIn
Linkedin
              

Trackbacks

  1. That Time I Was Crafty & New Beginnings | Caramelized Kitchen says:
    November 16, 2014 at 11:32 pm

    […] got to love pinterest when you’re feeling crafty. Pinterest taught me this cool way to arrange and hang the pictures so that everything is straight in the end. I’d […]

    Reply
  2. 23 Home Decor Ideas that Won’t Break the Bank says:
    January 21, 2015 at 12:10 pm

    […] Checkout: Tutorial […]

    Reply
  3. 55 Cool And Practical Home Decor Hacks You Should Try – Mirdova says:
    June 17, 2019 at 2:43 pm

    […] Use removable contact paper to picture how your photo frames would look like on a wall. This way you can pre-arrange them and come up with the best layout for the whole collection. Do this before drilling holes in the wall.{found on madincrafts}. […]

    Reply
  4. 55 Cool And Practical Home Décor Hacks You Should Try - Khmeng.Com says:
    February 14, 2020 at 6:09 am

    […] Use removable contact paper to picture how your photo frames would look like on a wall. This way you can pre-arrange them and come up with the best layout for the whole collection. Do this before drilling holes in the wall.{found on madincrafts}. […]

    Reply
  5. 55 Cool And Practical Home Décor Hacks You Should Try – PinkDIY.com says:
    June 29, 2020 at 6:47 pm

    […] Use removable contact paper to picture how your photo frames would look like on a wall. This way you can pre-arrange them and come up with the best layout for the whole collection. Do this before drilling holes in the wall.{found on madincrafts}. […]

    Reply
  6. 40 Decorating Hacks To Spark Joy In Your Home – SOLOWOLO says:
    January 10, 2021 at 5:07 pm

    […]  Source: Mad in Crafts […]

    Reply

Leave a Reply Cancel reply

Your email address will not be published. Required fields are marked *

Recipe Rating


About Jessica

Search the blog…

Gallery of Valentine's Day Crafts
DIY Home Organization
Delicious Dessert Recipes

Copyright

You're welcome to link to Mad in Crafts or use a single image with a brief description to link back to any post. Republishing posts in their entirety is prohibited. Feel free to pin on Pinterest!

Affiliate Disclosure

Jessica Hill is a participant in the Amazon Services LLC Associates Program, an affiliate advertising program designed to provide a means for sites to earn advertising fees by advertising and linking to Amazon.com

Copyright © 2021 · Metro Pro Theme on Genesis Framework · WordPress · Log in

We use cookies to ensure that we give you the best experience on our website. If you continue to use this site we will assume that you are happy with it.Ok