Mad in Crafts

  • Email
  • Facebook
  • Instagram
  • LinkedIn
  • Pinterest
  • Twitter
  • YouTube
  • Home
  • About
    • ABOUT JESSICA
    • CONTACT
    • MEDIA KIT
    • Seen On
  • PRIVACY
  • CRAFTS
    • HOLIDAY
      • VALENTINE’S DAY
      • ST. PATRICK’S DAY
      • EASTER
      • FOURTH OF JULY
      • FALL
      • HALLOWEEN
      • THANKSGIVING
      • CHRISTMAS
    • HOME DECOR
    • KIDS
    • MISC
    • Wearable
      • JEWELRY
      • PURSES, CLUTCHES AND TOTE BAGS
      • T-SHIRTS
    • FREE PRINTABLES
    • FREE SVGs
  • DIY
    • Gardening
    • Health
    • ORGANIZATION
    • Outdoor
    • Room Makeover
    • The Mad House
  • Recipes
    • Dessert
    • DINNER
    • DRINKS
    • Snacks and Appetizers
  • ENTERTAINING
    • Birthday Party
    • Party
    • Wedding
  • SHOP
Please note: This page may contain affiliate links. If you click a link and choose to make a purchase from the partnership site, I will earn a commission. Thank you for supporting Mad in Crafts!

Designer-Inspired Nailhead Table for $6

February 14, 2013 by madincrafts 10 Comments

Six Dollar Nailhead Table Makeover

 
Since it is Valentine’s Day, I thought I would share the tutorial for one of my favorite projects I have ever finished.  I originally shared this project on Décor Hacks, but this is the first time I have published the tutorial on Mad in Crafts.
 
I had inherited a bedside table that was in desperate need of a facelift, but I didn’t have the budget for a major makeover.  For just $6 and some designer inspiration, I was able to turn that bedside table into a chic Nail Head Table for our entryway!
 
To make a $6 Nail Head Table, you will need:
hand-me-down table
sanding block
paintbrushes
primer
grey paint sample
2 packages of gold thumbtacks from the dollar store
ruler
pencil
drill
1/8 inch drill bit
hammer
scrap cardboard
gold drawer pulls
 
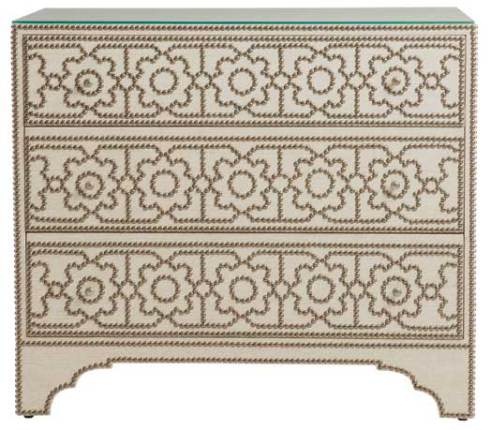
cabrillo-nailhead-chest-bernhardt

I first spied this Cabrillo Chest from Bernhardt in an issue of Architectural Digest and loved it immediately.  The feminine global pattern and the masculine nail head trim were such a striking combination.  I used this pricey piece as makeover inspiration.

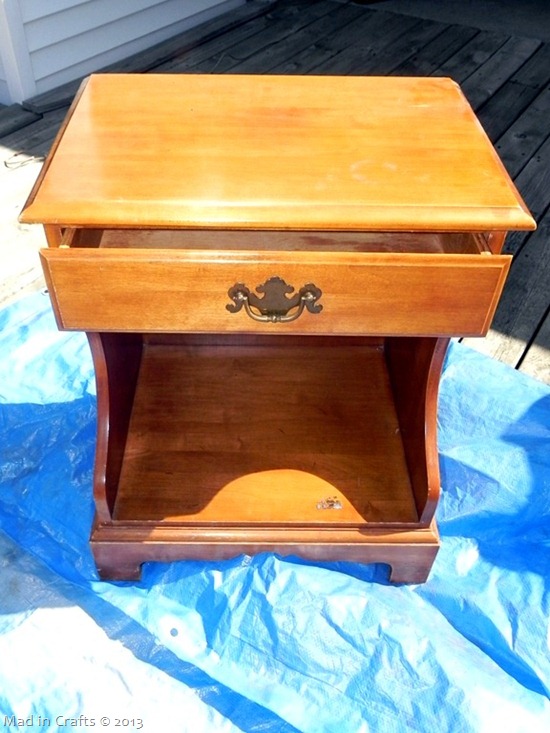
Side table before

 
I started with this hand-me-down bedside table from my grandfather.  While it was sturdily built of solid wood, it had no real style or design.  In other words, it was perfect for a DIY makeover!

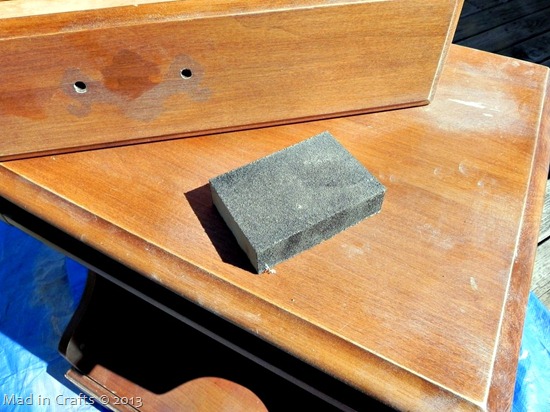
sand the whole piece

I gave the whole piece a sanding with a foam sanding block to rough up the varnish.  Then I wiped it all down with a cloth to remove the dust and dirt.

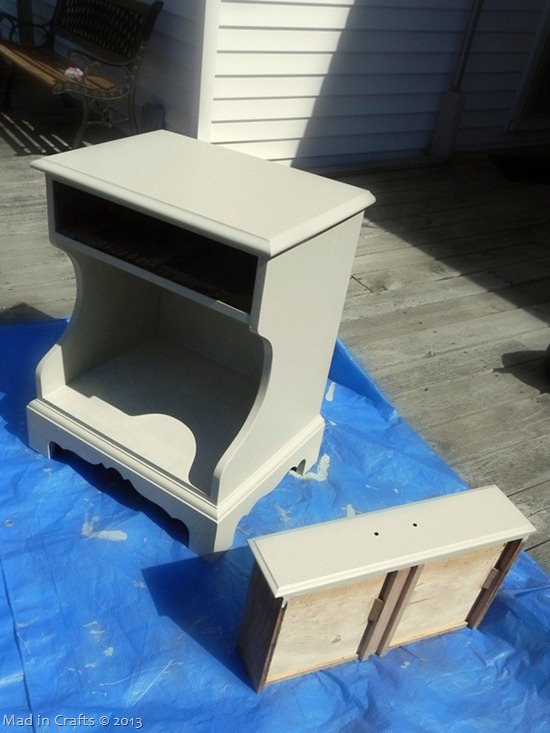
after two coats of paint

 
I had some primer left over from painting my son’s bed, so I gave the table and drawer a good coat.  After the primer dried I added two coats of a warm grey paint that I had received as a free sample.

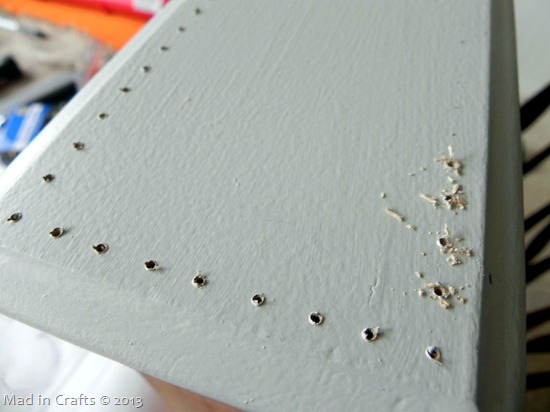
drill individual guide holes

 
I originally tried to hammer the thumbtacks directly into the wood, but the spikes of the tacks kept bending and breaking.  Eventually I resigned myself to having to drill shallow guide holes for each tack.  I busted out my ruler and marked dots every 1 cm down the perimeter of the drawer.  I used my smallest drill bit and drilled a shallow hole at each mark.  Once I got a rhythm down, it didn’t take long at all.

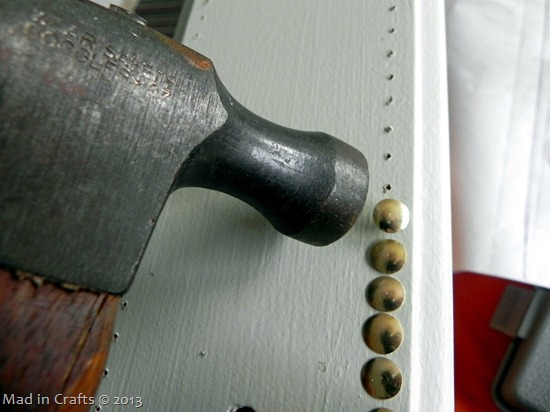
hammer in the thumbtacks

 
After the guide holes had been drilled, it was simple to hammer the thumbtacks into place.  It is important that I not drill the holes too deep because the tacks still needed to be able to be hammered into actual wood.

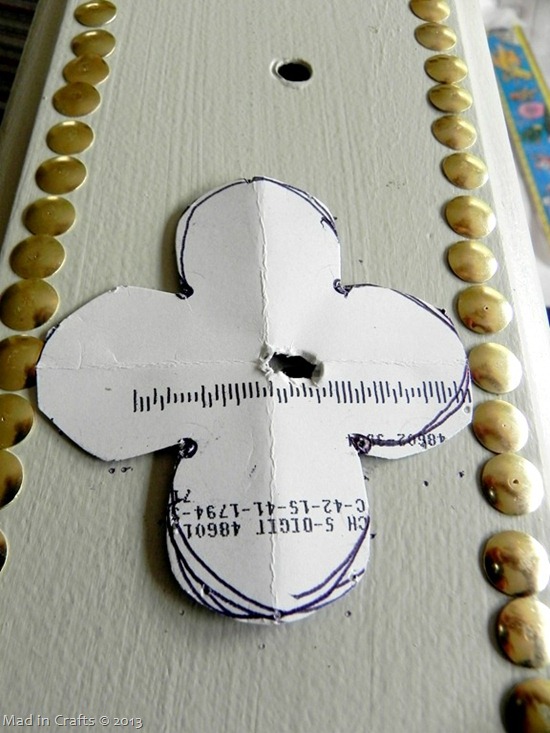
create a pattern guide

 
I used some junk mail to create a template for the flower pattern in the middle of the drawer, starting around the holes for the drawer pulls.  I marked dots every 1 cm again.

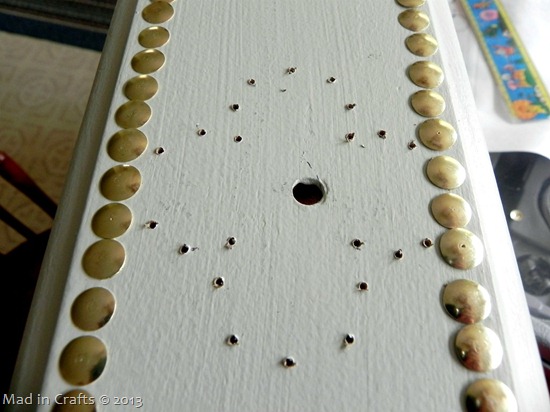
drill more guide holes

More drilling.

halfway through

 
The design was starting to take shape!  You can see there were a few guide holes that I made too deep, causing the tacks to just fall out.  I fixed that mistake by putting a little craft glue on the spike of the tack and reinserting it into the hole.  Worked like a charm.

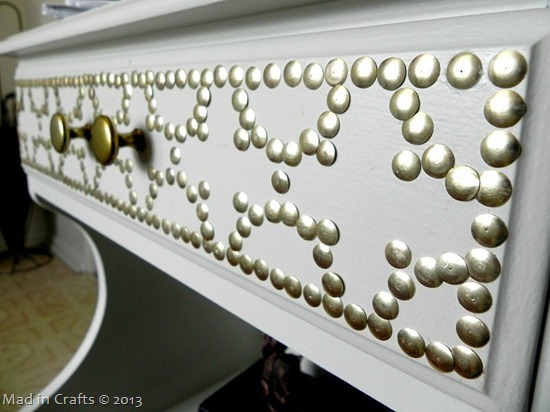
drawer detail
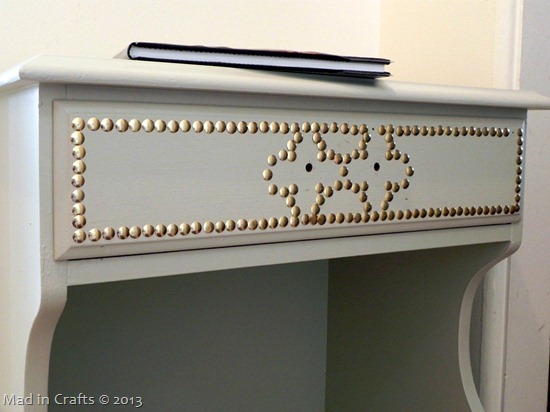
 More drilling and hammering and the drawer pattern was done.

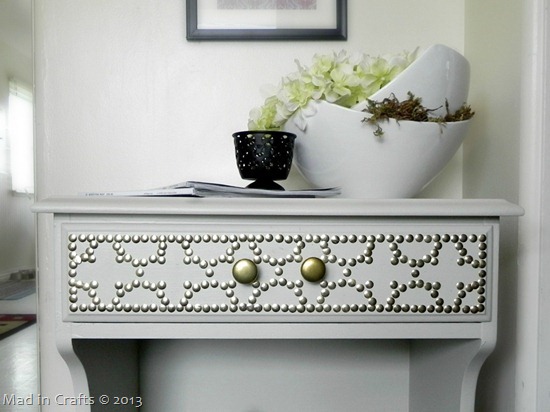
finished drawer

 
I replaced the dated hinge pull with two inexpensive gold-tone drawer pulls I purchased for $2 each at a home improvement store.

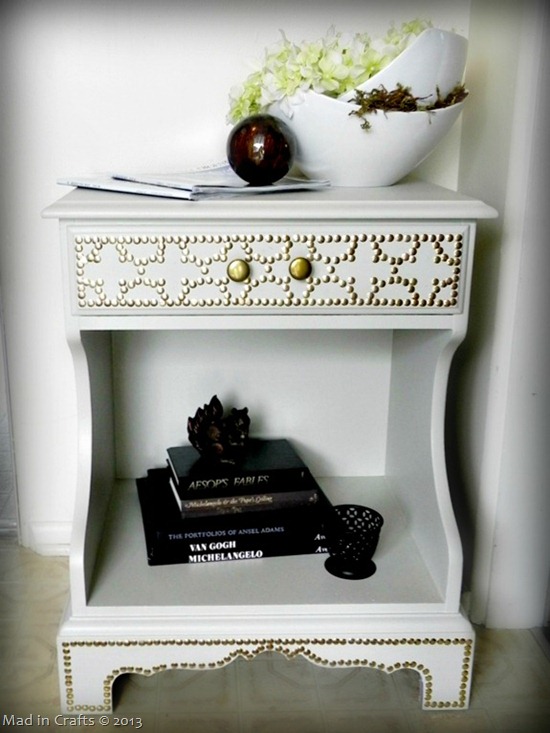
Six Dollar Nailhead Table Redo

 
I outlined the detail on the bottom of the table the same way I outlined the drawer.  I think the overall effect is very similar to my designer inspiration piece.  Most people can’t believe that I was able to give the table such a dramatic makeover for only six dollars, but that’s really all it took!
 
The TODAY Show chose this Nailhead Table as one of their Top 10 DIY Style Projects and featured it on air!  You can see the video on my As Seen On page linked in my menu bar.  You can imagine how excited I was when I got THAT email!
 
Do you have any old pieces of furniture in your house that could use a facelift?

banner[7]

 
My NEW ebook is now for sale on E-Junkie.  Find out more about it HERE!

Did you like this post?  Think it’s worth sharing?  Please share with your friends using the social media share buttons on the toolbar at the bottom of the page!
Thanks,  Jessica Hill

Filed Under: Before & After, DIY, Furniture Makeovers Tagged With: affiliate, designer, DIY, dollar store, furniture makeover, nailhead, paint, side table, thumbtacks, tutorial

Share on Facebook
Facebook
Pin on Pinterest
Pinterest
Tweet about this on Twitter
Twitter
Share on LinkedIn
Linkedin
              

Comments

  1. カシオ ベビーG オータムカラー ボルドー says

    July 14, 2014 at 1:53 pm

    The Ten MostOdd bag Hacks… And How To Employ them !

    Reply
  2. Kathy says

    January 27, 2016 at 10:39 pm

    Beautiful !

    Reply
  3. Christine says

    May 13, 2017 at 1:40 am

    So brilliant!

    Reply
    • madincrafts says

      May 14, 2017 at 9:52 pm

      Thank you!

      Reply

Trackbacks

  1. 10 Ways to Decorate with Thumbtacks! - A Prudent Life says:
    October 1, 2014 at 1:19 pm

    […] Designer Thumbtack Table by Mad in Crafts […]

    Reply
  2. 20 Fun Crafts Under $10 that Won't Break the Bank - Little Red WindowLittle Red Window says:
    March 19, 2015 at 11:16 am

    […] DIY Nailhead Table Makeover from Mad in Crafts […]

    Reply
  3. MODERN IKEA RAST HACK - Mad in Crafts says:
    August 16, 2015 at 9:44 pm

    […] of my favorite projects I have ever shared on Mad in Crafts is my Designer-Inspired Nail Head Table.  I have seen dressers in similar styles in many designer home catalogs, so I figured I would […]

    Reply
  4. 5 Ways to Update Furniture Without Paint says:
    August 15, 2016 at 8:41 pm

    […] look at how stunning this table makeover is!  Mad in Crafts nailed it.  (Sorry, I couldn’t […]

    Reply
  5. Decorate Homes with Thumbtacks DIY Projects | Do It Yourself Projects and Crafts says:
    February 2, 2017 at 9:05 am

    […] Image via madincrafts […]

    Reply
  6. 20 Fun Crafts Under $10 that Won't Break the Bank - Little Red Window says:
    April 29, 2020 at 4:31 pm

    […] DIY Nailhead Table Makeover from Mad in Crafts […]

    Reply

Leave a Reply Cancel reply

Your email address will not be published. Required fields are marked *

Recipe Rating


About Jessica

Search the blog…

Gallery of Valentine's Day Crafts
DIY Home Organization
Delicious Dessert Recipes

Copyright

You're welcome to link to Mad in Crafts or use a single image with a brief description to link back to any post. Republishing posts in their entirety is prohibited. Feel free to pin on Pinterest!

Affiliate Disclosure

Jessica Hill is a participant in the Amazon Services LLC Associates Program, an affiliate advertising program designed to provide a means for sites to earn advertising fees by advertising and linking to Amazon.com

Copyright © 2021 · Metro Pro Theme on Genesis Framework · WordPress · Log in

We use cookies to ensure that we give you the best experience on our website. If you continue to use this site we will assume that you are happy with it.Ok