
I’d like a grown-up’s bedroom. I really would. A bedroom with matching furniture, drapes, maybe even a little reading nook. But, you see, like for most people, money is an issue. Right now we have a perfectly nice bedroom with hand-me-down mismatched dressers, old bedside tables, and UGLY light-blocking curtains. But everything is functional and, for a room where you spend most of your time with eyes closed, that’s better than a sharp stick in the eye.
Still, I’d like a grown-up bedroom. So I’m taking baby steps (there’s irony there somewhere). And step one was to get a headboard. But…. headboards also cost money. Shoot. So I had a dilemma. How could I get a nice-looking headboard for our room but spend almost no money?
And that’s when this happened. Necessity is one heck of a mother.
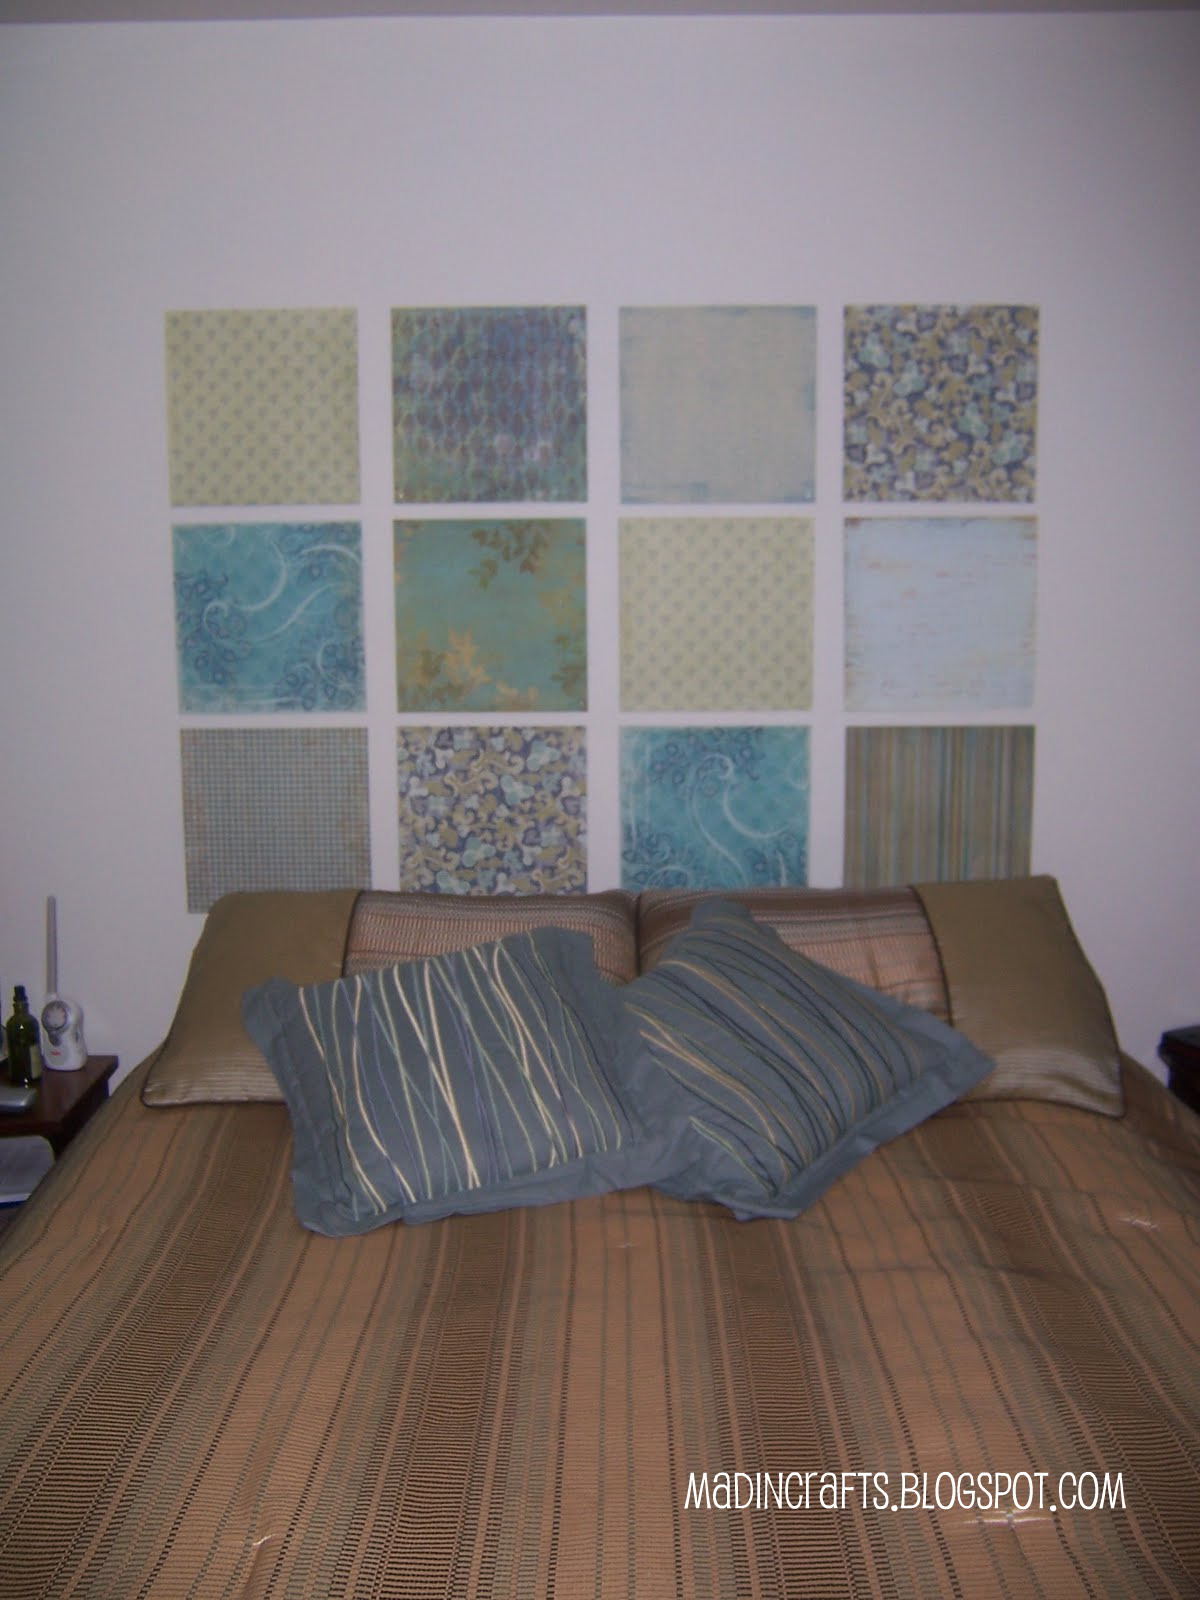
To make this headboard, you will need:
12 sheets of scrapbook paper
12 lineoleum floor tiles with adhesive backing
nails
hammer
level
I had bookmarked this idea off of Dollar Store Crafts which originally put the idea into my head to make a headboard for our bed using scrapbook paper. I am a big lover of squares and straight lines, so I loved the look of that paper installation!
At that same time, I was finding tons of people were making wall decor for their walls using foam board. Sounded like a great idea to me, so I headed out to the craft store.
I found 12 sheets of scrapbook paper that I loved (and were on sale – bonus!) but the styrofoam board was pricey! Then there was the question of how to attach the paper to the foam board. Spray adhesive? Mod Podge? What?
Frustrated, I headed to Home Depot figuring I could talk some burly dude in the lumber department into cutting some MDF into 12×12 squares for me. As I was trying to figure out how exactly to ask for what I wanted without going into this whole long story (yes, I am one of those people who rehearses whole conversations in her head), I wandered down the flooring aisle.
And there they were. Self-adhesive linoleum floor tiles. And they were already 12 inches square! And they cost a whopping 28 cents a piece. Nice.
I couldn’t even wait to get home to get started on the project! I stopped off at my parents’ house on the way home and began peeling the backing off the floor tiles and smoothing the scrapbook paper on. Like magic.
As soon as I got home, I headed up to our room (which at the time was well over 90 degrees and un-air-conditioned) with hammer, nails and level in hand. Less than 30 minutes later, I had my headboard. For less than $10.

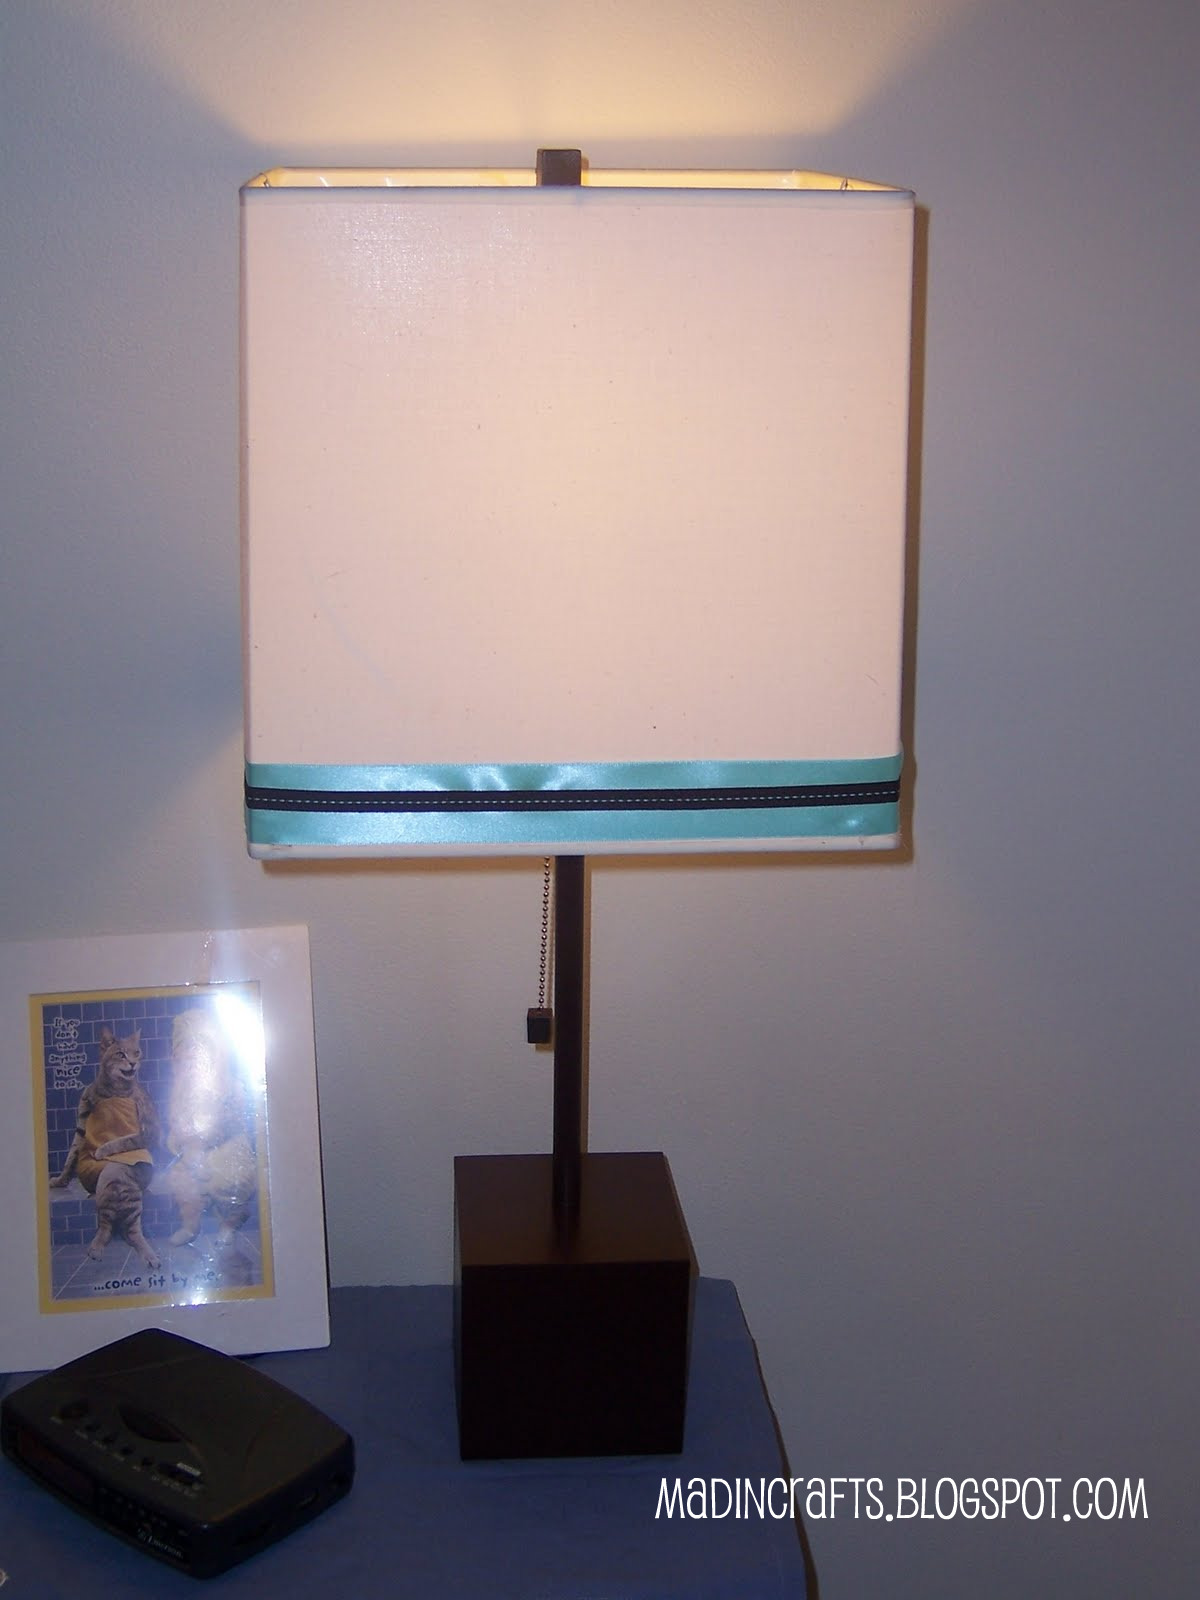
A month or two later, I stumbled upon this lamp at Goodwill. It was originally a weird fake metal color, so I hit it with some Espresso spray paint. Then I hot glued on the two ribbons. I love how even the little pull for the switch has a cube on it. Yippee for squares!
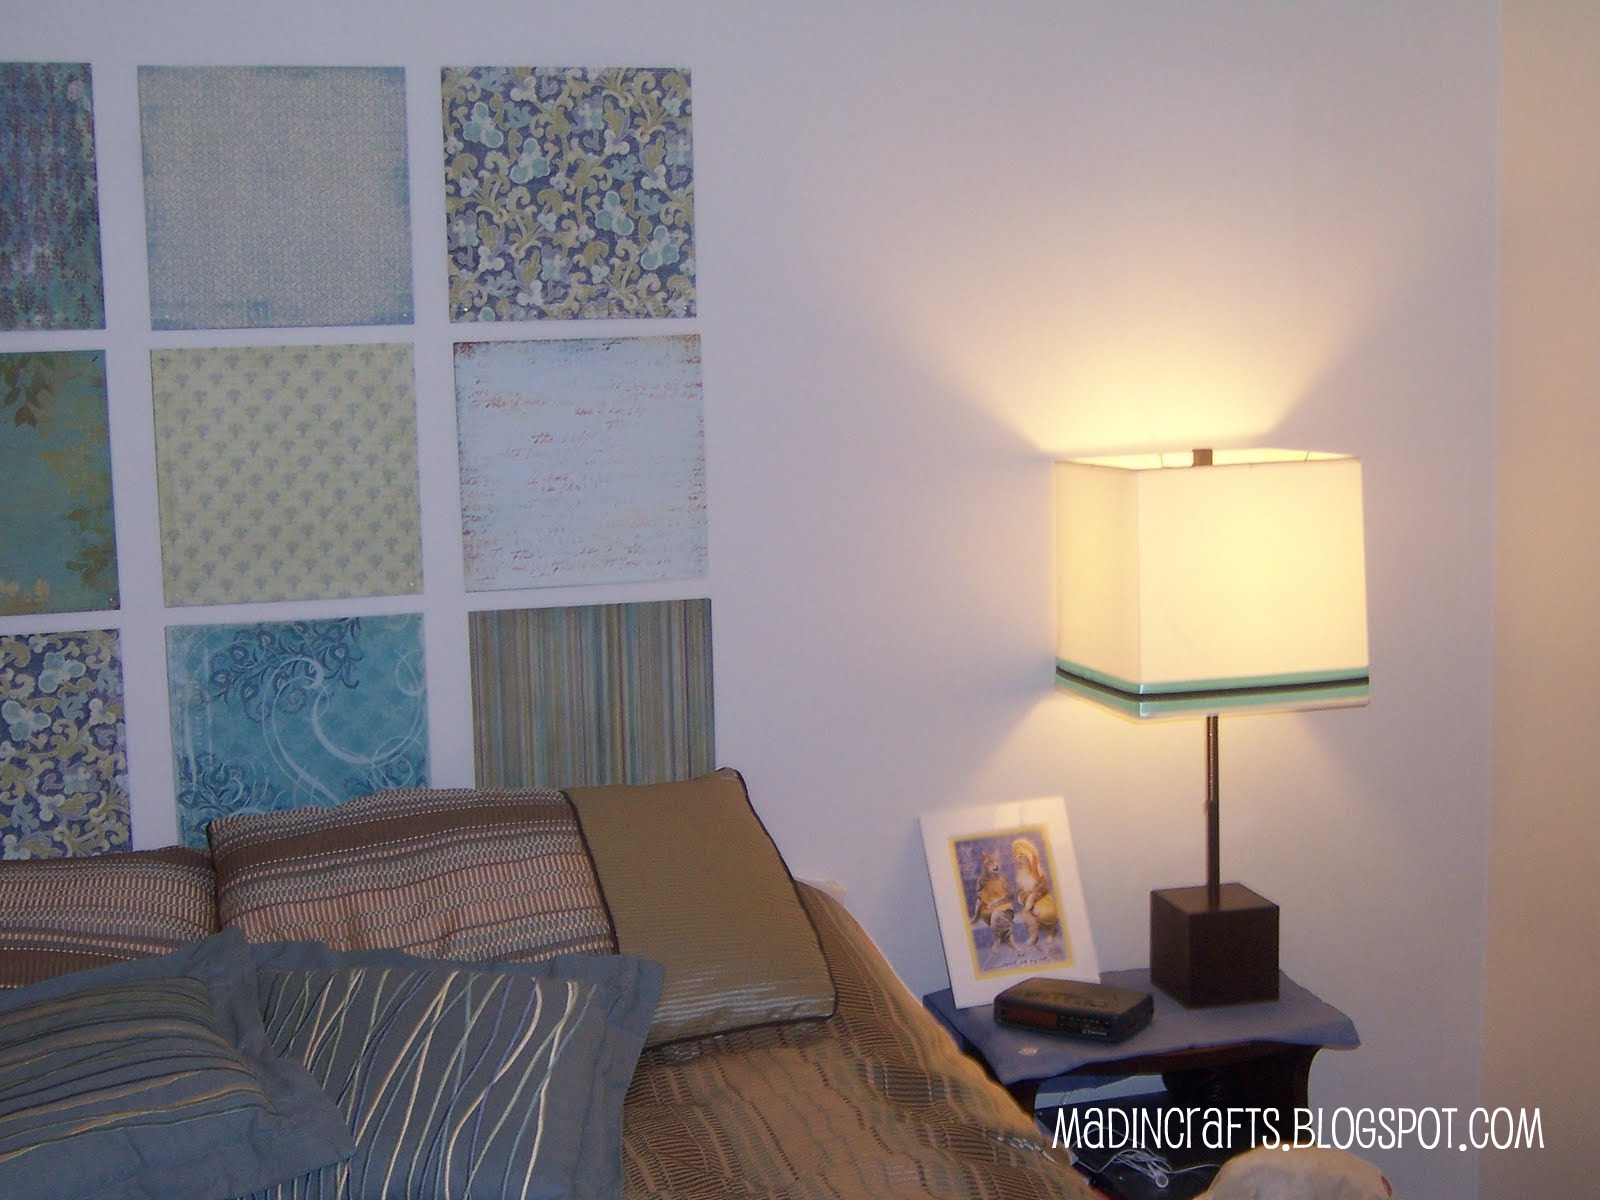
Here it is in the context of the room. Don’t ask about the kitty picture leaning up beside it. My husband has a weird sense of humor.
And there you have it. A bedroom fit for a(n almost) grown-up. Which suits me pretty well anyway.


Yeah, the linoleum tile was a stroke of genius!
Great choice of scrapbook paper. Looks really cute!
Oh. My. Gosh. This is officially my new favorite blog! I think the little person in my head is related to Cheapy CHeaperton. I am going to do this project in my hous somewhere this week! Thanks!!
I plan to do this soon. I had planned to go with MDF, but now I think I'll check out those floor tiles – great idea!
Hi! Oh no, I can't read a word on your blog… it seems to be light grey on top of bright red, and none of the wording shows up. Cool pics, though!!Sheila
Ok, for some reason after I left a comment, the white page showed up. Maybe your blog just takes a long time to load. Anyway… love it.Sheila
OMG!!!! I totally love this idea and am going to do this as well! I'm in the same "headboard dilemma" as you mentioned and I think these squares are just the thing I need. Thanks for the great inspiration!