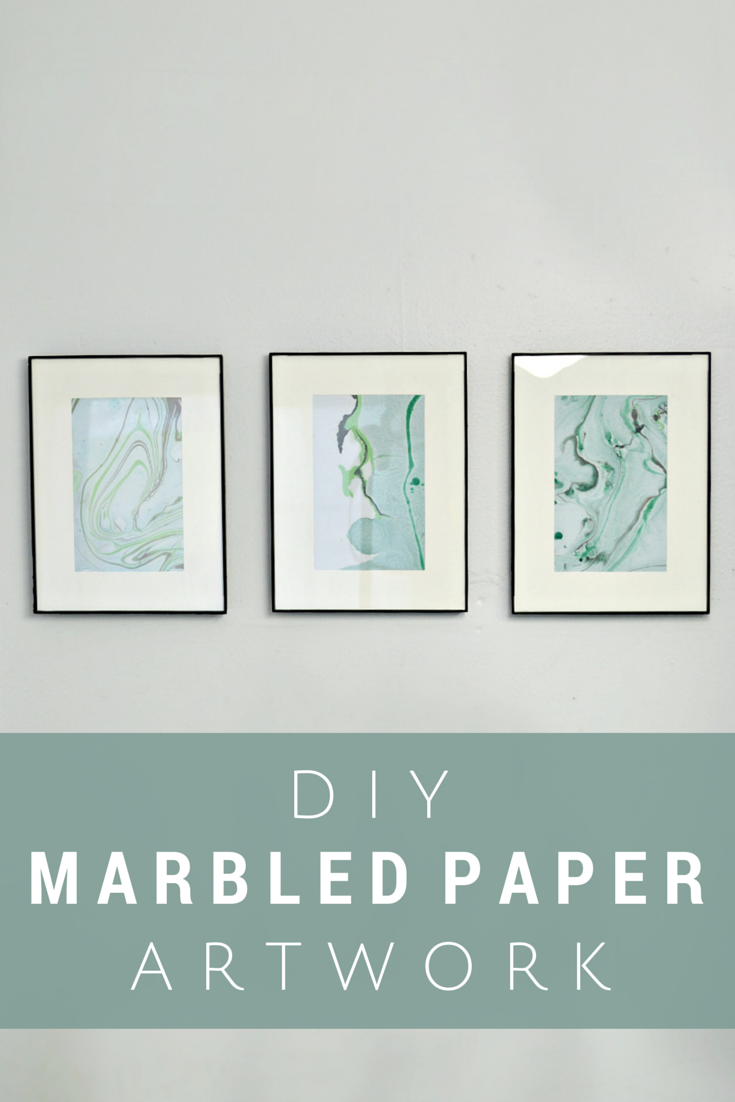
When I was coming up with cheap homemade art for the wall for our bathroom makeover, I had a few false starts. First I tried painting watercolor peacock feathers, but they look like my 6 year old made them. Then I tried paintings of geodes using acrylic paint, but they looked cheap and fake. Finally I took a cue from my marbled drawer pulls and decided to frame some homemade marbled paper art.
Unfortunately, most of the instructions I found online called for expensive dyes or paints, something called alum (??), and other specialized tools. Suddenly my cheap art project was looking a lot more expensive. I marbled a few sets of beads with nail polish earlier this year, so I thought, “What is the worst that could happen if I tried marbling paper with nail polish too?” Turns out that what did happen was I got some elegant framed artwork for the bathroom for about $10.
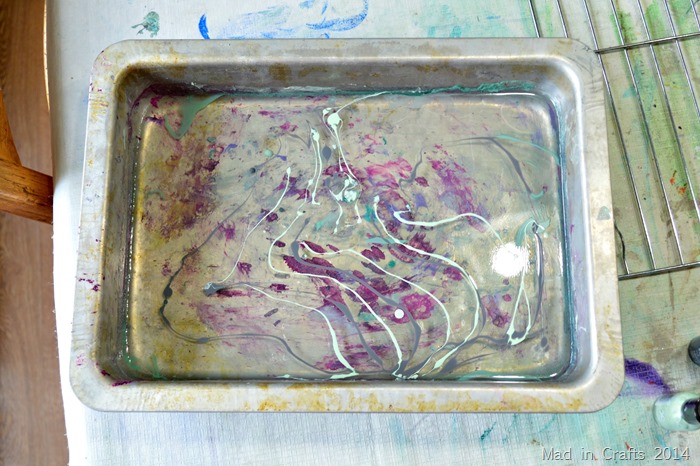
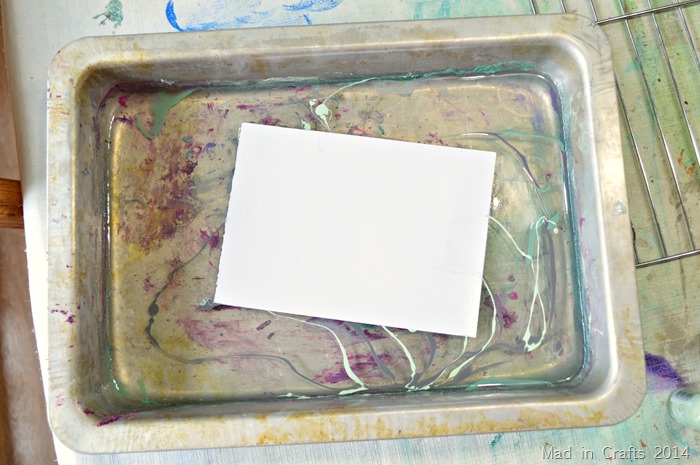
Start by filling your pan or bucket with roughly an inch of water. Make sure you have the watercolor paper ready to go. Once the nail polish is in the water you have a short window of time before the polish sets. Slowly drizzle ribbons of nail polish onto the surface of the water. Depending on how old the nail polish and what kind you are using, the polish may float, spread, or sink. They will all contribute different looks to your finished paper, so experiment!
Once the nail polish is on the water, you can choose to tilt the pan back and forth to swirl the colors or leave them as they lie. Carefully place the paper onto the surface of the water.
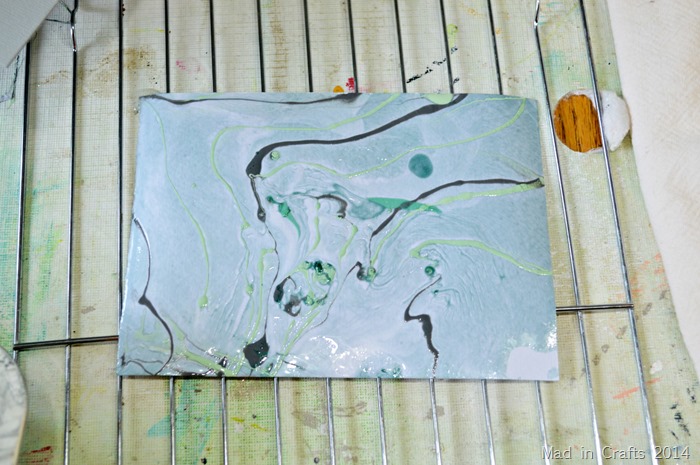
Grab the paper by one corner and peel the paper back off of the surface of the water. Lay the paper on a rack or clip it to a clothesline to dry.
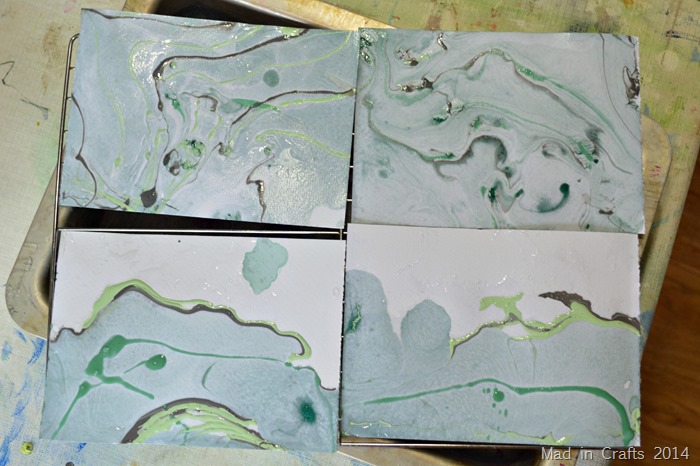
I was only able to get two uses out of a pan of water before I needed to pour it out and add fresh water and paint. These papers were marbled using the same four colors of nail polish in different swirl configurations. Let the papers dry completely before framing.
I am about to share the ONE BIG SECRET to making any framed art look fancy…
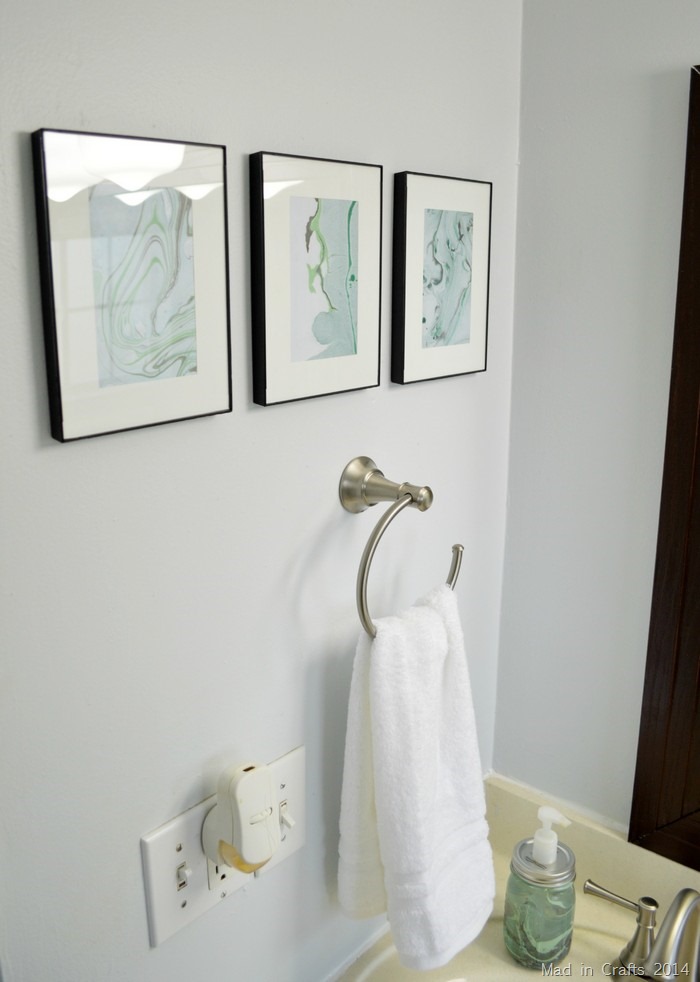
…mat it up! Anything looks fancier inside of a mat. I bet you could cut a piece out of a garbage bag, put it in a mat, and frame it and it would look fancy. These are super cheap $2 frames from Walmart that come with cheap paper mats, but lined up in a group like this they look like honest to goodness art.
To break it down, $1 for watercolor paper, $3 for nail polish, and $6 for matted frames turn into this classy marbled paper artwork for my bathroom walls!
Check out these other DIYs from our bathroom makeover:




Very cool. Alum is sold with the spices. My mom used it in making pickles, and I’ve use it to do paper marbling with inks, it’s not expensive. But as you proved it’s not necessary if you use nail polish.
Are you using glossy paper? That’s what I marbled.
Luv this look. What is watercolor paper and where would I purchase it? Or are we just talking colored paper to start with here. This is a new concept for me…..but I really really want to try it!
Watercolor is paper specifically designed for watercolor painting. You can find it at art supply stores or crafts stores.
I love this, and I’m looking forward to trying it! I have 2 questions, though:
1. Is it correct to assume you would have to use a pan or pail that is strictly relegated to craft projects, and not something that is used for actual food prep? Not being one who has done a lot of craft projects that require mixing and such, I don’t currently have a spare pan I can dedicate to this, so if that is the case, I’ll have to purchase one. If it IS everyday kitchenware used for food prep, how do you clean the nail polish residue off of the pan? I’m guessing you wouldn’t want to use nail polish remover on something that is also used for food. Can you tell I don’t do a lot of crafting LOL.
2. How did you dispose of the liquid after you were finished? Since it is nail polish, I’m concerned about staining and/or clogging the sink or drain, and I’m not sure about just dumping it on the ground somewhere. Not that it’s as toxic or hazardous as paint, but it is a paint medium, after all. So I’m just curious. More evidence that I’m not a crafter LOL.
Thanks in advance for your response! And again, great job all around!
~Karen 🙂
Thanks for your questions, Karen. Yes, it's a pan that I only use for crafting. You can buy disposable roasting pans at the grocery store or dollar store that will work very well and you can just toss them when you are done. If you take a piece of paper towel and skim the surface of the water with it, you can pick up most of the unused nail polish and then through it away in the trash. The water can just be dumped out after. Hope that helps!
Be sure to recycle if you use the disposable pan 🙂
THANK YOU SO MUCH FOR SUCH AN EXCITING AND INEXPENSIVE WAY TO DRESS UP A WALL! I CAN’T WAIT TO TRY IT!
I’m going to try it for three reasons:
1–It looks cool and fun.
2–I just moved in a new home and need some new wall art that is cool, fun, and cheap but looks cool, artistic, and expensive.
3–Maybe this will turn out better than my ‘fails’ at doing the marble nails – ha!
Thanks for sharing this and the great tip about matting. Smart lady and cool and fun but not cheap!
These are gorgeous. You did a fantastic job and the colors are perfect. Can’t wait to try this. Thanks so much for sharing a great project at a great price!
How did you get the back ground color(s)? I noticed that two of them seem to have a blue-ish tinted background, while the other two have a half white/half blue background. Thanks!
The variation in color is all from the nail polish. Some of the polishes spread out on top of the water more than others, so it put a thin layer of color on the paper.
Thanks for posting this! These pictures are wonderful and look so professional! And expensive too. Would make nice gifts. I will try this out this weekend.
This an awesome idea….I am going to do a few for Christmas gifts…thank you for sharing and I look forward to doing more of your craft ideas!!
Are these frames still available at Walmart? My search has come up empty. Did you find them in the store or online? I’d love to make these as gifts for the holidays!
I found them in store. I believe they are the Mainstay (Walmart) brand. Hope that helps!
Very helpful! Thank you for the quick response 🙂 Looking forward to doing this with my daughter.
I think these are the frames: http://www.walmart.com/ip/Mainstays-6×8-4×6-Forma… When I bought them in store you could purchase them individually for $2.
I just did some nail polish paper marbling.
Just remember to have good ventilation because nail polish is super stinky. =)
Definitely! Thanks for the reminder.
Absolutely beautiful artwork! How many different colors did you use? What were the colors? Which color do you think tinted the background? Was it a different formula than the others?
Unfortunately, I don\’t remember the names or brands that I used. I know at least two of the colors (the grey and matte teal) were from Dollar Tree.
WHAT A GREAT WAY TO USE UP OLD NAIL VARNISH….I REMEMBER DOING MARBLING WITH MY TWO ELDEST CHILDREN ,30 YEARS AGO AND IT WAS A VERY REWARDING CRAFT AS EVEN A CHILD WHO IS NOT ‘GOOD AT ART’ CAN MAKE BEAUTIFUL DESIGNS.WE USED THE PAPER TO COVER SCHOOL BOOKS,AS BACKGROUNDS FOR PHOTO FRAMES AS WELL AS PAINTINGS IN THEIR OWN RIGHT.
My nailpolish keeps “sliding off the paper” when i try to peel it back from the water’s surface. Any tips on how to make it stick!?
You might want to try a “rougher” paper. I used watercolor paper which isn’t as smooth as printer paper.
How do you keep the paper from becoming warped/wrinkly from the water?
I used watercolor paper which is designed to handle water well.