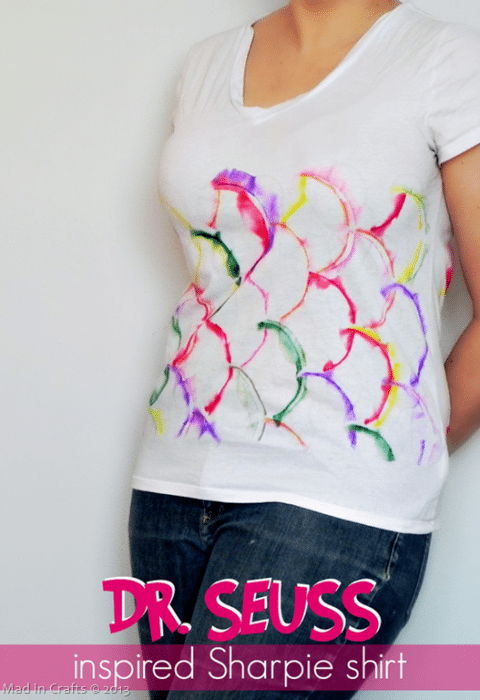
I love Dr. Seuss – both for his wonderful books and for what they teach the kids who read them. I think one of the reasons he is such an beloved children’s author is because he really understood how important imagination and creativity are to how kids learn. Today I will show you how to make a Seuss-inspired Sharpie shirt that you can make in just minutes.
“I like nonsense, it wakes up the brain cells. Fantasy is a necessary ingredient in living, it’s a way of looking at life through the wrong end of a telescope. Which is what I do, and that enables you to laugh at life’s realities.” – Theodore Geisel
This project is part of this week’s Craft Lightning series. All the projects involved in the series will be Seuss-related AND they are all projects that will take no more than 15 minutes to complete! As always, the Craft Lightning series is hosted by Carolina of 30 Minute Crafts and Angie of The Country Chic Cottage. Thanks for having me, ladies!
While I have also done projects inspired by Dr. Seuss’ stories, I decided to be inspired by his illustrations for this quick project. If you’d like to see my other Seuss tutorials, you will find links to them at the end of this post.
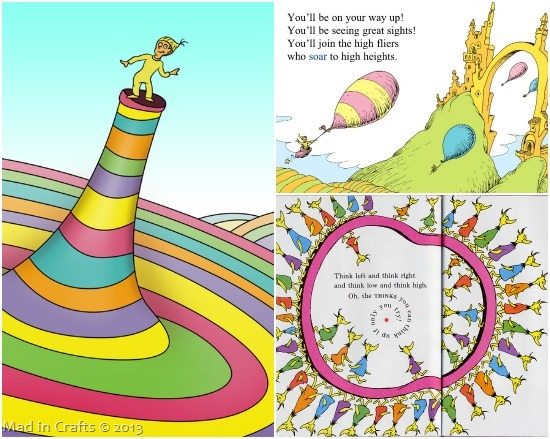
I love these illustrations from “Oh, the Thinks You Can Think” and “Oh, the Places You’ll Go,” and I was inspired by the colors and arcing patterns to make a similar design on a t-shirt.
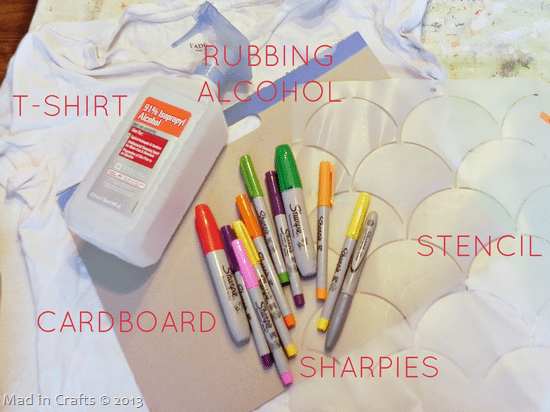
To make a Seuss-Inspired Sharpie Shirt, you will need:
The following links are affiliate links and I may receive compensation if you purchase after clicking the links.
a cotton t-shirt
cardboard
stencil
rubbing alcohol
eye dropper or straw
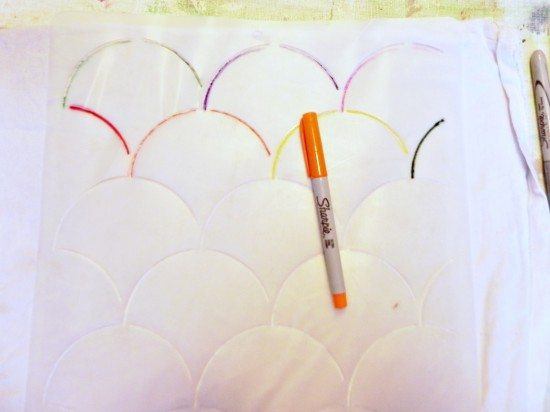
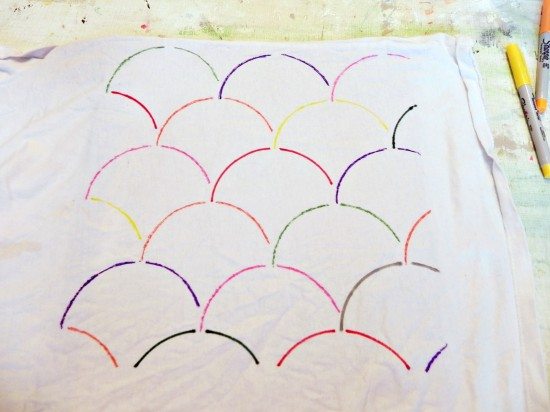
I put my piece of cardboard inside the shirt between the front and back of the shirt, in order to prevent any ink from bleeding through to the back. I placed the stencil on the shirt and filled in each scallop with my Sharpies.
You wouldn’t need a stencil to create this same look. You could either freehand the scallops or trace the edge of a cup or container lid.
I suggest using the chisel-tip Sharpies rather than the ultra-fine-tip variety because the project goes much more quickly with bigger markers. Either kind works, but the fine-tip markers might take this project over 15 minutes.
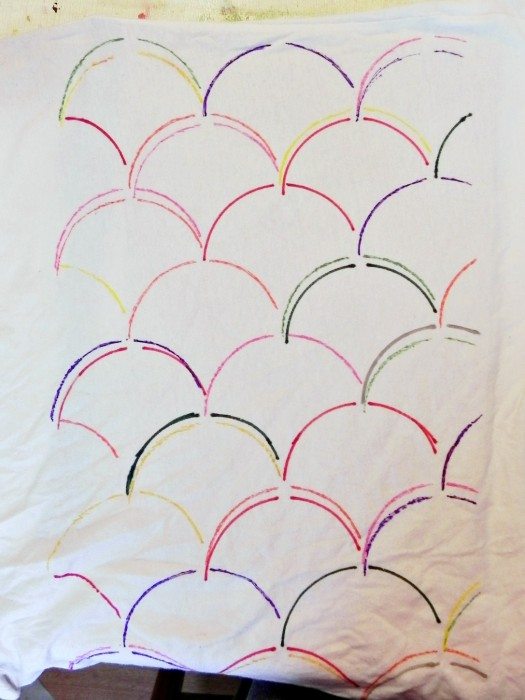
After I covered the front of the shirt, I went back and added some additional swoops of ink under several of the scallops. The inks blended together in those spots.
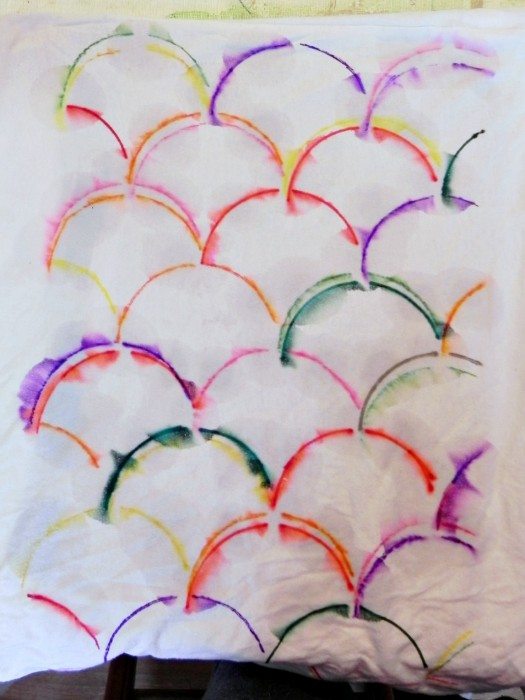
I used a drinking straw like an eye dropper to drop small amounts of rubbing alcohol all over the ink pattern. The colors of the ink spread, separated, and blended into each other in a tie dye effect. I gave the rubbing alcohol time to dry and then heat set the blended ink with a hot iron.
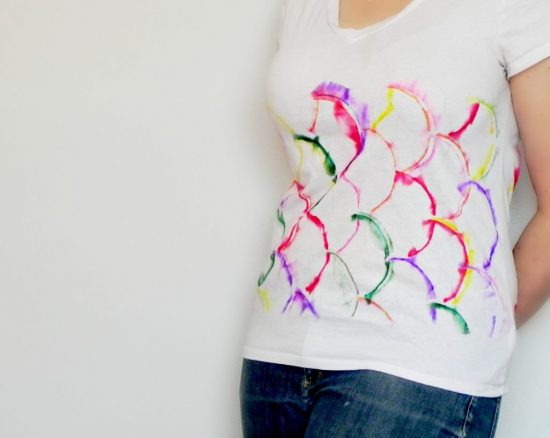
Just that quickly, you have a colorful and playful Seuss-inspired t-shirt. If you have some extra time, you can easily turn the shirt into a simple no-sew infinity scarf or a quick throw pillow.
For more Seuss goodness, check out the Craft Lightning round-ups on 30 Minute Crafts and The Country Chic Cottage this week or click through my links below.
CLOCKWISE FROM TOP LEFT:
HOMEMADE DR. SEUSS PARTY DECORATIONS




this is so fun and easy! while i love the seuss inspiration, my first thought was that it looked kinda mermaidish–something my daughter loves right now! will have to try it with her.
thanks for hosting the mad skillz party!
http://www.reckonandrevel.com