Are you planning a wedding? Thoughtfully choosing and pinning ideas for flowers, shoes, and décor? Awesome! I know everything will turn out beautifully. BUT, don’t forget the boys! I know weddings are mostly about the girls’ details, but the guys deserve a few special touches too. You can make your own DIY faux pocket squares cheaply and easily. No sewing required!
DIY Faux Pocket Squares
WHY CHOOSE POCKET SQUARES FOR YOUR EVENT?
Usually, the only accessory the groom and the groomsmen get is a boutonniere that ends up smooshed and wilted after one hug from Great Aunt Ethel. For my wedding, we 86ed the boutonnieres for the classic pocket square. If there are any of you out there who think that pocket squares are just for grandpas, take a look at this collage.
Pocket squares also go with any style of wedding, from casual to formal. Going clockwise around the collage you can see that pocket squares can be worn: 1) without a tie, 2) with suits and ties, 3) with a tuxedo, 4) in addition to a boutonniere.
The problem with pocket squares, as with real bow ties, is that nobody knows how to work them. If you have a wedding party filled with guys who know how to properly fold their own pocket squares, you are a lucky lady.
Most bridal stores have jumped on the fake bow tie bandwagon, but it’s harder to find places that will provide you with a workable solution for the pocket square. Fortunately, they are both inexpensive AND easy to make, and I’m here to show you how.
WHAT YOU NEED TO MAKE YOUR OWN POCKET SQUARES
Traditionally, pocket squares are made from silk but you can get away with other fabrics, they might just not fall as nicely as real silk.
For our wedding, we used the fabric salvaged from the bottom hem of one of my bridesmaid’s dresses (the dress was crazy long and she is on the short side). The lady who did the alterations on my dress was able to make faux pocket squares for each of the four groomsmen and two ushers with just that little amount of fabric!
I made each of these faux pocket squares with half of a fat quarter of fabric. You really need very little material to work with.
These are all affiliate links, if you make a purchase (of anything from the site, not just these items) after clicking through, I will earn a small commission. Ads and affiliate links are the way I am able to keep this website running and to offer you free tutorials all year long. Thank you so much for supporting me and Mad in Crafts!
- 1/2 of a fat quarter of fabric for each pocket square
- stitch witchery
- iron
- pocket-sized pieces of cardboard (cereal boxes work well)
- staples, hot glue, or safety pins

Want to know which craft supplies I always keep in my craft room?
Visit the Mad in Crafts Amazon Storefront to learn more and to buy your own supplies!
DIFFERENT KINDS OF POCKET SQUARE FOLDS
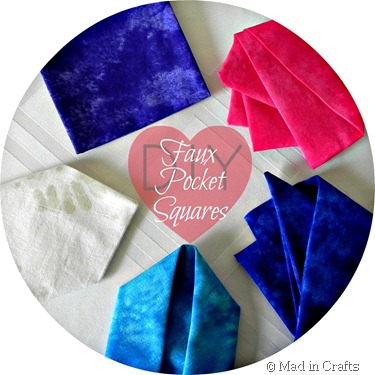
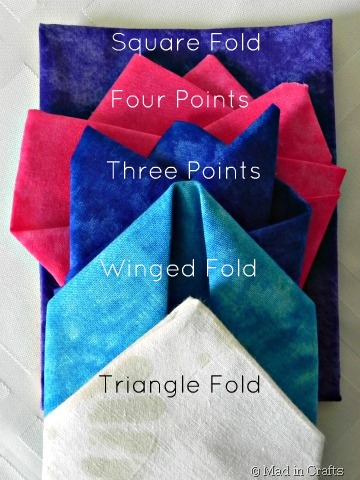
First, you will need to decide which style of fold you would like to use. I will show you how to make 5 popular styles. The Square Fold and the Triangle fold are the most classic and understated styles. The Winged Fold and the Three and Four Point pocket squares are a bit more formal and flashy.
HOW TO MAKE FAUX POCKET SQUARES
Before you begin, iron each of the fat quarter halves to remove any packaging wrinkles. All five pocket square styles start with the same three steps.
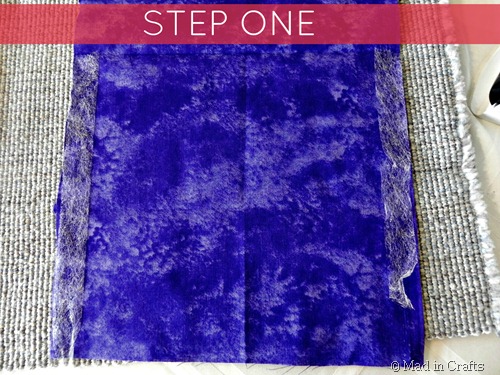
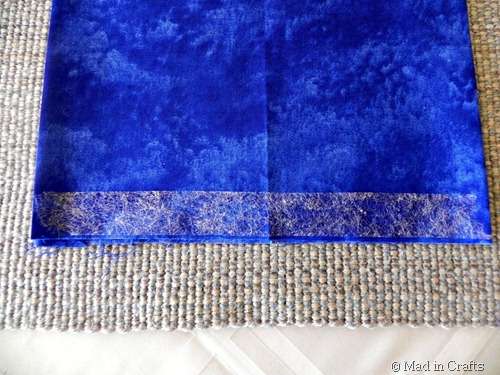
Step 1: Fold the material in half with RIGHT SIDES TOGETHER and iron along the fold. Open. Use stitch witchery and an iron (or a sewing machine) to hem the left and right edges.
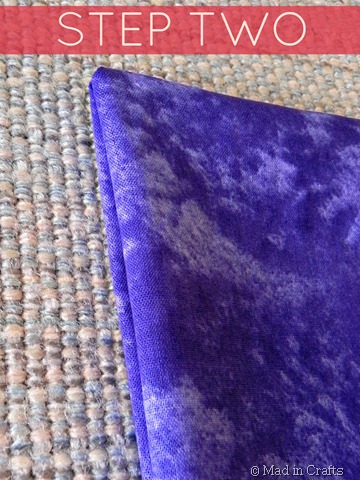
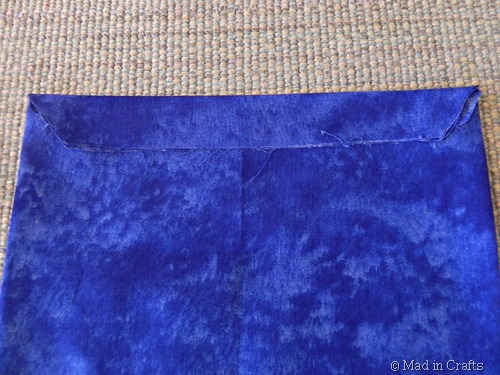
Step 2: Turn the material right side out and push the corners out as best you can.
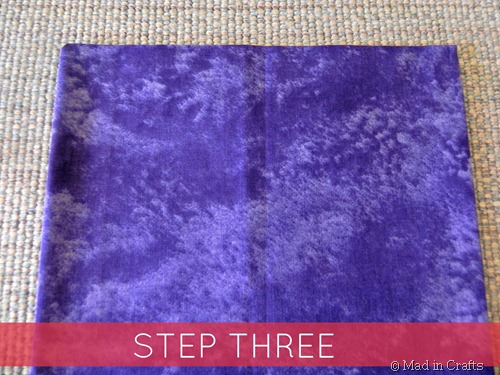
Step 3: Iron the material flat.
Do those three steps to begin each of the five pocket square styles shown below.
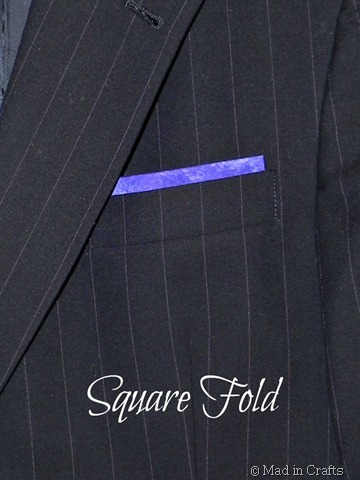
The Square Fold
Do Steps 1-3 as shown above.
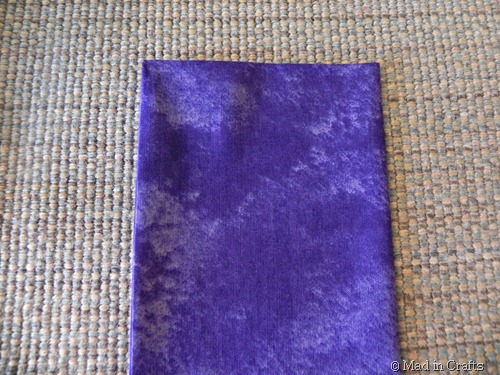
Square Fold Step 4: Fold the ironed material in half. Iron flat.
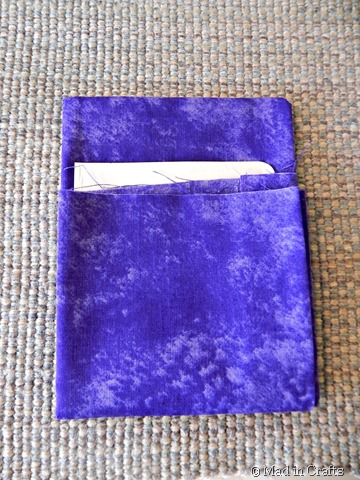
Square Fold Step 5: Place the cardboard piece one inch from the top edge, and fold the excess material up over the bottom. Attach the material with staples, hot glue, or safety pins, or by running it through your sewing machine.
(NOTE: This is the back of the pocket square.)
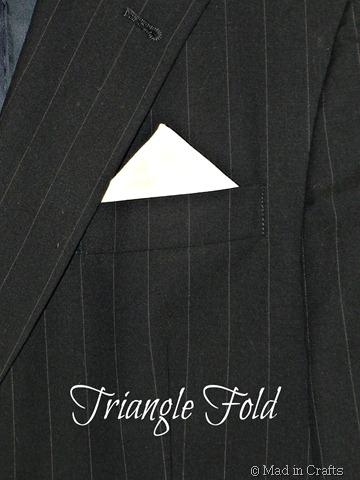
The Triangle Fold
Do Steps 1-3 as shown above.
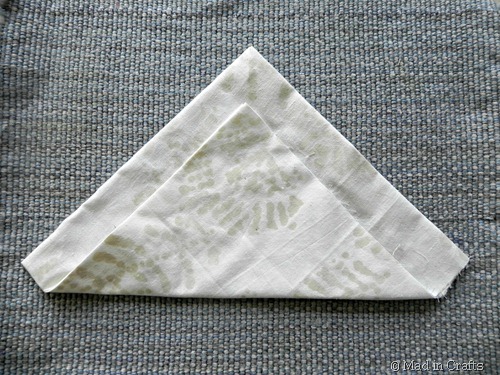
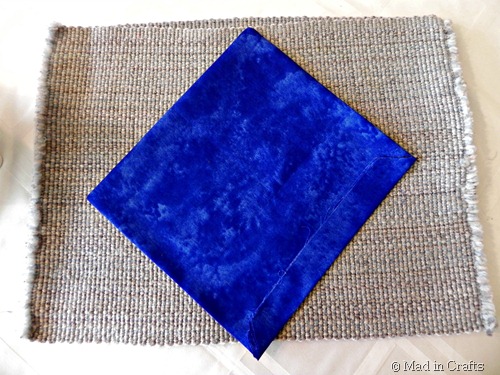
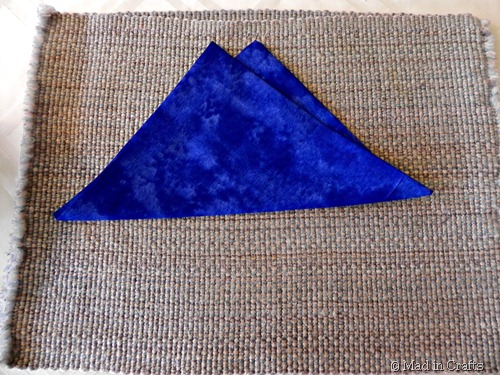
Triangle Fold Step 4: Lay the material down like a diamond with un-hemmed edge on the bottom right side of the diamond; fold the bottom point up. Don’t fold the point all the way up to the top point. Iron flat.
Triangle Fold Step 5: Place the cardboard on the material, fold the excess fabric over the cardboard, and attach.
(NOTE: This is the back of the pocket square.)
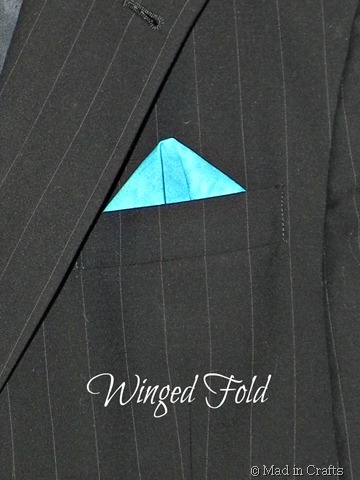
The Winged Fold
Do Steps 1-3 as shown above.
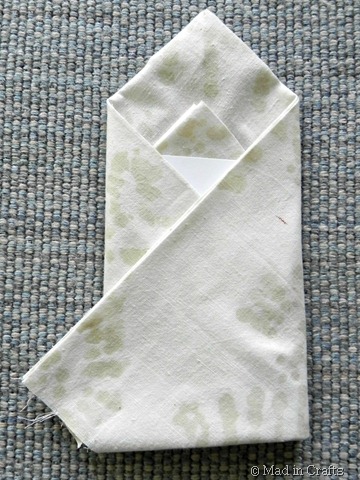
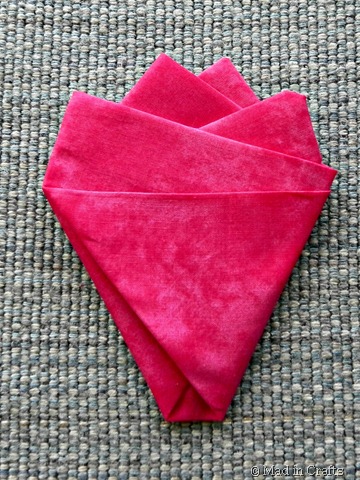
Winged Fold Step 4: Lay the material down like a diamond with un-hemmed edge in the bottom right side of the diamond; fold the top point down. Fold the point down so it meets the bottom point (as closely as possible).
Winged Fold Step 5: Fold the right point of the triangle down to meet the bottom points. Fold the left point of the triangle down to meet the bottom points. Iron flat.
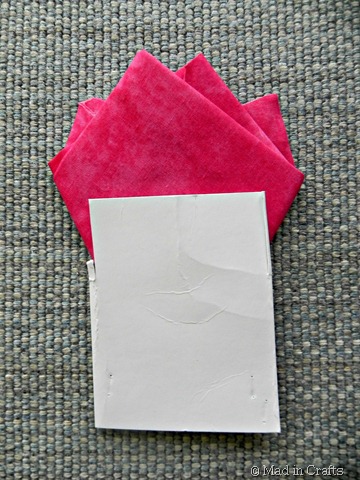
Winged Fold Step 6: Flip the pocket square over, lay the cardboard on the material, and fold the excess fabric over. Attach.
(NOTE: This is the back of the pocket square.)
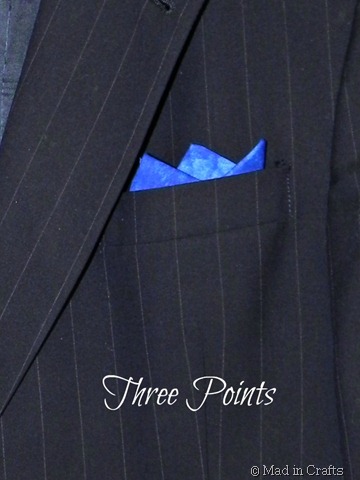
Three Points Fold
Do Steps 1-3 as shown above.
The following steps are the instructions for BOTH the Three Point pocket square and the Four Point pocket square unless otherwise stated.
Three AND Four Points Step 4: Fold up the bottom edge of the fabric and hem in place with stitch witchery or a sewing machine.
Three AND Four Points Step 5: Miter your corners and iron flat.
Three AND Four Points Step 6: Lay the material down like a diamond with newly hemmed edge facing up. The newly hemmed edge should be in the bottom right side of the diamond.
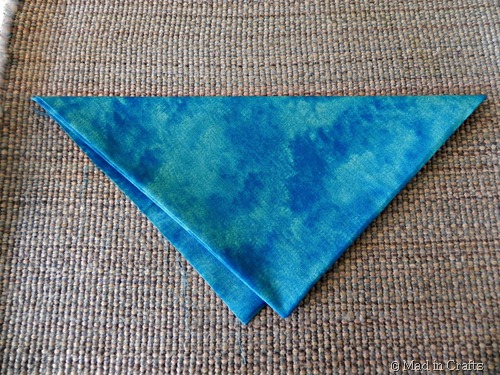
Three AND Four Points Step 7: Fold the bottom point up and JUST TO THE LEFT of the top point. Iron flat.
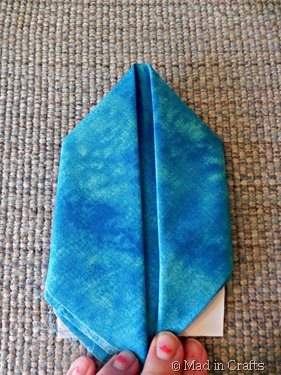
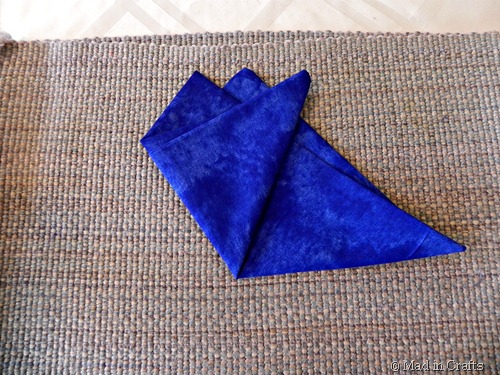
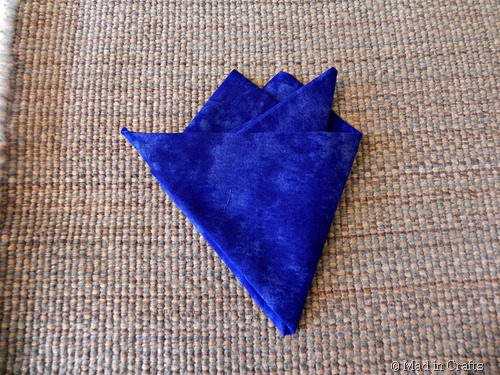
Three AND Four Points Step 8: Fold the left point across and JUST TO THE RIGHT of the top point. Iron flat.
If you are making a Four Points pocket square, stop here and skip down to Four Points Step 9.
Three Points ONLY Step 9: For the Three Point pocket square, fold the right point straight across. Iron flat.
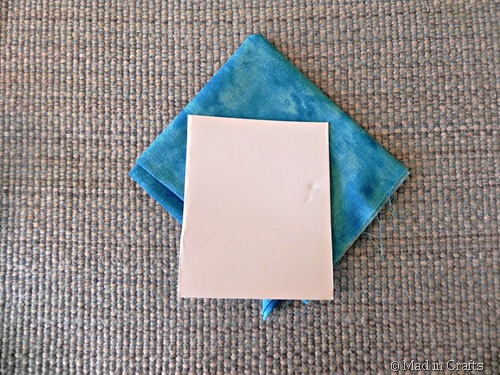
Three Points ONLY Step 10: Flip the pocket square over, lay a piece of cardboard on the fabric, and attach.
(NOTE: This is the back of the pocket square.)
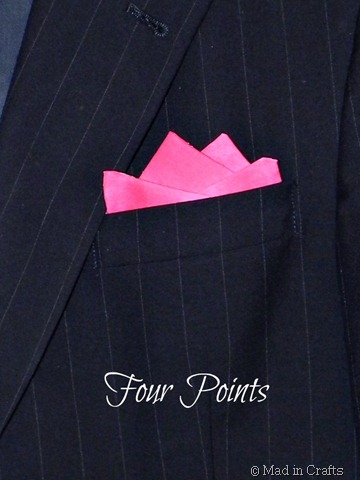
The Four Points Fold
Four Points ONLY Step 9: For the Four Point pocket square, fold the right point up and JUST TO THE LEFT of the farthest left point. Iron flat.
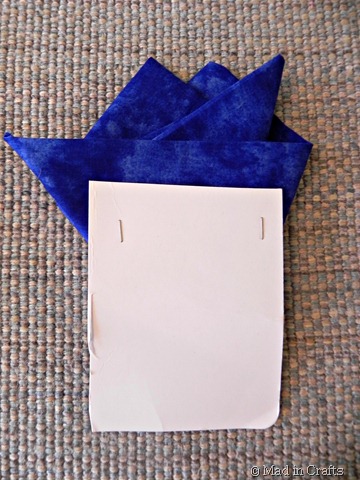
Four Points ONLY Step 10: Flip the pocket square over, lay a piece of cardboard on the fabric, and attach.
(NOTE: This is the back of the pocket square.)





Hello and thank you so much for you diy faux pocket square. I was trying it out for a gift and was a little mixed up with some of the directions. In step 1. after I fold the piece in half and iron it, it says to add the stitch witchery. I did it as it was shown in the photo but was not sure what to do after that because my square did not look like yours did in step 2.
What are the dimensions of half of a fat quarter? Thanks
Roughly 18″ by 11″
Love this, but didn’t see the measurement for the cloth use to make the pocket squares.