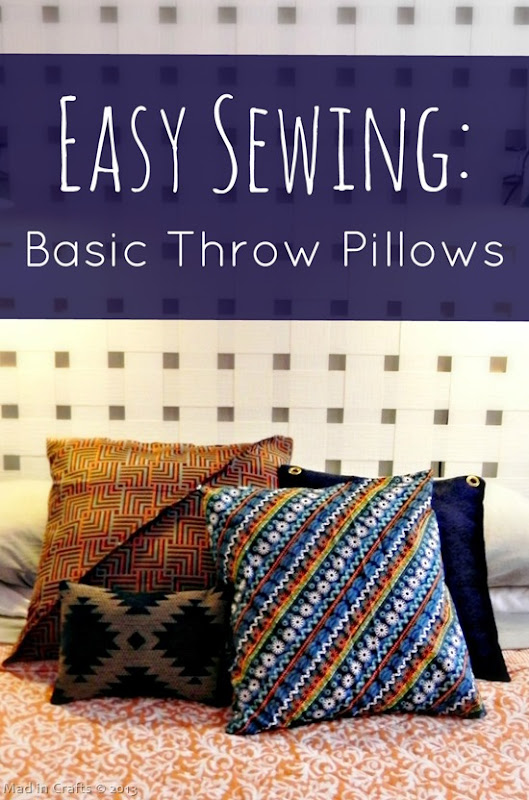
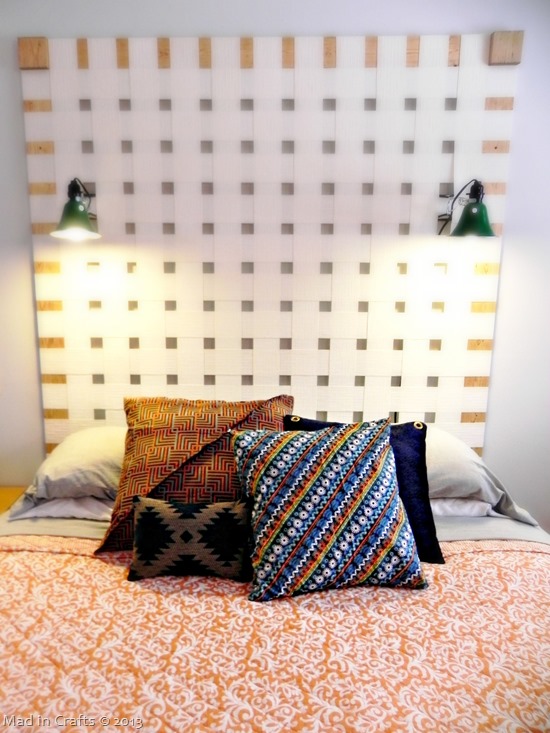
When I was styling my new headboard, I knew I needed some throw pillows to tie all the colors together and add some interest to the bedding. Buying store-bought pillows was out of the question because those puppies can be expensive! Who can afford to buy four $20 decorative pillows at the drop of a hat? Not me!
Thanks to a very generous friend-of-a-friend donation, I have boxes and boxes of fabric in my stash. I sorted through it looking for pieces that would be usable for this project. I ended up using three upholstery samples, a large, triangle-shaped remnant of fabric, and one new fat quarter from Walmart to make four new throw pillows! Total cost = only a few bucks!
The only problem with the whole situation was that I was going to have to face my nemesis – my sewing machine. I have my own sewing machine, but she and I don’t normally get along. Especially if I have to touch the bobbin, she really hates that. BUT, on this particular morning, she was in a forgiving mood and I was able to whip out these pillows without too many tears.
Be forewarned, I am admittedly NO KIND of sewing expert. I don’t usually pin my projects because I am lazy, and I am pretty much limited to sewing straight lines. If I can make these simple throw pillows, I know you can too.
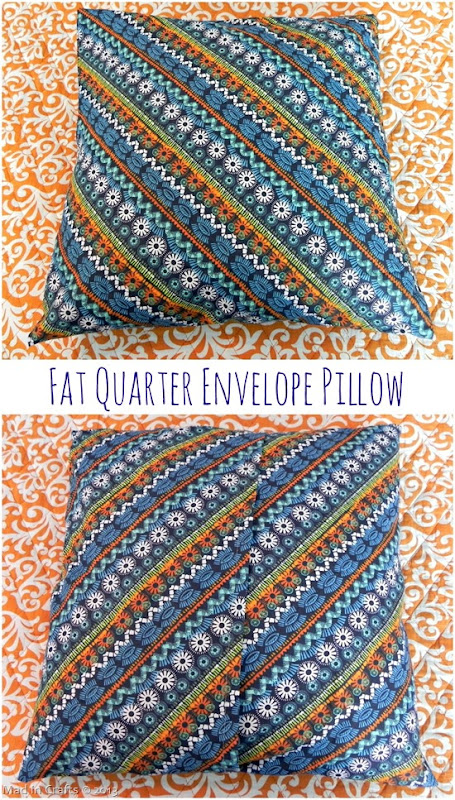
I am not going to bore you with the mathematical dimensions (mostly because I didn’t take any) but a fat quarter will easily cover a standard sized pillow insert, with fabric left over. You can be fairly generous with the amount of fabric you overlap for the envelope enclosure to make sure the pillow insert is fully covered.
To make a Fat Quarter Envelope Throw Pillow:
- Lay out the fat quarter, wrong side up.
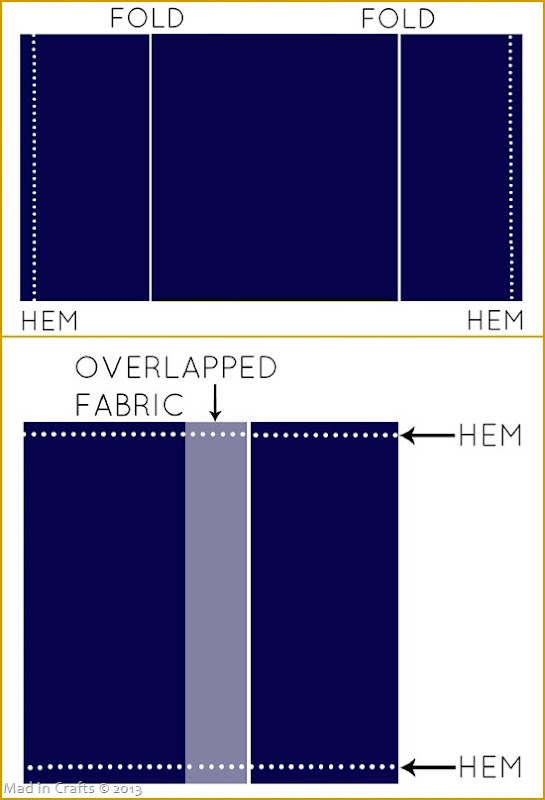
- (Iron, pin, and) hem the two shorter ends of the fabric – as seen on the top half of the diagram.
- Fold the two hemmed sides in, overlapping a few inches in the middle, to create a square – as seen in the bottom half of the diagram. Make sure the right sides are together.
- (Iron, pin, and) hem the sides, sewing right over the overlapped fabric.
- Turn the fabric right side out, and insert your pillow form.
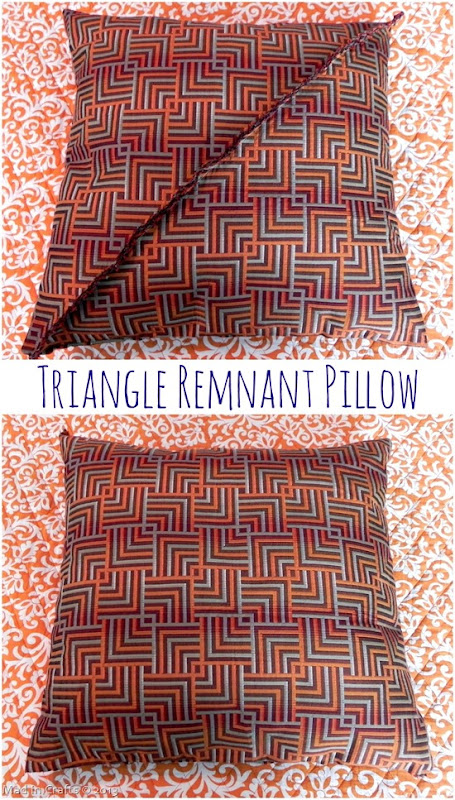
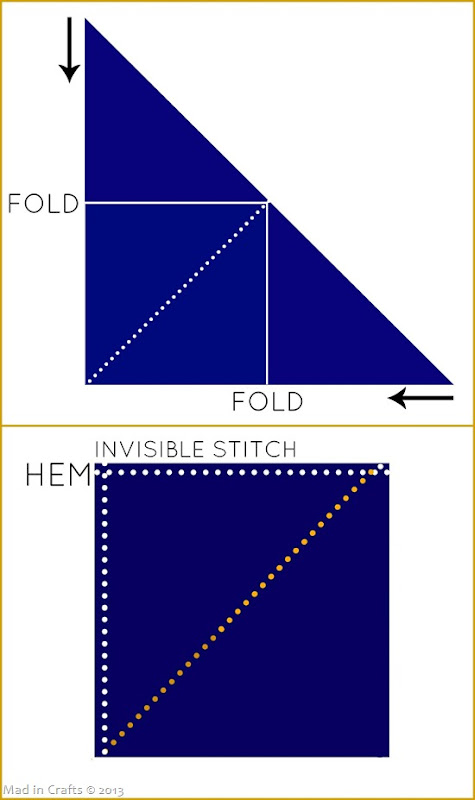
One of the fabric remnants in my stash was a large right angle triangle, maybe from a quilting project. I am not sure. With a few folds, the fabric was still usable to make a square throw pillow. I decided to leave the 45 angle seam exposed because I liked the fringy look, but you could hide that seam inside if it’s not your style.
To make a Triangle Remnant Throw Pillow:
- Lay the remnant down flat.
- Fold the 45 degree angled corners down to the 90 degree corner – as seen on the top half of the diagram.
- (Pin and) sew the seam where these pieces meet (the dotted line on the top half of the diagram). You can choose to have the raw edge of the fabric exposed (like I did) by pinning the fabric wrong sides together before you hem or hidden inside the pillow by pinning right sides together.
- Turn the material so that the right sides are facing each other.
- Hem up one open side.
- Turn the pillow right side out. Stuff with pillow stuffing or pillow insert. Hand sew the final side closed with an invisible stitch.
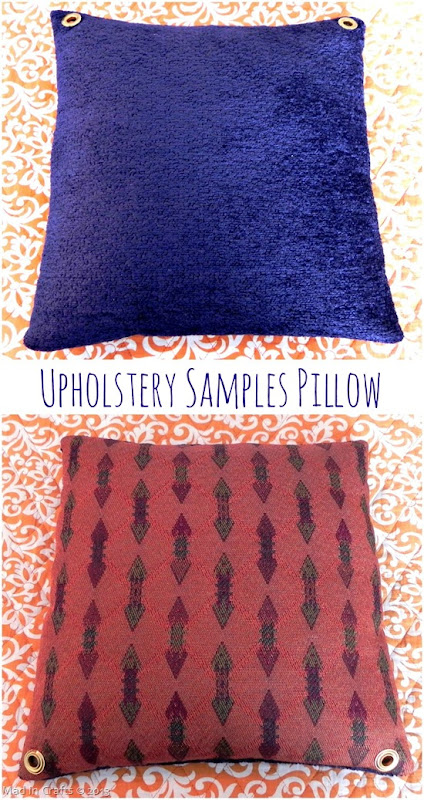
There were dozens of upholstery samples in the boxes of donated fabric, most of them seriously dated. I was able to find a few pieces that worked, but they still had metal grommets from being threaded onto display rings. Again, I kind of liked that added detail, so I left the grommets visible!
To make an Upholstery Sample Throw Pillow:
- Place the two wrong sides together. (Pin and) hem three of the sides.
- Flip the pillow right side out.
- Fill with pillow stuffing or pillow insert.
- Hand sew the final side closed with an invisible stitch.
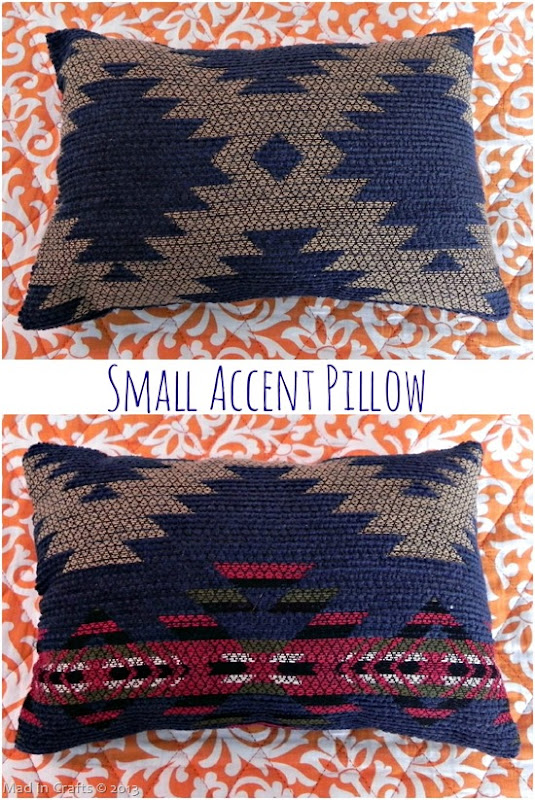
This accent pillow was made from just one upholstery sample. Of the four pillows, this was the simplest to sew.
To make a Small Accent Pillow:
- Fold the fabric in half, wrong sides together.
- (Pin and) hem two of the three sides.
- Flip the pillow right side out and stuff with pillow stuffing or pillow insert.
- Hand sew the last side closed with an invisible stitch.
The pillows tie together the blues, green, and orange of the room and make the bed look a bit more inviting. I am pretty proud of myself that my limited sewing skills were able to produce such nice results. Trust me, if I can pull them off, you can too!
My NEW ebook is now for sale on E-Junkie. Find out more about it HERE!
Did you like this post? Think it’s worth sharing? Please share with your friends using the social media share buttons on the toolbar at the bottom of the page!
Thanks, Jessica Hill




Leave a Reply