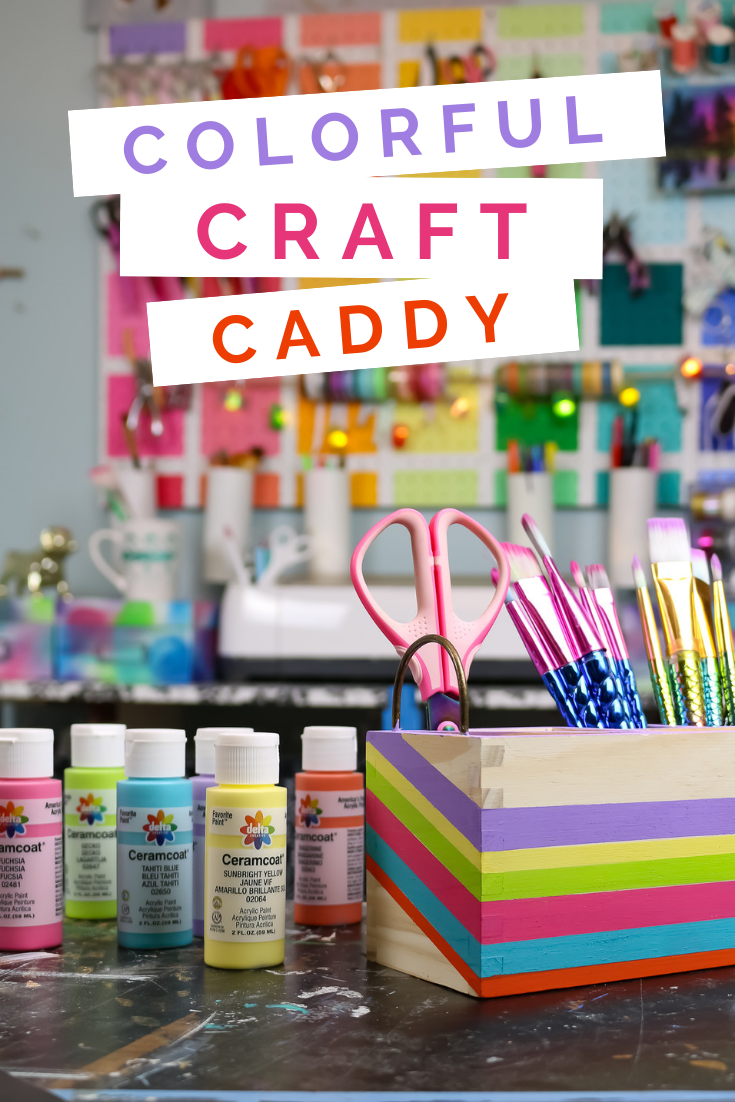
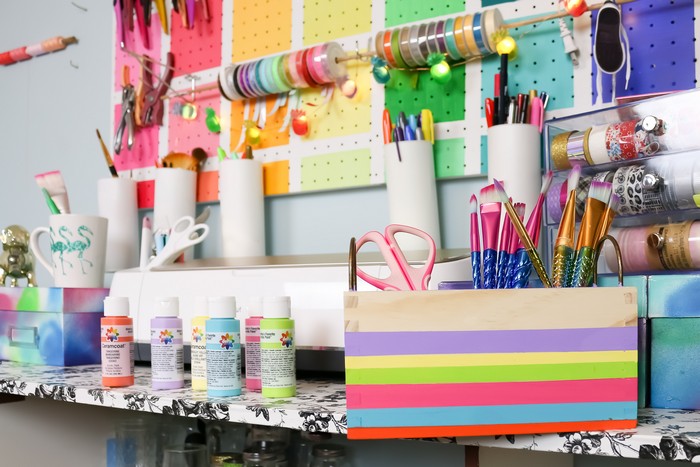
I don’t share all that many pictures of my craft room on the blog or on my social media channels. The truth is that it is usually in some state of chaos, and, even when it isn’t, it’s not like the pristine workspaces you often see online. The furniture doesn’t match. Supplies aren’t hidden in pretty baskets or cubbies. The color scheme of my craft room can best be described as “all of them.” That’s why when I picked up a plain wood organizer at the store, I knew I needed to give it a colorful makeover before using it. Now my colorful craft caddy fits in with all the loud, bright colors that I love in my craft room.
COLORFUL CRAFT CADDY TUTORIAL
WHAT YOU NEED TO PAINT A CRAFT CADDY
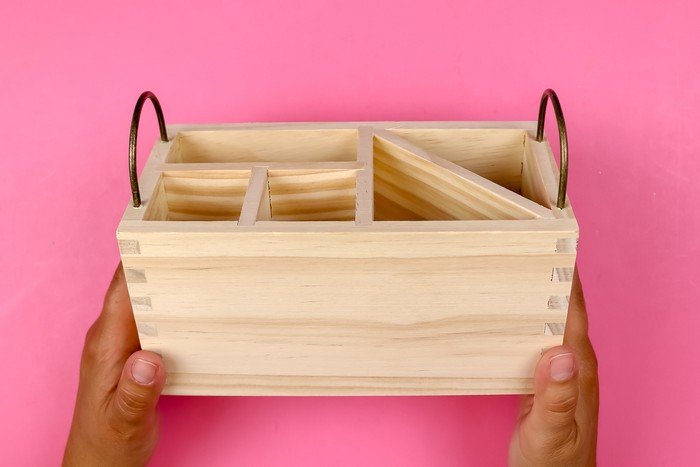
This cute wooden caddy is from the Handmade Modern line at Target. I purchased mine off the Target website, but you can find them in store as well. The caddy is the perfect size for craft projects, and it has just enough compartments for paintbrushes, scissors, rulers, markers, and more! My plan was to add to some colorful stripes to the caddy but to also leave much of the raw wood exposed as well.
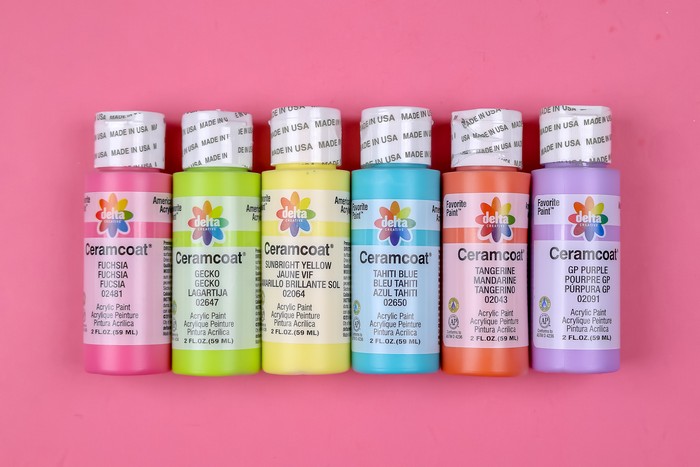
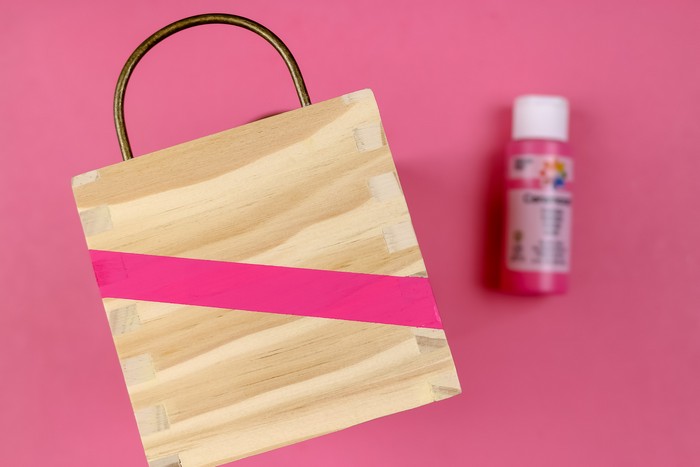
I chose to use Delta Ceramcoat paint to add the stripes to my caddy. I am so grateful to partner with Plaid as a Plaid Creator this year to bring you more information about their amazing products. Ceramcoat has a rich, creamy formula with really exceptional coverage. I will talk about why using paint with great coverage is so important for a project like this later. Ceramcoat works well on a variety of surfaces, including wood, making it ideal for my caddy. You can find Delta Ceramcoat at your local craft store.
HOW TO PAINT CRISP LINES
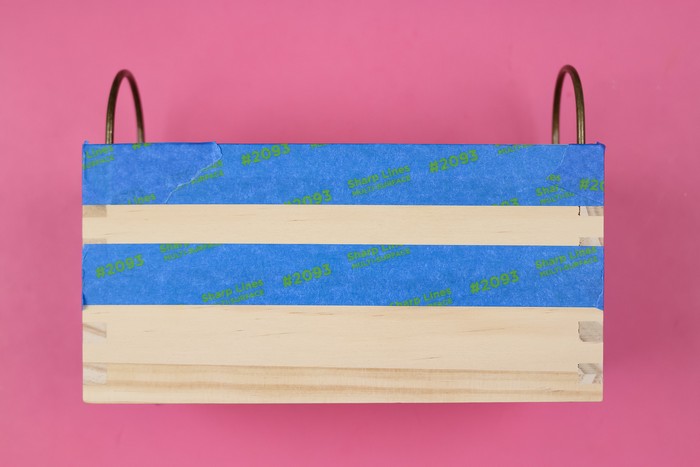
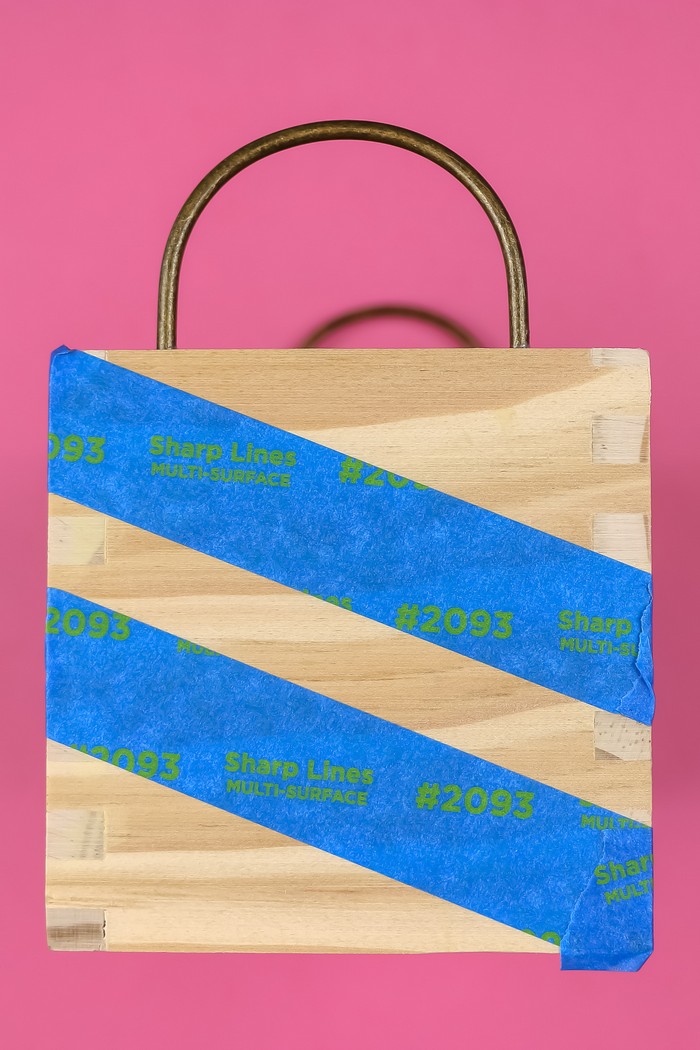
For this project to have the finished look that I wanted, it was crucial that my stripes were crisp and straight. The first step in achieving those crisp lines is to carefully lay down good painter’s tape. This isn’t the time to use the blue masking tape from the dollar store. Chose a tape that is meant for painting. Measure how wide you would like each stripe to be, and place the tape on the caddy in straight lines. Run your finger over the edges of the tape to make sure there is full contact between the wood and the tape.
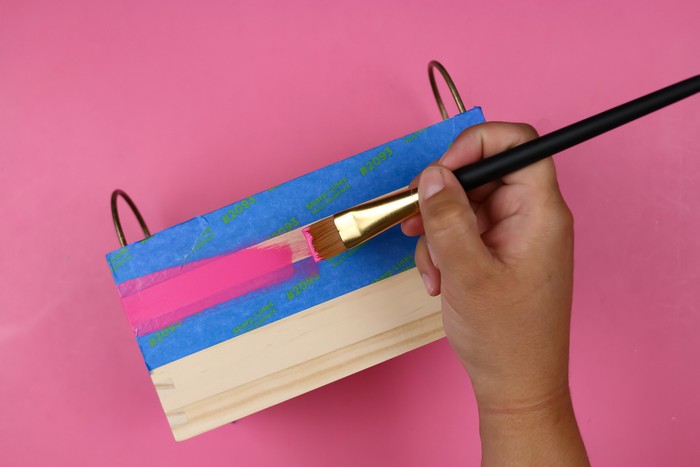
Now it’s time to paint. It is super important to use full coverage paint for this project. You want to be able to achieve full coverage in one coat. Having to paint multiple coats of paint increases the risk of the paint bleeding under the tape. Additionally, it’s best to peel the painter’s tape off while the paint is still wet. You can’t do this if you need to let the first coat of paint dry before adding a second coat.
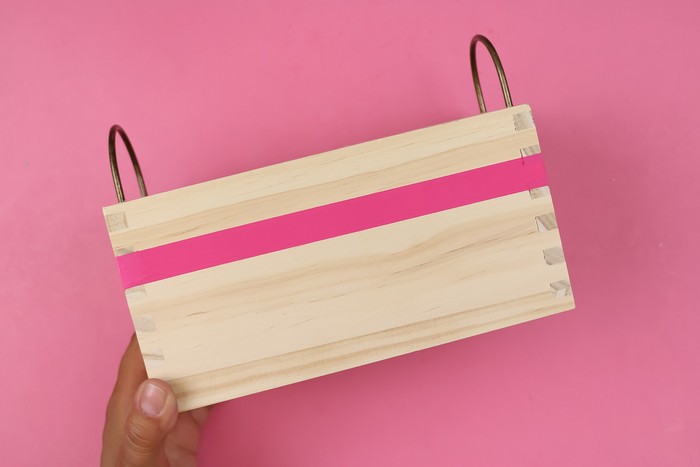
The Ceramcoat covered beautifully in just one coat, and it did not bleed under the tape at all!
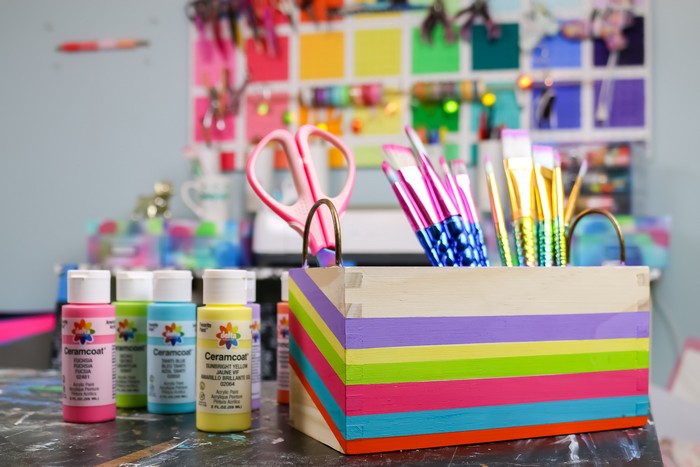
I continued my stripes all the way around the caddy. Instead of keeping the stripes level all around the caddy, I had the stripes follow a diagonal path on the two sides. The painting and taping process is the same for diagonal stripes as for the horizontal stripes.
Allow the first stripe to dry fully before moving on to the next color to prevent smudges.
PAINTING A COLORFUL CRAFT CADDY
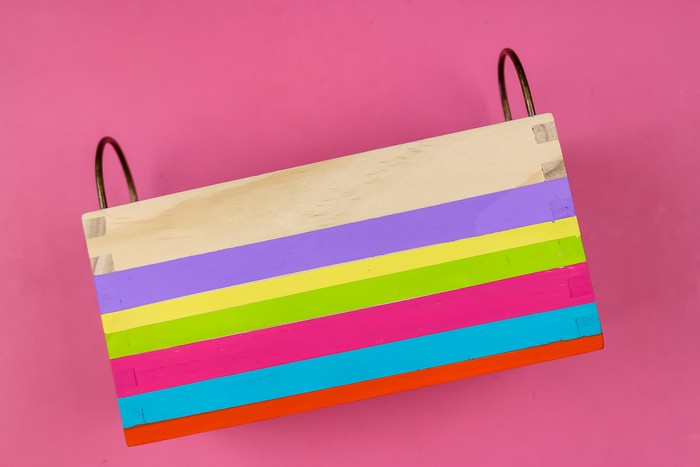
I followed the same process that I used for creating the first pink stripe to add five more colorful stripes to my craft caddy. I made sure the painter’s tape followed the lines of the other paint colors exactly so there weren’t any gaps between colors.
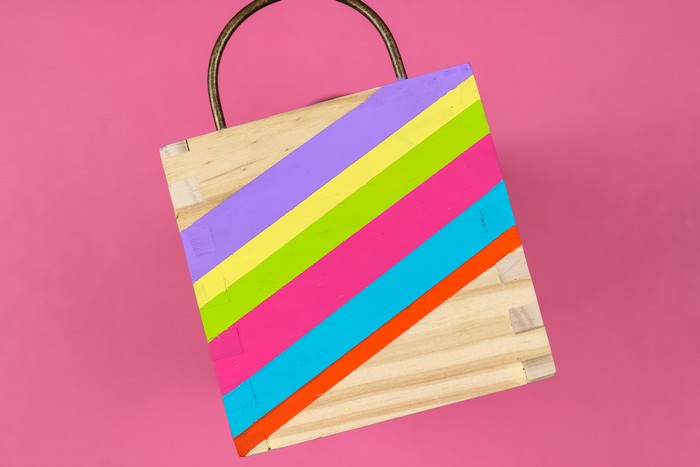
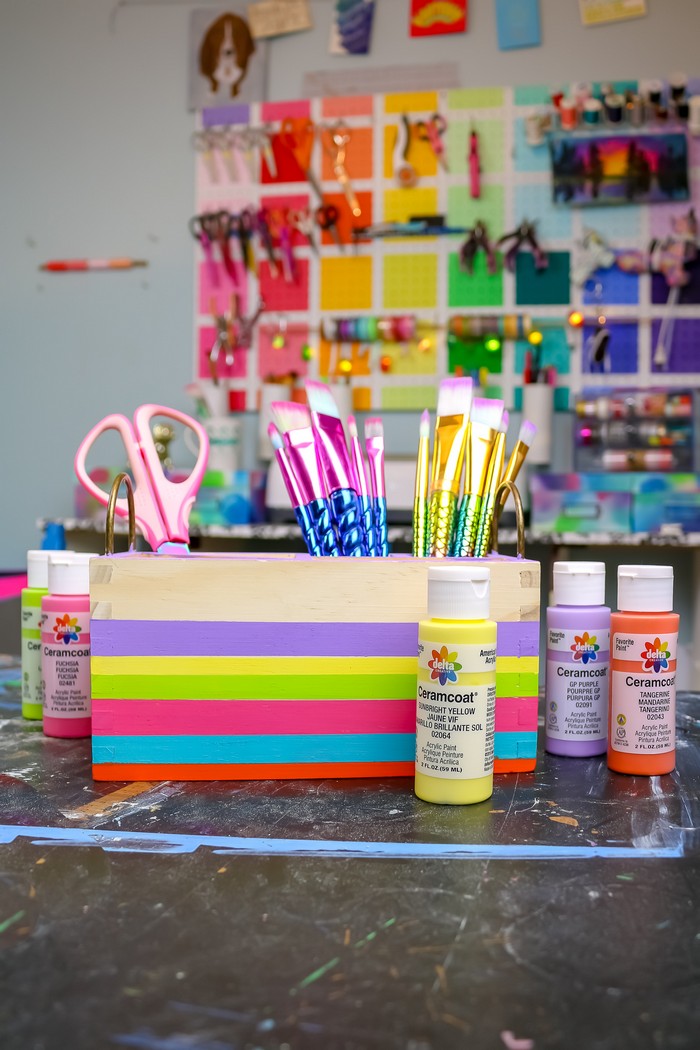
Look at how vibrant those Ceramcoat colors are with just one coat of paint! The colors I used are: GP Purple, Sunbright Yellow, Gecko, Fuchsia, Tahiti Blue, and Tangerine.
HOW I USE MY CRAFT CADDY
Like I mentioned earlier, my craft room is kind of an explosion of colors, so this colorful craft caddy fits right in!
I walk around my craft room, packing up my caddy with whatever tools and supplies I will need for the project I am currently working on. Then I tote the caddy over to my work table.
I used to spend half of the time working on a project searching for the paintbrush I *just* set down. Having the craft caddy gives me a place to keep all my tools corralled, so I misplace them less often. I mean, I still misplace them. Just less often.
You might like to see other organizational pieces in my craft room:



Leave a Reply